Turn Any Room Into a Real Movie Theater: The Best Home Theater Projectors, Compared
From reference-grade native 4K to wall-flush ultra short throw, here’s exactly which projector earns a place in your living room — and why.
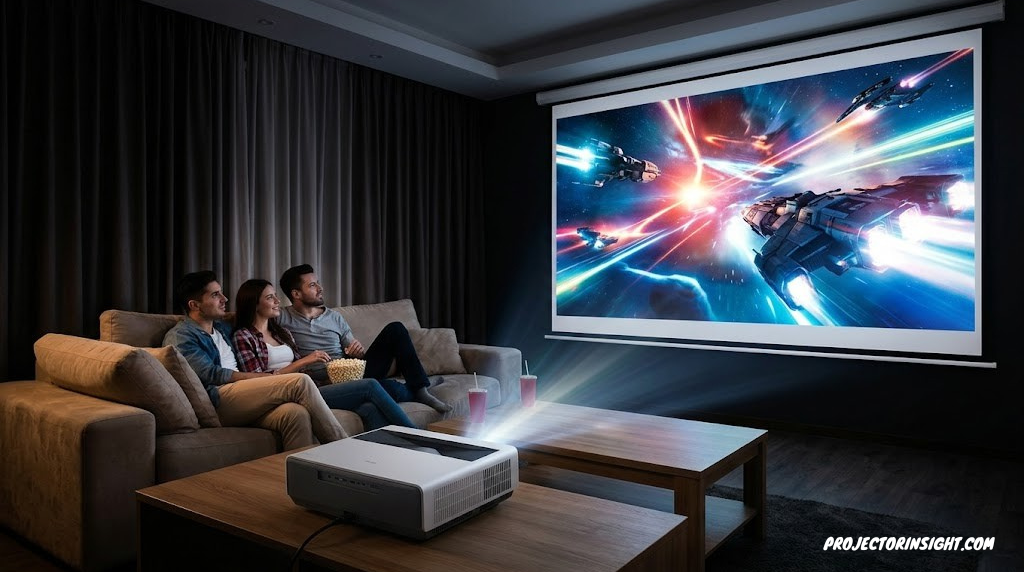

Why a Home Theater Projector Beats Even the Best TV
There’s a moment that happens the first time someone watches a movie on a properly set up 100-inch-plus projector screen in a darkened room: they stop talking. The image stops feeling like a thing you’re looking at and starts feeling like a place you’re looking into. No 65-inch or even 85-inch flat panel produces that effect, no matter how many marketing terms get attached to it. Scale changes perception, and a home theater projector is the only consumer display technology that lets you choose your own scale.
The honest comparison isn’t close once you control for price. A projector capable of a 120-inch image and the screen to go with it will typically cost less than a similarly sized premium flat panel — and flat panels much above 85 inches get exponentially more expensive and dramatically harder to ship, mount, and replace. If you’re weighing the two options directly, our detailed breakdown of projector vs. 85-inch TV walks through the cost and experience differences in more depth.
What a projector asks for in return is some intentionality. You need a room that can get reasonably dark, a wall or screen that can do the image justice, and a little bit of planning around throw distance and mounting. None of that is complicated, and we’ll walk through every part of it in this guide — but it’s worth being upfront that a projector rewards a bit of setup the way a good TV doesn’t.
This guide focuses specifically on home theater projectors: machines built to deliver the best possible movie-watching experience in a living room, media room, or dedicated theater. That’s a different category from portable mini projectors built for grab-and-go convenience, outdoor movie projectors designed to fight twilight and bugs, business presentation projectors optimized for fully lit conference rooms, or golf simulator projectors tuned for impact resistance and short-throw geometry. If your room is a real living space rather than a backyard or a boardroom, you’re in the right place.
Projector Technology, Explained Simply
Every projector in this guide uses one of three core imaging technologies, and understanding the difference will make every spec sheet you read afterward make sense. Each technology has a genuinely different way of getting light onto your screen, and that difference shows up directly in black levels, color handling, and price.
3LCD (Liquid Crystal Display)
3LCD projectors split light into red, green, and blue paths, pass each through its own LCD panel, then recombine the result through a prism. Because each color channel runs through its own dedicated panel continuously, 3LCD projectors deliver excellent color brightness — the image looks just as vivid in bright scenes as it does dim ones, with no rainbow artifacts. The Epson LS11000 in this guide uses a 3-chip 3LCD design.
DLP (Digital Light Processing)
Single-chip DLP projectors use a micromirror array and a rapidly spinning color wheel (or, in newer designs, an LED or laser array cycling through colors) to build the image one color flash at a time, faster than your eye can track. DLP projectors tend to be compact and well priced, with the BenQ HT4550i and the AWOL Vision LTV-2500 in this guide both using DLP-based engines — the BenQ with a 4-LED light source, the AWOL with a triple-laser array.
D-ILA / SXRD (LCoS Variants)
D-ILA (JVC’s branding) and SXRD (Sony’s branding) are both variants of LCoS — Liquid Crystal on Silicon. Instead of light passing through a transmissive panel, it reflects off a reflective silicon backplane coated in liquid crystal. This approach produces the deepest, most film-like black levels of any current projector technology, which is why the JVC DLA-NZ7 and Sony VPL-XW5000ES in this guide — both LCoS designs — are the two picks most prized by dedicated home theater enthusiasts chasing reference-quality contrast.
For a side-by-side technical breakdown of the two most common approaches at the value end of the market, our guide to 3LCD vs. DLP projectors goes deeper into rainbow artifacts, color brightness, and long-term reliability differences between the two designs.
Laser vs. Lamp vs. LED Light Sources
Separate from the imaging technology is the question of what’s actually generating the light. Traditional lamp-based projectors use a UHP bulb that runs roughly 3,000–5,000 hours before needing a $200–$400 replacement, and that bulb’s brightness degrades steadily from day one. Laser light sources — used by the JVC, Epson, Sony, and AWOL Vision models here — instead use solid-state laser diodes rated for 20,000+ hours, hold their brightness far more consistently over time, and reach full brightness almost instantly rather than needing a warm-up period. LED light sources, used by the BenQ HT4550i, split the difference: also solid-state with a comparably long lifespan, typically a notch behind laser in peak brightness and color volume, but meaningfully cheaper to manufacture. For the full breakdown of how these decisions play out in real ownership costs, see our dedicated guide to laser vs. lamp projectors.
What Actually Matters When Choosing a Home Theater Projector
Spec sheets for projectors are dense, and manufacturers don’t always measure things the same way. Here’s the short list of criteria that genuinely determine how good your movie nights will look — everything else is secondary.
ANSI Lumens
The industry-standard brightness measurement. More lumens means a usable image with some ambient light or a bigger screen without dimming. See our full explainer on what ANSI lumens actually means.
Contrast Ratio
The difference between the darkest black and brightest white a projector can produce. Native contrast (no tricks) matters more than dynamic contrast (laser dimming inflated numbers).
Native vs. Pixel-Shifted 4K
True native 4K panels display all 8.3 million pixels directly. Pixel-shifting projectors use lower native resolution and shift rapidly to simulate the full pixel count — a real distinction worth understanding before you buy.
Throw Distance & Ratio
How far the projector needs to sit from your screen to fill it at your target size. This single number determines whether a projector even fits in your room.
HDR & Color Gamut
HDR10, HDR10+, and Dolby Vision support, plus DCI-P3 color coverage, determine how vivid and dynamic modern streaming and 4K Blu-ray content looks.
Input Lag & Refresh
For gamers, low input lag (under ~25ms) and 4K/120Hz support matter as much as picture quality — a console-era spec that’s now standard on premium models.
Two of those criteria deserve a deeper visual explanation later in this guide, since they’re the two most commonly misunderstood: the brightness conversation in the ambient light section below, and the resolution conversation in the native 4K vs. pixel-shifting section. If you want the single best starting point before diving into specific models, our pillar guide on how to choose a projector covers the decision framework end to end.
Top Home Theater Projector Picks at a Glance
Before the full reviews, here’s how our five picks break down by what they’re each best at:
Read on for the full breakdown of each, including verified specs, honest pros and cons, and exactly who each projector is built for.
JVC DLA-NZ7 — Best Overall Home Theater Projector
JVC DLA-NZ7 D-ILA Laser Projector
A native 4K flagship built around JVC’s class-leading black levels — the projector dedicated home theater enthusiasts measure everything else against.
- Native 4K D-ILA panels with 40,000:1 native contrast
- BLU-Escent laser light source rated for 20,000 hours
- 8K e-shift technology sharpens detail beyond native 4K
- Frame Adapt HDR Generation 2 tone mapping is best-in-class
- 48Gbps HDMI 2.1 supports 4K/120 and 8K/60 input
- 2,200 lumens is modest for rooms with any ambient light
- Large, heavy chassis needs a sturdy mount or stand
- Premium price puts it out of reach for casual buyers
- Throw ratio is less flexible than some long-throw rivals
JVC’s D-ILA lineup has earned its reputation the hard way: by consistently producing the deepest, most film-accurate black levels of any consumer projector technology, generation after generation. The DLA-NZ7 continues that tradition with three native 4K D-ILA imaging chips and a native contrast ratio of 40,000:1 — a number that, combined with JVC’s laser dynamic dimming, climbs to a practically infinite dynamic contrast ratio in real content. For anyone chasing the closest thing to a true cinema experience in a dedicated, light-controlled room, this is the benchmark.
The NZ7’s 8K e-shift technology is worth understanding on its own terms. It doesn’t make the panel natively 8K — it shifts each native 4K pixel diagonally by half a pixel at high speed, effectively doubling the addressable detail on screen. Combined with native 4K source material, the result is an image with noticeably crisper fine detail than a standard native 4K projector, without the astronomical price of JVC’s true 8K-shifting flagship models.
Frame Adapt HDR Generation 2 deserves special mention because HDR tone mapping is where many projectors — including some very expensive ones — fall short. Since no consumer projector can match a flat panel’s peak brightness, the way a projector compresses HDR’s extended brightness range into its own more limited output makes or breaks HDR picture quality. JVC’s frame-by-frame analysis and remapping is widely regarded by reviewers as the most sophisticated implementation available, and it’s a major reason the NZ7 punches above its price class.
If you’re comparing this against JVC’s own lower-tier laser models or trying to understand where the value cutoff sits in JVC’s lineup, our dedicated comparison of the Epson LS12000 vs. JVC NZ500 is a useful read, since it covers the exact tier just below the NZ7 and helps frame what the step up actually buys you. For shoppers specifically prioritizing contrast above all else, our roundup of projectors with the highest contrast ratio covers how the NZ7 stacks up against its closest rivals in raw black-level performance.
Epson LS11000 — Best Value & Best for Gaming

Epson Home Cinema LS11000 4K PRO-UHD Laser Projector
A 3-chip 3LCD laser projector that combines genuinely high brightness, strong dynamic contrast, and console-friendly gaming specs at a notably approachable price for the category.
- 2,500 lumens of equal color and white brightness
- 1,200,000:1 dynamic contrast ratio via laser dimming
- 3-chip 3LCD design avoids rainbow artifacts entirely
- Motorized lens with focus, zoom, and shift memory
- HDMI 2.1 with 4K/120fps gaming and sub-20ms input lag
- Native contrast trails true LCoS designs like the JVC or Sony
- Pixel-shifted 4K, not native panel resolution
- White chassis is less discreet in some room aesthetics
- No built-in streaming apps or smart platform
The Epson LS11000 occupies a genuinely compelling middle ground: it’s bright enough to hold up reasonably well against moderate ambient light, contrasty enough to deliver a satisfying HDR experience in a darkened room, and priced meaningfully below the true LCoS flagships in this guide. For most buyers outfitting a living room rather than a dedicated theater, that combination of traits matters more in practice than chasing the absolute deepest black level.
The 3-chip 3LCD design is worth appreciating on its own merits, not just as a cheaper alternative to LCoS. Because each color channel runs through a dedicated panel rather than cycling sequentially, the LS11000 produces color brightness equal to its white brightness — a real practical advantage over single-chip DLP designs, where color images often look noticeably dimmer than pure white test patterns. If you want the deeper technical comparison, our 3LCD vs. DLP breakdown covers exactly this distinction.
For gamers specifically, the LS11000 is one of the more complete packages in this guide. HDMI 2.1’s full 48Gbps bandwidth means it accepts uncompressed 4K HDR signals at up to 120Hz directly from current-generation consoles or a capable gaming PC, and Epson’s measured input lag comes in comfortably under 20 milliseconds — fast enough that competitive gamers won’t feel a meaningful disadvantage versus a flat panel. If gaming performance is a primary driver of your purchase rather than a bonus, our dedicated roundup of the best 4K/120Hz gaming projectors dives deeper into how several models in this category compare on latency and motion handling specifically.
The motorized lens is a quality-of-life feature that’s easy to undervalue until you’ve lived without it. Being able to save focus, zoom, and lens-shift settings for multiple aspect ratios — standard 16:9 versus an anamorphic 2.35:1 setup, for instance — and recall them at the press of a button makes day-to-day use considerably more convenient than projectors that require manual lens adjustment every time you switch content types.
Sony VPL-XW5000ES — Best Color Accuracy & Most Compact Native 4K

Sony VPL-XW5000ES Native 4K SXRD Laser Projector
The most affordable native 4K, 3-chip LCoS projector on the market, built around Sony’s flagship X1 Ultimate video processor in a surprisingly compact, light chassis.
- Native 4K SXRD (LCoS) panels — true pixel-for-pixel 4K
- X1 Ultimate processor brings Sony’s flagship BRAVIA processing
- TRILUMINOS PRO color covers roughly 95% of DCI-P3
- Smaller and lighter than nearly every native 4K rival
- 2.1x motorized zoom with generous lens shift range
- 2,000 lumens is the lowest brightness rating in this guide
- No HDR10+ support, only standard HDR10 and HLG
- Best results demand a properly darkened room
- Fan noise is noticeable to some users at higher settings
For years, native 4K, 3-chip LCoS projectors started at prices that put them firmly out of reach for most home theater buyers. The Sony VPL-XW5000ES changed that math meaningfully, bringing true pixel-for-pixel native 4K SXRD imaging — the same fundamental technology behind Sony’s far more expensive flagship models — down to the most accessible price point Sony has offered for this panel type. If native resolution is a hard requirement for you and the JVC’s price feels like a stretch, this is the projector to look at first.
What sets the XW5000ES apart from the rest of this guide is the video processing pedigree behind it. The X1 Ultimate for Projector chip is adapted directly from Sony’s acclaimed BRAVIA television processing, and it shows in how the projector handles real-time object-based HDR remastering, scene-by-scene contrast enhancement, and upscaling of sub-4K content. Watching well-mastered 1080p Blu-ray content through this processor is a genuinely different experience than on projectors with less sophisticated scaling — detail and depth both increase noticeably.
Color accuracy is where this projector quietly wins the category. Sony’s TRILUMINOS PRO color processing combined with the wide gamut of the Z-Phosphor laser light source produces coverage of roughly 95% of the DCI-P3 color space used to master modern HDR content — numbers that hold up extremely well against far more expensive competitors. Skin tones in particular look unusually natural on this projector, which matters more than synthetic test-pattern numbers for how movies actually feel to watch.
The compact, lightweight chassis is a genuinely underrated advantage. Sony shrank the optical path enough that the XW5000ES is meaningfully smaller and lighter than the generation before it and lighter than most native 4K competitors, which makes ceiling mounting and shelf placement noticeably easier in rooms where a large, heavy projector body would be awkward. If you’re planning that installation yourself, our complete walkthrough of how to mount a projector to the ceiling covers the process from drop calculation to cable management.
BenQ HT4550i — Best Budget-Friendly Smart Projector

BenQ HT4550i 4K HDR LED Smart Projector
A factory-calibrated, genuinely bright 4-LED DLP projector with built-in Android TV streaming — the easiest of the five to set up and start watching the same day.
- 3,200 ANSI lumens — the brightest projector in this guide
- 100% DCI-P3 and 100% Rec.709 color, factory calibrated
- Built-in Android TV dongle with Netflix pre-loaded
- Solid-state 4-LED light source rated 20,000+ hours
- Genuinely accurate picture straight out of the box
- Single-chip DLP native contrast trails 3LCD and LCoS rivals
- Rated brightness only achievable in less accurate picture modes
- No HDMI 2.1 — limited to 4K/60Hz gaming, not 4K/120
- Lens shift range is more limited than premium competitors
The BenQ HT4550i solves a specific problem that the rest of this guide doesn’t address quite as directly: what if you want excellent picture quality without doing any calibration work, and you want streaming apps built in rather than relying on an external device? BenQ ships every unit with an individual factory calibration report, and independent measurements consistently confirm that the HT4550i hits its claimed 100% DCI-P3 and 100% Rec.709 color coverage right out of the box — a level of out-of-box accuracy that’s rare at any price, let alone this one.
Brightness is the HT4550i’s standout spec. At a rated 3,200 ANSI lumens, it’s brighter than every other projector in this guide, and independent testing has confirmed it actually exceeds that figure in its brightest picture mode. That brightness headroom means the HT4550i is meaningfully more usable in rooms with some daylight or ambient lighting than the LCoS-based picks here — though, as with any projector, the most accurate picture modes will measure dimmer than the maximum spec, since accuracy and raw brightness pull in slightly different directions. For shoppers whose room simply can’t get fully dark, our dedicated guide to the best projectors for bright rooms covers this exact trade-off across more models.
The included Android TV dongle is a genuinely convenient touch rather than a marketing checkbox. It tucks into a hidden compartment on the back of the projector, connects via internal HDMI and USB power, and gives you the full Google Play ecosystem along with pre-loaded Netflix — meaningful because Android TV with native, full-resolution HDR Netflix support isn’t something every smart projector platform manages cleanly. If built-in streaming is a priority feature for your next projector rather than an afterthought, our roundup of the best smart projectors with Netflix compares several platforms on exactly this point.
Where the HT4550i makes its clearest compromise is black level performance. Single-chip DLP, even with BenQ’s contrast-enhancing zone processing, simply can’t match the native contrast of 3LCD or LCoS designs. In a fully darkened room watching a moody, dark-heavy film, the difference versus the JVC or Sony is noticeable. In a typical living room with some light control but not full blackout — which describes most homes — it’s a much smaller practical gap than the spec sheets alone would suggest.
AWOL Vision LTV-2500 — Best Ultra Short Throw, No Ceiling Mount Needed

AWOL Vision LTV-2500 4K UHD Ultra Short Throw Triple Laser Projector
An ultra short throw “laser TV” that sits inches from the wall and throws a 100–150 inch image — the projector for anyone who wants the scale without the ceiling mount or hanging cables.
- Ultra short throw — sits under 5 inches from the wall
- No ceiling mount, no dangling cables, no drilling required
- Triple-laser light source covers 107% of BT.2020 color
- Dolby Vision, Dolby Atmos, and active 3D all supported
- Built-in 36W soundbar with center-channel speaker mapping
- Performs best paired with a dedicated ALR screen, an added cost
- Native contrast trails long-throw LCoS and 3LCD designs
- Build quality feels a notch below higher-end AWOL models
- 3D glasses are sold separately, not included
Every other projector in this guide assumes you’re comfortable mounting a unit to your ceiling or placing it on a rear shelf, with a long, unobstructed throw to the screen. The AWOL Vision LTV-2500 exists for the very large number of people for whom that’s simply not realistic — renters, anyone without easy ceiling access, or anyone who just doesn’t want a projector and its cabling visible in the middle of their living room. Ultra short throw design solves that by placing the entire optical path within inches of the wall, throwing the image upward at a steep angle from a low credenza or console.
The technical achievement that makes this possible is a fixed 0.25:1 throw ratio lens — meaning the projector can produce a 100-inch image from roughly 10 inches away from the screen. That’s a fundamentally different optical design from the long-throw projectors elsewhere in this guide, and it comes from precision optics, not from any trick or compromise. For the full technical and practical comparison between this approach and traditional projector placement, our guide to UST vs. standard throw projectors covers exactly where each design wins.
AWOL’s triple-laser light engine — using discrete red, green, and blue laser diodes rather than a single blue laser bounced through a phosphor wheel — is a genuinely premium choice that shows up directly in color performance. The result is coverage exceeding 107% of the BT.2020 color space used in the most demanding HDR mastering, alongside whisper-quiet operation since pure RGB laser engines run cooler than phosphor-based alternatives. Dolby Vision support is a meaningful differentiator too; dynamic, scene-by-scene HDR metadata is still relatively rare on UST projectors at this price, and AWOL includes it here alongside Dolby Atmos audio pass-through and even active 3D for anyone with a remaining 3D Blu-ray collection. If 3D home cinema is a feature you specifically care about, our roundup of the best 3D home cinema projectors covers how this and other models handle it.
The honest caveat with any UST projector, including this one, is screen choice. Because the image is being thrown up at a steep angle from very close range, a standard projector screen will show noticeably uneven brightness and reduced contrast in ambient light. UST projectors are designed to be paired with an Ambient Light Rejecting (ALR) screen engineered specifically for that steep throw angle — our dedicated guide to choosing an ALR screen for a UST projector explains exactly what to look for and why a generic screen will undersell this projector’s real capability. Buyers focused specifically on this category should also see our broader best ultra short throw projectors roundup for how the LTV-2500 compares against its closest UST rivals.
Full Projector Comparison Table
Here’s how all five projectors stack up across the specs that actually drive picture quality and day-to-day usability:
| Feature | JVC NZ7 | Epson LS11000 | Sony XW5000ES | BenQ HT4550i | AWOL LTV-2500 |
|---|---|---|---|---|---|
| Best For | Reference Picture | Value + Gaming | Color Accuracy | Budget / Smart TV | No Ceiling Mount |
| Imaging Tech | D-ILA (LCoS) | 3-Chip 3LCD | SXRD (LCoS) | Single-Chip DLP | Single-Chip DLP (UST) |
| Resolution | Native 4K + 8K e-shift | 4K Pixel-Shift | Native 4K | 4K Pixel-Shift | 4K Pixel-Shift |
| Brightness | 2,200 lm | 2,500 lm | 2,000 lm | 3,200 lm | ~2,000–2,500 lm |
| Light Source | Laser | Laser | Laser | LED | Triple Laser |
| Native Contrast | 40,000:1 | Not disclosed | High (LCoS) | Moderate (DLP) | 2,500:1 |
| HDMI Spec | 2.1 (48Gbps) | 2.1 (48Gbps) | 2.0/2.1 hybrid | 2.0b | 2.1 |
| Gaming (4K/120) | ✓ | ✓ | ⚠ Limited | ✗ | ✓ |
| Dolby Vision | ✗ | ✗ | ✗ | ✗ | ✓ |
| Built-In Streaming | ✗ | ✗ | ✗ | ✓ Android TV | ⚠ Varies |
| Throw Type | Long Throw | Long Throw | Long Throw | Long Throw | Ultra Short Throw |
| Price Tier | Premium | Upper-Mid | Upper-Mid | Mid-Range | Upper-Mid |
No single row tells the whole story — that’s the nature of comparing projectors built around genuinely different priorities. The JVC wins on pure picture quality in the dark; the BenQ wins on brightness and convenience; the AWOL wins on installation simplicity; the Epson and Sony split the difference between the two extremes in different ways. If you’re still narrowing down by budget rather than by feature set, our broader resource on the best projectors for every budget and room size is a good next stop.
Brightness & Ambient Light: Reading Lumens Correctly
ANSI lumens is the single most misunderstood spec in projector shopping, mostly because it’s easy to assume “more is simply better” the way it is with a flashlight. In reality, the right brightness level depends entirely on your room’s ambient light, your target screen size, and your screen’s gain — and chasing the highest lumens number on the spec sheet can sometimes work against you.
The general rule of thumb most projector reviewers use: for a fully dark, dedicated theater room, anywhere from 1,500 to 2,500 ANSI lumens onto a properly sized screen produces an excellent, comfortable image — which is exactly why the JVC, Sony, and Epson all cluster in that range; they’re optimized for darkness, not daylight. For a living room with some controllable but not eliminated ambient light, 2,500 to 3,500+ lumens, paired with a higher-gain or ambient-light-rejecting screen, becomes the more comfortable range — which is exactly the gap the BenQ HT4550i is built to fill.
Screen size interacts directly with this math. The same projector throwing a 150-inch image will look noticeably dimmer than that identical projector throwing a 100-inch image, because the same total light output is being spread across roughly 2.25 times the screen area. If you’re planning a very large screen, you generally need to budget for more lumens than you would for a more modest size — our full explainer on what ANSI lumens actually means includes the underlying math in more detail.
Native 4K vs. Pixel-Shifted 4K: What the Difference Actually Looks Like
Of the five projectors in this guide, only the JVC DLA-NZ7 and Sony VPL-XW5000ES use truly native 4K imaging panels, where each of the 8.3 million pixels in a 4K signal maps to one dedicated, physical pixel on the chip. The Epson, BenQ, and AWOL Vision all use a lower native panel resolution combined with extremely fast pixel-shifting technology — rapidly displacing each pixel to effectively double the resolution the eye perceives.
In practical viewing terms, the difference is genuinely subtle at normal seating distances — most viewers comparing the two approaches side by side struggle to identify which is which from across a typical living room. Where native 4K pulls ahead is in fine, high-contrast detail at closer viewing distances, and in motion handling during fast camera pans, where pixel-shifting can occasionally introduce very minor softness that native panels don’t exhibit. For a focused comparison of two specific models that sit right at this dividing line, our breakdown of the Epson LS12000 vs. JVC NZ500 walks through exactly how that gap plays out in real testing.
It’s also worth saying plainly: pixel-shifting 4K is not a downgrade or a marketing trick — it’s a legitimate engineering approach that lets manufacturers deliver excellent 4K-class image quality at meaningfully lower cost than true native 4K panels allow, which is precisely why the Epson, BenQ, and AWOL Vision in this guide all cost less than the native 4K JVC and Sony. If your budget realistically sits below native 4K LCoS pricing, pixel-shifted 4K is a perfectly satisfying way to get there rather than a compromise to apologize for. For buyers who’d rather skip the 4K conversation altogether and prioritize value at native 1080p, our roundup of the best native 1080p projectors remains a genuinely solid path, especially for screens under 100 inches where the resolution difference matters least.
Throw Distance & Room Planning: Making Sure It Actually Fits
Throw distance is the single most overlooked spec in projector shopping, and it’s the one that determines whether a given projector even works in your specific room — no amount of picture quality matters if the projector physically can’t sit far enough (or close enough) from your wall to produce the image size you want.
For traditional long-throw projectors — the JVC, Epson, Sony, and BenQ in this guide — the relevant number is the throw ratio: the distance from the lens to the screen divided by the screen’s width. A 1.5:1 throw ratio means the projector needs to sit 1.5 times the screen’s width away from it. Most home theater long-throw projectors offer some zoom flexibility, expressed as a throw ratio range rather than a single fixed number, which gives you room to work with if your space isn’t an exact match.
Rather than doing that math manually for every screen size you’re considering, our interactive tool to calculate projector throw distance handles the conversion directly — plug in your target screen size and the projector’s throw ratio range, and it tells you exactly how much room depth you need.
Ultra short throw changes this calculation entirely. Because the AWOL Vision LTV-2500 uses a fixed 0.25:1 throw ratio lens specifically engineered for near-wall placement, the relevant measurement isn’t room depth at all — it’s simply whether you have a low credenza, console, or floor space within about 10 inches of the wall you intend to project onto. That makes UST projectors dramatically easier to retrofit into existing rooms without ceiling work, which is precisely why we cover it as its own category in our UST vs. standard throw comparison.
One detail worth double-checking before buying any long-throw projector: vertical and horizontal lens shift range. Even when the throw distance math works out, your projector’s mounting height relative to the screen’s vertical position needs to land within its lens shift range, or you’ll be relying on digital keystone correction — which technically squares up the image but does so at the cost of resolution and sharpness. All four long-throw projectors in this guide offer genuine optical lens shift rather than requiring digital correction, which is a meaningfully better outcome for final image quality.
Room Design & Ambient Light Control for the Best Projector Experience
Choosing the right projector is half the equation. The room you put it in is the other half — and it’s the half that most buyers underestimate. A reference-grade JVC DLA-NZ7 in a room with white walls, uncovered windows, and a bare ceiling will produce a noticeably worse picture than a mid-range Epson LS11000 in a room with proper light control and dark surfaces. Room treatment isn’t about obsessive audiophile-level tweaks; it’s about removing the handful of things that actively degrade the image your projector is working hard to produce.
Why Wall and Ceiling Color Matter More Than You Think
When a projector lights up a screen, light doesn’t just go from the screen to your eyes — it bounces off the screen onto your walls, ceiling, and floor, then reflects back onto the screen as stray, indirect light. That reflected light raises the effective black level of the entire image, because “black” on a projector screen is really just the absence of projected light, and any ambient reflection fills that absence with a faint gray haze. The lighter your walls and ceiling, the more of that stray light gets bounced back, and the more your projector’s contrast ratio gets eroded.
The most impactful single room treatment for any projector setup is painting the wall immediately surrounding the screen — and ideally the ceiling area directly above and in front of the screen — a dark, matte color. Deep charcoal, dark gray, or even a near-black matte finish absorbs rather than reflects the light that escapes the screen’s borders, and the visible improvement in perceived contrast is immediate. You don’t need to paint an entire room black; even a 3- to 4-foot border of dark paint around the screen and the first few feet of ceiling above it makes a measurable difference. For homeowners who can’t or don’t want to paint, dark velvet or felt fabric panels hung around the screen area accomplish the same absorption without permanent wall changes.
The floor is the third surface that matters, though it’s the least impactful of the three. A dark carpet or rug in front of the screen absorbs floor-bound reflections that a light hardwood or tile floor would bounce back upward. If a full room-darkening renovation isn’t realistic, prioritizing in this order gives you the most improvement per dollar and effort: (1) darken the ceiling directly above and in front of the screen, (2) darken the wall around the screen, (3) add a dark rug or carpet in the viewing area.
Ambient Light Sources to Eliminate or Control
Windows are the most obvious ambient light enemy, but they’re not the only one. LED indicator lights on electronics, illuminated power strips, hallway light leaking under doors, and even the standby LEDs on a soundbar or receiver can introduce enough stray light to noticeably wash out a projector’s image in a dark scene. Before investing in blackout curtains, do a quick audit: sit in your viewing position with the projector off and the room as dark as you can reasonably make it, and look for every visible light source. You’ll almost certainly find more than you expected.
For windows, the best approach is layered light control. Full blackout curtains or roller shades block direct sunlight and are the baseline requirement for any projector room that gets daytime use. If you want to maintain some natural light during non-viewing hours, a dual-layer approach — a sheer daytime shade behind a blackout drape — lets you switch between modes without committing to permanent darkness. Motorized roller shades with remote control are a surprisingly affordable upgrade that removes the friction of manually adjusting multiple windows every time you want to watch something.
For rooms where windows simply can’t be fully covered — a living room with large glass doors, for instance — the strategy shifts from total darkness to managing the projector’s brightness and screen choice to compensate. This is exactly the scenario where the BenQ HT4550i’s 3,200-lumen output paired with an ambient-light-rejecting screen becomes the pragmatic choice over the JVC or Sony’s higher-contrast but lower-lumen output. The projector isn’t fighting the room as hard because it’s brighter, and the ALR screen does the work of rejecting overhead and off-axis ambient light that would otherwise hit the screen surface.
Dedicated Theater Room vs. Multi-Use Living Room
If you’re building or converting a dedicated theater room — even a spare bedroom repurposed as a media room — you have the freedom to optimize everything: dark walls, blackout window treatment, controlled lighting, even acoustic panels that double as light absorption. In this scenario, a lower-lumen, higher-contrast projector like the JVC DLA-NZ7 or Sony VPL-XW5000ES will reward you with image quality that genuinely approaches a commercial cinema, because nothing in the room is working against the projector’s strengths.
If the projector is going into a living room that serves multiple purposes — family hangout during the day, movie room at night — the optimization approach is different. You can still make significant improvements with dark curtains and a dark paint border around the screen area, but you’re probably not going to paint the entire room charcoal or remove all ambient lighting permanently. In this context, choosing a projector that’s designed for your room’s actual conditions — brighter and more forgiving of ambient light — matters more than buying the absolute best picture-quality projector and hoping it works. The Epson LS11000 and BenQ HT4550i both shine in this multi-use scenario precisely because they’re engineered to look good even when conditions aren’t ideal.
Seating Distance and Viewing Angle
One final room design consideration that directly affects perceived image quality: how far you sit from the screen. The Society of Motion Picture and Television Engineers (SMPTE) recommends a viewing angle of at least 30 degrees for an immersive cinema experience, which for a 120-inch screen translates to a seating distance of roughly 10 to 13 feet. Sitting further back reduces the immersion factor that makes a projector special in the first place; sitting closer than about 1.2 times the screen width starts to expose pixel structure on pixel-shifted 4K projectors (though native 4K models like the JVC and Sony hold up well at closer range).
Choosing the Right Screen for Your Projector
A projector is only half of the picture-quality equation — quite literally. The screen you project onto has a measurable, sometimes dramatic effect on perceived brightness, contrast, and color, and pairing the wrong screen with the right projector can undercut everything the projector itself does well.
| Screen Type | Best Paired With | Key Trait |
|---|---|---|
| Standard White (1.0 Gain) | JVC NZ7, Sony XW5000ES | Neutral color, ideal for dark, light-controlled rooms |
| High-Gain / ALR (Long Throw) | Epson LS11000, BenQ HT4550i | Reflects more light back, helpful with some ambient light |
| UST-Specific ALR Screen | AWOL Vision LTV-2500 | Engineered for steep throw angles; rejects overhead light specifically |
| Acoustically Transparent | Any model behind a sound bar/speaker | Lets speaker placement sit directly behind the screen |
For the four long-throw projectors in this guide, a simple, properly tensioned white or light-grey screen at 1.0 to 1.3 gain in a dark room will let the projector’s own contrast and color performance shine through without interference — which is exactly why a screen upgrade matters less for the JVC and Sony than for the brighter-but-less-contrasty BenQ in a semi-lit room, where an ambient-light-rejecting screen can meaningfully claw back contrast that room light would otherwise wash out.
For the AWOL Vision LTV-2500, screen choice isn’t optional in the same way — it’s part of the system. Because UST projectors throw their image up at a steep angle from very close to the floor or a low console, a standard flat-white screen will show visibly uneven brightness, with the bottom of the image brighter than the top, and will struggle with any overhead room lighting. A UST-specific ALR screen uses a microstructured surface engineered to reflect light coming from below back toward the viewer while rejecting light coming from above — exactly the geometry of a UST setup and exactly the geometry that ordinary screens aren’t designed for. Our full guide on choosing an ALR screen for a UST projector goes deep on gain, viewing angle, and sizing for this specific pairing.
Screen gain deserves a quick explanation because it’s another spec that sounds more technical than it is. Gain measures how much light the screen reflects back toward the viewer compared to a standard white reference surface at 1.0 gain. A 1.3-gain screen reflects 30% more light back on-axis — which makes the image appear brighter — but at the cost of a narrower optimal viewing angle and potential “hotspotting,” where the center of the screen looks brighter than the edges. For most dedicated theater rooms with controlled light and off-center seating, a 1.0 to 1.1 gain screen is the sweet spot. For living rooms fighting ambient light, a 1.3 to 1.5 gain or ALR screen adds a useful brightness buffer. Screens above 1.5 gain are rarely necessary or desirable for home theater projectors at this tier.
Fixed-frame screens — the kind that mount permanently to a wall with a taut, wrinkle-free surface — deliver the best image quality because the screen surface is always perfectly flat. Pull-down and motorized retractable screens add convenience, especially in multi-use rooms where you don’t want a permanent screen visible, but they can develop slight waves or curls over time that introduce subtle image distortions. If your room allows a fixed frame, it’s the better long-term choice; if it doesn’t, a high-quality tensioned motorized screen from a reputable manufacturer minimizes the curl issue effectively.
Sound, Smart Features & Gaming Considerations
Sound: Most Projectors Need Help
With one notable exception in this guide, none of these projectors are meant to be your primary audio source. The JVC, Epson, Sony, and BenQ all include small reference speakers at best, intended for basic functionality rather than genuine home theater sound — they exist so the projector technically “works” without external audio, not so you’ll actually want to use them for movie night. Budget for at least a soundbar, and ideally a proper AV receiver and speaker setup, alongside any of these four.
The AWOL Vision LTV-2500 is the exception, with its built-in 36-watt Dolby Atmos soundbar and an unusual center-channel speaker mapping technique that projects dialogue clarity directly from the screen area. It’s a genuinely good starting point for a UST “all-in-one” setup, though serious enthusiasts will still likely want to add dedicated surround speakers eventually for the full Atmos experience the soundbar can only approximate on its own.
Smart Platforms: Built-In vs. External
Of the five, only the BenQ HT4550i includes a fully integrated, certified smart TV platform — Android TV via its included dongle, with Netflix pre-loaded and full Google Play access. The JVC, Epson, and Sony all expect you to supply your own streaming device (an Apple TV, Roku, or similar), which is standard for dedicated home theater projectors at this tier, since enthusiast buyers often already have a preferred streaming box and AV receiver in their signal chain anyway. The AWOL Vision’s smart platform support varies by configuration and region, so it’s worth confirming current software details before assuming built-in streaming is included.
Gaming: Input Lag and Refresh Rate
For console and PC gamers, two specs matter more than picture quality alone: input lag (the delay between a controller input and it appearing on screen) and maximum supported refresh rate at 4K. The Epson LS11000 and JVC DLA-NZ7 are the strongest all-around gaming picks here, both supporting full HDMI 2.1 bandwidth for 4K at up to 120Hz with low double-digit millisecond input lag — genuinely competitive numbers that won’t put you at a meaningful disadvantage in fast-paced games. The BenQ tops out at 4K/60Hz without full HDMI 2.1 support, which is perfectly fine for single-player and story-driven games but a real limitation for competitive multiplayer at the highest settings. For a deeper, gaming-specific comparison across more models, our dedicated guide to the best 4K/120Hz gaming projectors is the right next read.
HDR Formats Explained — HDR10, HDR10+, HLG & Dolby Vision
High Dynamic Range is one of the most significant picture quality improvements in modern home video — a bigger perceptual leap than the jump from 1080p to 4K resolution, in fact. But the term “HDR” covers several different formats, and not every projector supports all of them. Understanding what each format does, which content uses it, and which projectors handle it well will save you from discovering after purchase that your projector can’t take full advantage of the content you’re actually watching.
HDR10 — The Universal Baseline
HDR10 is the open, royalty-free HDR standard that every HDR-capable display — projector or flat panel — is required to support. It uses static metadata, meaning the brightness and color information is encoded once for the entire movie or show, and the display processes that single set of instructions from beginning to end. Every projector in this guide supports HDR10, and every 4K Blu-ray disc and major streaming platform delivers HDR10 as a baseline format.
The limitation of static metadata is that it can’t adapt scene by scene. A movie that mixes very dark interior scenes with very bright exterior shots — which describes most modern films — gets a single HDR grading pass that represents a compromise between those extremes. The display’s tone mapping engine then has to figure out how to translate that compromise into its own brightness range on the fly, which is where projector-specific processing quality becomes critical.
HDR10+ — Dynamic Metadata, Open Standard
HDR10+ adds dynamic, scene-by-scene metadata on top of HDR10’s foundation. Instead of one set of brightness instructions for the whole film, the content creator embeds brightness and color instructions for each individual scene, allowing the display to optimize its tone mapping for the specific content being shown at any given moment. It’s a meaningful improvement over static HDR10, particularly for projectors with limited peak brightness that need to be very judicious about how they allocate their brightness budget across dark and bright scenes.
Of the five projectors in this guide, the JVC DLA-NZ7 and Epson LS11000 both support HDR10+, while the Sony, BenQ, and AWOL Vision do not. HDR10+ content is available from Amazon Prime Video, Samsung TV Plus, and a growing number of 4K Blu-ray titles, though its library remains smaller than Dolby Vision’s at present. Whether HDR10+ support should be a deciding factor depends on where you get most of your content — if you’re primarily an Amazon Prime Video viewer, it’s more relevant than if you’re mostly watching Netflix or Disney+.
HLG — Broadcast HDR
Hybrid Log-Gamma was developed jointly by the BBC and NHK specifically for HDR broadcast television. Unlike HDR10 and Dolby Vision, which are designed around authored, mastered content, HLG is backward-compatible — an HLG signal displays as a standard dynamic range image on non-HLG displays without looking wrong, while HDR-capable displays unlock the extended dynamic range automatically. All five projectors in this guide support HLG, though its practical relevance depends on your region’s broadcast adoption. In the UK and Japan, HLG broadcast content is increasingly common; in the US, HDR broadcast adoption has been slower, making HLG less of a day-to-day factor for most American buyers.
Dolby Vision — The Premium Dynamic Format
Dolby Vision is Dolby’s proprietary HDR format, and it’s the most technically sophisticated of the group. Like HDR10+, it uses dynamic, scene-by-scene metadata, but with several additional technical advantages: support for up to 12-bit color depth (versus HDR10’s 10-bit), a more advanced perceptual quantizer for brightness encoding, and a content-aware tone mapping algorithm that can be embedded directly in the content itself, giving the display more intelligent instructions about how to handle brightness extremes.
The practical result of Dolby Vision support is that content mastered in the format typically looks noticeably more refined on displays that support it — highlights are more controlled, shadow detail is more nuanced, and the overall image has a more “finished” quality than the same content viewed through basic HDR10 processing. Netflix, Disney+, Apple TV+, and most major streaming platforms deliver a significant portion of their 4K library in Dolby Vision, making it the most widely available premium HDR format for streaming content.
Of the five projectors in this guide, only the AWOL Vision LTV-2500 supports Dolby Vision natively. This is a genuine differentiator for the AWOL, though it’s worth noting that Dolby Vision support on projectors is complicated by the fact that projectors can’t physically match a flat panel’s peak brightness, so the dynamic metadata advantages are partially offset by the projector’s inherent brightness ceiling. For most viewers, a projector with excellent HDR10 tone mapping — like the JVC’s Frame Adapt HDR Gen 2 — will deliver a comparable or better HDR experience from HDR10 content than a projector with mediocre Dolby Vision processing delivers from Dolby Vision content. Tone mapping quality matters more than format support on projectors specifically.
Color Calibration — Getting the Most Accurate Picture From Your Projector
Out of the box, most projectors don’t display colors exactly the way the content creator intended. Factory default picture modes are typically tuned to look impressive in a brightly lit showroom — oversaturated colors, boosted contrast, sharpened edges — rather than to reproduce the D65 white point and DCI-P3 or Rec.709 color targets that professional content is mastered against. Understanding calibration means understanding how to close that gap, whether you do it yourself with free tools, hire a professional, or simply choose a projector that’s already accurate from the factory.
Factory Calibration: When It’s Already Done For You
The simplest path to accurate color is buying a projector that arrives calibrated. The BenQ HT4550i stands out in this guide specifically because BenQ ships every unit with an individual factory calibration report documenting that the unit meets its claimed color accuracy targets — 100% of both DCI-P3 and Rec.709 color spaces with a Delta E value below 3 (the threshold where color errors become imperceptible to most viewers). This means that in Cinema or Filmmaker mode, the HT4550i reproduces colors approximately the way they were mastered without any additional adjustment on your part.
The Sony VPL-XW5000ES also arrives with strong factory calibration out of the box, aided by Sony’s TRILUMINOS PRO processing and the X1 Ultimate chip’s real-time color correction. JVC’s DLA-NZ7 is similarly well calibrated in its reference modes, though JVC gives enthusiasts more manual adjustment tools to fine-tune beyond the factory defaults if they choose to. The Epson LS11000 and AWOL Vision LTV-2500 are both reasonably accurate in their cinema-oriented picture modes, but benefit more from some user adjustment to hit their full potential.
DIY Calibration With Free Tools
For buyers who want to improve on factory defaults without hiring a professional, a surprisingly effective calibration is possible with free software and modest hardware. The basic process involves adjusting the projector’s brightness (black level), contrast (white level), color saturation, tint, and color temperature controls while displaying standardized test patterns — either from a calibration disc like the Spears & Munsil UHD Benchmark or from free test pattern generators available online.
The single most important calibration step, and the one that makes the most visible difference, is setting the correct color temperature. Most projectors default to a “Cool” or “Medium” color temperature that shifts the image toward blue, making whites look slightly bluish and distorting every other color as a result. Switching to the “Warm” or “Warm2” preset on most projectors brings the white point much closer to the D65 standard (6500 Kelvin) that professional content is graded against, and the improvement in skin tone accuracy alone is worth the adjustment.
Beyond basic white point correction, adjusting brightness and contrast using a pluge (Picture Line-Up Generation Equipment) pattern — a test pattern with bars slightly above absolute black and slightly below peak white — lets you set the projector’s black and white clipping points precisely so you’re seeing the full detail range the content contains without crushing shadow detail or clipping highlights. This takes about five minutes and eliminates one of the most common calibration errors.
Professional ISF Calibration
For buyers who want the absolute most accurate picture their projector is capable of producing, an ISF (Imaging Science Foundation) certified calibrator uses professional-grade colorimeters and spectrophotometers along with specialized software like CalMAN or ChromaPure to measure and adjust every aspect of the projector’s color performance against reference standards. A full ISF calibration typically takes two to four hours and costs between $300 and $600, depending on the calibrator and your market.
What professional calibration achieves that DIY methods can’t is precision in the projector’s color management system (CMS) — the internal controls that adjust the hue, saturation, and brightness of each individual primary and secondary color. Getting these controls right requires measuring the actual output of each color against its target with laboratory-grade instruments, which is beyond what visual test patterns alone can accomplish. For the JVC DLA-NZ7 and Sony VPL-XW5000ES specifically, which both have extensive, well-implemented CMS controls, professional calibration can squeeze out the last few percent of color accuracy that separates “very good” from “reference.”
Whether professional calibration is worth the cost depends on how much you value that marginal accuracy improvement. For most viewers watching streaming content in a living room, the factory calibration on a well-tuned projector is more than sufficient. For dedicated theater enthusiasts with a light-controlled room who primarily watch 4K Blu-ray discs, a professional calibration can be a meaningful final step that makes the most of the projector’s capabilities.
Picture Mode Selection: The Quickest Win
If you do nothing else, switch your projector out of its default or “Bright” picture mode and into its “Cinema,” “Filmmaker,” or “Reference” mode. This single change typically corrects the most egregious color temperature and color space errors, disables oversharpening and noise reduction processing that degrades fine detail, and brings the projector much closer to reference accuracy without any tools or expertise. It’s the single biggest free improvement most projector owners never make — and the projector modes with the most accurate colors typically also happen to produce the best-looking image for movies and TV content, not just the most technically correct one.
Installation & Mounting: Getting It Right the First Time
For long-throw projectors, ceiling mounting remains the cleanest installation, both visually and functionally — it gets the projector and its heat and fan noise out of the main sightline, keeps cabling tucked away, and typically lines up well with the lens shift range most home theater projectors are designed around. It does, however, mean committing to a fixed position, running power and HDMI cabling through or along the ceiling, and being comfortable working at height.
A rear shelf or credenza placement is the more flexible, less permanent alternative, and it’s a completely legitimate option for any of the four long-throw projectors here — provided the shelf sits within the projector’s vertical lens shift range relative to your screen’s height, and provided nothing (a tall person standing up, a pet jumping onto furniture) can wander into the beam path between the projector and the screen.
If you do decide to go the ceiling-mount route, the process is more approachable than it might seem, but it benefits from doing the math before you start drilling. Our complete walkthrough of how to mount a projector to the ceiling covers calculating the correct drop distance from your throw distance numbers, choosing a mount with the right adjustability, and routing cables cleanly so you’re not staring at a visible cord running across your ceiling for the next several years.
The AWOL Vision LTV-2500 sidesteps essentially this entire conversation, which is precisely its appeal. Installation is closer to setting up a soundbar than a projector: place it on a low console against the wall you intend to project onto, run power and any source cables, and adjust the built-in focus and any keystone correction. No ceiling access, no mount purchase, and no permanent commitment to a single room configuration — you can move it to a different wall or even a different room with considerably less effort than repositioning a ceiling-mounted long-throw setup.
Projector Maintenance & Long-Term Care
A home theater projector is a long-term investment, and like any precision optical device, it benefits from basic maintenance that keeps it performing at its best year after year. The good news is that modern laser and LED projectors require dramatically less ongoing care than their lamp-based predecessors — no bulb replacements, no dimming degradation to fight, and far fewer moving parts to wear out. But “low maintenance” doesn’t mean “no maintenance,” and the few tasks that do matter are easy to neglect precisely because they’re infrequent.
Lens Cleaning: The Single Most Impactful Maintenance Task
The projector’s lens is the final optical element between the imaging chip and your screen, and any dust, fingerprints, or haze on the lens surface degrades the image in a way that’s immediately visible — softening focus, reducing contrast, and introducing faint halos around bright objects. Projectors in home environments accumulate dust on the lens faster than most owners expect, especially if the projector is ceiling-mounted where it’s out of sight and therefore out of mind.
Cleaning a projector lens correctly requires the right materials and a gentle touch. Start with a rocket blower (not canned air, which can spray propellant residue onto the lens) to blow loose dust off the surface. Then use a clean, microfiber lens cloth — the same type used for camera lenses — with a small amount of lens cleaning solution applied to the cloth (never directly to the lens) to gently wipe in a circular motion from center to edge. Never use paper towels, tissues, or household glass cleaner, all of which can scratch the lens coating or leave residue. For a complete step-by-step walkthrough of the process, including how to handle stubborn smudges safely, our guide to how to clean a projector lens covers every detail.
Air Filter Maintenance
Most projectors — including all five in this guide — have internal air filters that prevent dust from reaching the imaging chips and optical path. Over time, these filters accumulate dust and become clogged, which restricts airflow, causes the projector to run hotter, forces the fan to spin faster (and louder), and in extreme cases can trigger thermal protection shutdowns. Checking and cleaning the air filter every 500 to 1,000 hours of use — roughly every 4 to 8 months for a projector used a few hours daily — prevents all of these issues.
The filter cleaning process varies slightly by model but follows the same general pattern: power off and unplug the projector, locate the filter compartment (usually on the side or bottom of the chassis), remove the filter, and either vacuum it gently with a soft brush attachment or wash it with water if the manufacturer specifies a washable filter type. Let it dry completely before reinstalling. Replacement filters, when needed, are typically inexpensive — usually $15 to $30 — and available directly from the manufacturer or through authorized parts suppliers.
Firmware Updates
Projector manufacturers periodically release firmware updates that can improve performance, fix bugs, add features, or enhance compatibility with new source devices. JVC, for instance, has historically issued firmware updates for its D-ILA projectors that improve HDR tone mapping performance and add new features like additional frame interpolation modes. Epson, Sony, and BenQ similarly release periodic updates that address specific issues or improve processing performance.
The update process varies by manufacturer — some projectors update via USB drive, others via network connection — and the specific method for your model is documented in the user manual. Checking for firmware updates every six months or so is a reasonable cadence. It’s worth noting that firmware updates carry a small but nonzero risk of introducing new issues, so if your projector is performing well and you’re not experiencing any specific problems, there’s no urgency to install every update the moment it’s released. A sensible approach is to read the release notes for each update and install it if it addresses a problem you’re experiencing or adds a feature you want.
Lamp Hours Tracking and Replacement (Lamp-Based Projectors Only)
If you own or are considering a lamp-based projector rather than one of the laser or LED models in this guide, tracking lamp hours becomes a critical maintenance concern. Traditional UHP projector lamps are rated for roughly 3,000 to 5,000 hours in full-power mode (some projectors offer an “eco” mode that extends lamp life to 5,000–10,000 hours at the cost of reduced brightness), and their brightness degrades gradually from the moment they’re first powered on. By the end of their rated life, a UHP lamp may have lost 30 to 50% of its original brightness.
Replacement lamps for genuine OEM units typically cost between $200 and $400, depending on the projector model, and the replacement process usually involves opening a panel on the projector’s underside, sliding out the lamp module, and sliding in the new one — a process that takes about 10 minutes and requires no special tools beyond a screwdriver. Third-party “compatible” lamps are available for significantly less ($50 to $100), but they often use inferior bulb components that produce less brightness, degrade faster, and in some cases can damage the projector’s power supply. For lamp-based projectors, genuine OEM replacement lamps are almost always worth the premium.
For the four laser and one LED projectors in this guide, lamp replacement is a non-issue. The solid-state light sources are rated for 20,000+ hours and are not user-replaceable — they’re designed to last the practical lifetime of the projector itself. At 4 hours of daily use, 20,000 hours translates to over 13 years of viewing before the light source reaches half brightness, which exceeds the expected useful lifespan of most consumer electronics. This is one of the most significant practical advantages of laser and LED projectors over lamp-based designs, and it’s worth factoring into any cost comparison between the two approaches — our full guide to laser vs. lamp projectors covers the total cost-of-ownership math in detail.
Environmental Considerations
Projectors generate meaningful heat during operation — all five models in this guide consume between 200 and 400 watts under full load — and adequate ventilation around the chassis is essential for long-term reliability. Never place a projector in an enclosed cabinet without airflow, never block the intake or exhaust vents, and if ceiling-mounting, ensure the mount position allows at least 6 to 8 inches of clearance around all vent openings. Operating a projector in a dusty, smoky, or high-humidity environment accelerates filter clogging and can cause internal optical contamination that’s expensive to remediate.
For households with pets, pet hair is a significant contributor to filter clogging and internal dust accumulation. If you have cats or dogs that shed, checking the projector’s filter more frequently — every 3 to 4 months rather than every 6 — helps prevent the gradual buildup that leads to overheating and fan noise escalation.
Projector Noise Levels — What the Decibel Numbers Mean in Your Room
Every projector with an internal fan produces some amount of noise during operation, and for viewers sensitive to background hum, the difference between a quiet projector and a loud one can matter as much as the difference in picture quality between two models. Projector manufacturers typically rate their fan noise in decibels (dB), but those numbers are measured in standardized conditions that may not reflect how the projector sounds in your specific room, so understanding what drives projector noise and how to minimize it is more useful than comparing spec-sheet dB figures directly.
What Drives Projector Fan Noise
Projector fan noise is a direct function of heat output: the more light the projector produces and the more power its electronics consume, the more heat needs to be exhausted, and the faster the fan needs to spin to do it. Brighter picture modes produce more heat and therefore more noise; eco or low-brightness modes reduce both. Laser and LED light sources run significantly cooler than traditional UHP lamps, which is one reason the laser projectors in this guide tend to be quieter than comparably bright lamp-based models.
The JVC DLA-NZ7, despite its substantial brightness output, is widely noted by reviewers for being relatively quiet in operation — JVC’s thermal management design channels heat efficiently enough that the fan rarely needs to reach its maximum speed during normal viewing. The Sony VPL-XW5000ES has a slightly more noticeable fan presence at full brightness, though it’s still well within acceptable range for a home theater. The Epson LS11000’s fan is audible in quiet scenes but blends into room noise at typical viewing volumes. The BenQ HT4550i, being the brightest projector in this guide, produces the most fan noise when running at maximum brightness, though stepping down to a more accurate, slightly dimmer picture mode brings the noise level down significantly. The AWOL Vision LTV-2500’s triple-laser engine runs cool enough that fan noise is rarely a concern — another practical advantage of the UST form factor, which allows for a more efficient thermal path given its proximity to the wall and floor.
Practical Noise Management
The single most effective thing you can do about projector noise is distance. Fan noise drops roughly 6 dB with every doubling of distance from the source, which means a projector that sounds noticeably loud at arm’s length will be substantially less audible from a typical seating position 10 to 14 feet away. Ceiling-mounted projectors benefit from this distance advantage naturally, since they’re positioned far from the viewer’s ears, while shelf-mounted projectors placed closer to seating positions may produce more perceptible noise.
Room acoustics also play a role. Hard, reflective surfaces — bare walls, hardwood floors, large glass windows — reflect projector fan noise more than soft, absorptive surfaces. A room with carpet, upholstered furniture, curtains, and fabric wall panels will absorb more of the projector’s mechanical noise than a minimally furnished room with all hard surfaces. This is one of those cases where room treatment improvements made for picture quality (dark curtains, soft wall panels) also improve the acoustic environment as a secondary benefit.
If you’re genuinely sensitive to projector noise, using the projector’s eco or low-brightness mode during movies where peak brightness isn’t critical — dramas, dialogue-heavy films, anything without major daylight scenes — reduces fan speed and noise meaningfully while maintaining excellent picture quality in a dark room where you don’t need maximum brightness anyway. In a light-controlled room, the difference between a projector’s full-brightness and eco-brightness modes is often less visible than you’d expect, because the room’s darkness already provides the contrast that ambient-lit rooms require the projector to generate on its own.
Connectivity, Ports & Wireless Options Explained
A projector’s connectivity determines what you can plug into it, how much bandwidth the signal path supports, and whether the projector can take full advantage of the latest source devices. In an era where HDMI versions, HDCP copy protection, and eARC audio return matter directly to picture and sound quality, understanding the port panel on the back of your projector is more important than it used to be — and more confusing, because not every “HDMI 2.1” port actually delivers the same capabilities.
HDMI 2.0 vs. HDMI 2.1: What Actually Changes
The critical difference between HDMI 2.0 and HDMI 2.1 for home theater projectors is bandwidth. HDMI 2.0 supports a maximum of 18 Gbps of data throughput, which is sufficient for 4K resolution at up to 60Hz with 8-bit color and standard dynamic range, or 4K at 60Hz with 10-bit HDR using chroma subsampling (4:2:0). HDMI 2.1 increases that maximum to 48 Gbps — enough for 4K at 120Hz with full 10-bit HDR color and no chroma subsampling, or even 8K at 60Hz.
For movie watching, HDMI 2.0 is entirely sufficient — no film is mastered above 24 frames per second, and 4K/24 HDR content fits comfortably within HDMI 2.0’s bandwidth ceiling. For gaming at 4K/120Hz, however, HDMI 2.1 is a genuine requirement, because the bandwidth needed to deliver 4K resolution at 120 frames per second with HDR color information simply exceeds what HDMI 2.0 can carry. This is why the Epson LS11000 and JVC DLA-NZ7 — both equipped with full 48Gbps HDMI 2.1 ports — are the stronger gaming picks in this guide, while the BenQ HT4550i’s HDMI 2.0b ports limit it to 4K/60Hz gaming regardless of the source device’s capabilities.
Adding to the confusion, some manufacturers label ports as “HDMI 2.1” even when they don’t support the full 48 Gbps bandwidth or all of HDMI 2.1’s optional features (like Variable Refresh Rate, Auto Low Latency Mode, or Quick Frame Transport). The Sony VPL-XW5000ES, for instance, has a hybrid HDMI implementation that supports some HDMI 2.1 features but doesn’t deliver full 48 Gbps on all ports. When evaluating a projector’s HDMI specification, look for the specific features you need — 4K/120 support, VRR, ALLM — rather than relying on the HDMI version number alone.
eARC (Enhanced Audio Return Channel)
eARC is an HDMI 2.1 feature that allows a display to send high-bandwidth, uncompressed audio back to an AV receiver or soundbar through the same HDMI cable that’s carrying the video signal to the display. For projector setups where the projector is the first device in the signal chain — receiving a direct HDMI input from a streaming stick or gaming console — eARC lets you pass lossless Dolby Atmos or DTS:X audio to your sound system without running a separate audio cable.
In practice, most dedicated home theater projector setups route source devices through an AV receiver or HDMI switch first, sending only the video signal to the projector, which makes eARC less critical than it is for flat-panel TVs where the display is also the hub. But for simpler setups — particularly the BenQ HT4550i with its built-in Android TV, or the AWOL Vision LTV-2500 with its integrated streaming — eARC support on the projector lets you send the audio from built-in apps to an external sound system without an additional optical or auxiliary cable. If you’re building a streamlined, minimal-cable setup, eARC support is worth checking on the projector’s spec sheet.
USB, Network, and Wireless Connectivity
Most home theater projectors include one or more USB ports, primarily intended for firmware updates (via USB drive) and occasionally for powering streaming dongles or small accessories. The BenQ HT4550i uses an internal USB port specifically to power its included Android TV dongle — a clean integration that avoids external cable clutter. The Epson and JVC models include USB ports primarily for service and firmware use rather than media playback.
Network connectivity varies across the five projectors. The BenQ HT4550i connects to your home Wi-Fi network for its smart TV platform and can receive firmware updates over the network. The Epson LS11000 and JVC DLA-NZ7 include Ethernet ports primarily for network-based control (integration with home automation systems like Control4, Crestron, or Savant) rather than for content streaming. The Sony and AWOL Vision models similarly include network connectivity for control and updates rather than direct streaming.
Wireless projection — Miracast, AirPlay, Chromecast built-in, or proprietary wireless display protocols — is available on some projectors but comes with practical limitations that are worth understanding. Wireless video transmission introduces latency (typically 50 to 200 milliseconds, depending on the protocol and network conditions), compresses the video signal to fit within wireless bandwidth constraints, and is susceptible to interference and dropouts in environments with heavy Wi-Fi traffic. For casual use — showing photos, mirroring a laptop for a quick presentation — wireless projection is convenient. For serious movie watching or gaming, a wired HDMI connection remains meaningfully superior in reliability, latency, and image quality. If you need to bridge a long cable distance without running HDMI through walls, a dedicated wireless HDMI transmitter system (like those from Nyrius or J-Tech Digital) is a more reliable solution than the projector’s built-in wireless capabilities, though it adds cost and another device to manage.
Budget Tiers Explained: What You Actually Get at Each Price Point
Home theater projector pricing spans an enormous range, and what a given dollar amount buys you changes meaningfully as you move up through the tiers. Here’s a clear-eyed breakdown, with links to dedicated roundups at each level if you want to go deeper at your specific budget.
Entry Level
Under $100 territory is almost entirely portable mini and novelty projectors, not genuine home theater performers. See our best projectors under $100 roundup for honest expectations at this price.
Budget Home Theater
Under $500 introduces genuine native 1080p and entry 4K-capable models suitable for casual movie nights. Our best projectors under $500 guide covers the realistic standouts.
Serious Entry Point
Under $1,000 is where dedicated home theater 4K-capable projectors with real HDR support begin to appear. See our best projectors under $1,000 picks for this tier.
Enthusiast / High-End
$2,500 and up is where every projector in this guide lives — native or pixel-shifted 4K, laser or premium LED light sources, and genuine HDR processing. Our best high-end home cinema projectors roundup goes further upmarket still.
The five projectors reviewed in depth in this guide all sit in that final, enthusiast-grade tier, which is precisely why each has been chosen as a genuine standout rather than simply “good for the money.” If your budget realistically sits below this range, that’s not a reason to skip a projector altogether — it’s a reason to set realistic expectations and start with our broader, budget-segmented resource on the best projectors for every budget and room size, which spans the full range from casual to reference-grade.
The Biggest Mistakes People Make Buying a Home Theater Projector
Mistake 1: Ignoring throw distance until after purchase. This is the single most common and most expensive mistake. A projector that’s genuinely excellent on paper is useless if your room’s depth doesn’t fall within its throw ratio range for your target screen size. Always run the numbers — using our throw distance calculator — before you buy, not after.
Mistake 2: Buying based on lumens alone, ignoring contrast. A projector with high lumens but mediocre native contrast can actually look worse in a dark room than a dimmer projector with excellent contrast, because perceived picture quality in darkness is driven far more by black level than by peak brightness. Match the projector’s strengths to your room’s actual lighting conditions, not to the single biggest number on the spec sheet.
Mistake 3: Skipping screen selection entirely. Projecting onto a plain painted wall is a legitimate starting point, but a properly selected screen — matched to your projector’s throw geometry and your room’s ambient light — recovers a meaningful amount of contrast and color accuracy that a wall simply can’t deliver, especially with UST projectors where screen choice is closer to mandatory than optional.
Mistake 4: Assuming a UST projector works with any screen. As covered in the screen pairing section above, ultra short throw projectors specifically need an ALR screen engineered for their steep throw angle. Pairing a UST projector with a standard flat-white screen meant for long-throw use will noticeably undersell its real picture quality.
Mistake 5: Underestimating the value of genuine optical lens shift. Relying on digital keystone correction to square up a misaligned image costs you real resolution and introduces softness. A projector with generous optical lens shift gives you significantly more installation flexibility without that quality penalty — worth prioritizing if your mounting position won’t be perfectly centered and level with your screen.
Mistake 6: Forgetting that the room itself needs some attention too. Even the best projector will lose contrast against light-colored walls and ceilings, which bounce stray light back onto the screen and raise the effective black level. A dark, matte ceiling and walls — or at minimum, dark trim immediately around the screen — make a genuinely noticeable difference for any of the projectors in this guide.
Mistake 7: Treating built-in speakers as sufficient. As covered above, none of the long-throw projectors in this guide ship with audio that does justice to the picture quality they’re capable of. Budget for at least a soundbar from day one rather than treating sound as an afterthought purchase six months later.
Widescreen & Anamorphic Setups for the Ultimate Cinema Experience
Most projector owners project in the standard 16:9 aspect ratio — the same rectangle used by broadcast television, streaming platforms, and gaming. But the majority of Hollywood films are actually shot and mastered in wider aspect ratios, most commonly 2.35:1 or 2.39:1 (known as “CinemaScope” or “anamorphic widescreen”). When you watch a 2.35:1 film on a 16:9 screen, the projector displays black letterbox bars above and below the image, wasting a significant portion of your screen’s area — sometimes as much as 25 to 30% of the total screen height.
Constant Image Height (CIH): The Cinematic Approach
Constant Image Height is a projection philosophy that prioritizes the widescreen cinematic experience by using a screen with a 2.35:1 or 2.40:1 aspect ratio instead of 16:9. The image always fills the screen’s full height, and when you watch 16:9 content (broadcast TV, most streaming shows), it displays as a smaller rectangle centered within the wider screen — pillarboxed with black bars on the sides. When you watch a 2.35:1 film, it fills the entire screen edge to edge, with no letterbox bars at all.
The result is a more genuinely cinematic viewing experience: scope-ratio films fill your peripheral vision in a way that a 16:9 screen simply can’t replicate, because the horizontal dimension is maximized for the content that was designed to use it. For dedicated home theater enthusiasts who watch primarily films rather than television, a 2.35:1 screen paired with a CIH setup is a transformative upgrade that changes the way movies feel to watch.
Anamorphic Lenses: Maximizing Resolution and Brightness
For the highest-quality CIH setups, an anamorphic lens is an optical accessory placed in front of the projector’s own lens that horizontally stretches the projected image by a factor of 1.33x. The projector internally pre-compensates by vertically stretching the image by the same factor, so the final result on screen is correctly proportioned — but because the projector is using its full panel resolution for the widened image rather than projecting black letterbox bars and wasting pixels on the top and bottom, you get more of the projector’s native resolution and brightness dedicated to the actual image content.
The practical benefits of an anamorphic lens setup are threefold: you recover the resolution that would otherwise be lost to letterboxing (roughly 25% more vertical pixel usage for 2.35:1 content), the image is noticeably brighter because the same projector output is concentrated into the image area rather than being partially wasted on black bars, and the transition between aspect ratios (if your screen supports a masking system) is seamless rather than involving visible black bars. The JVC DLA-NZ7’s motorized zoom and lens shift memory make it particularly well-suited for anamorphic setups, as it can recall zoom and shift presets for different aspect ratios at the press of a button.
The Simpler Alternative: Zoom Method
For buyers who want a 2.35:1 viewing experience without the $2,000 to $5,000 investment in a quality anamorphic lens, the “zoom method” is a practical alternative. Using the projector’s optical zoom, you enlarge the image to fill a 2.35:1 screen for widescreen films, accepting that the top and bottom letterbox areas project beyond the screen’s borders onto the wall behind it (which works fine if that wall is dark). When switching to 16:9 content, you zoom the projector back down to fit the narrower format within the screen’s height.
The zoom method sacrifices the resolution and brightness advantages of a true anamorphic lens, but it costs nothing beyond the price of a 2.35:1 screen, and projectors with motorized zoom and lens memory — like the JVC DLA-NZ7 and Epson LS11000 — make the aspect ratio switching process almost as convenient as an automated anamorphic lens sled. For most home theater enthusiasts interested in wider screens, the zoom method is the right starting point; an anamorphic lens becomes worth considering when you’ve committed to the CIH philosophy and want to extract maximum performance from it.
If you’re primarily watching television content or gaming in 16:9, a standard 16:9 screen remains the more practical choice, and the 2.35:1 approach adds complexity that doesn’t pay off when your content doesn’t use the wider format. The decision comes down to your content library: if 80% or more of your viewing is widescreen films, a 2.35:1 screen is a compelling upgrade. If it’s a roughly even split between films and TV, the standard 16:9 format wastes less screen area overall.
Common Projector Problems & How to Fix Them
Even the best home theater projector will occasionally present a technical problem that disrupts your viewing. Most projector issues have straightforward solutions that don’t require professional service — you just need to know where to look. Here are the most common problems projector owners encounter, ranked roughly by frequency, along with the specific steps to resolve each one.
No Signal / HDMI Handshake Failures
The single most common projector issue is the “No Signal” message — the projector powers on and displays its menu, but shows no image from your source device. In the vast majority of cases, this is an HDMI handshake problem rather than a hardware failure. HDMI’s copy-protection protocol (HDCP) requires the source device and display to complete a digital “handshake” before transmitting content, and this handshake can fail for reasons ranging from a loose cable connection to an incompatible HDMI switch to a timing mismatch during power-on sequencing.
The fix sequence that resolves most HDMI handshake issues: (1) ensure the HDMI cable is firmly seated at both ends, (2) try a different HDMI input on the projector, (3) power-cycle both the projector and the source device (turn both fully off, wait 30 seconds, turn the projector on first, then the source), (4) try a different HDMI cable — damaged or low-spec cables are a surprisingly common cause of intermittent signal loss. If you’re routing through an AV receiver or HDMI switch, try connecting the source device directly to the projector to isolate whether the intermediate device is the issue. For a more thorough walkthrough of every troubleshooting step, our dedicated guide to fixing projector no-signal HDMI errors covers the diagnostic process end to end.
Projector Turns On But Shows No Picture
If the projector powers up — fans spin, indicator lights illuminate — but the screen stays completely dark with no menu, no splash screen, and no source content, the issue is typically one of three things: the lens cover or shutter is still closed (an easy oversight on some models), the lamp has failed (on lamp-based projectors), or the laser/LED light source has reached end of life or experienced a driver failure (on solid-state projectors). Start by checking the lens cover and any physical shutter mechanism, then verify that the projector’s input source is correctly selected. If neither of those resolves it, a light source failure or internal electronics issue may require service — our full troubleshooting guide for projector turns on but shows no picture walks through the diagnostic process step by step.
Projector Keeps Turning Off Unexpectedly
Unexpected shutdowns mid-viewing are almost always thermal. The projector’s internal temperature exceeds its safety threshold, and the thermal protection circuitry shuts the unit down to prevent damage. The most common cause is blocked ventilation — either the intake or exhaust vents are obstructed by the mounting surface, nearby objects, or accumulated dust in the air filter. Check that all vents have at least 6 to 8 inches of clearance, clean or replace the air filter if it hasn’t been serviced recently, and verify that the room’s ambient temperature isn’t excessive (projectors should operate in environments below about 95°F / 35°C).
If ventilation is clear and the projector still shuts down, the internal thermal compound between the light source and its heatsink may have degraded (more common in older lamp-based models), or the fan itself may be failing and unable to maintain adequate airflow. Our complete troubleshooting guide for why a projector keeps turning off covers every potential cause from simple to complex.
Color Shifts, Uniformity Issues, and Dead Pixels
Gradual color shifts — where the image takes on a yellowish, greenish, or pinkish tint — are most commonly caused by a degrading lamp in lamp-based projectors. As UHP lamps age, their color temperature shifts, typically toward green or yellow. Switching to a newer lamp resolves the issue entirely. In laser and LED projectors, color shifts are far less common but can indicate a failing color wheel or laser diode driver, which requires manufacturer service.
Brightness uniformity issues — where one area of the screen is noticeably brighter or darker than the rest — can result from lens misalignment, a damaged optical element, or (in the case of DLP projectors) partial failure of the micromirror array. Mild uniformity variation is normal in all projector technologies; significant variation that’s clearly visible during regular viewing is not and warrants a service call.
Fan Noise Escalation Over Time
If your projector has become noticeably louder over the months or years you’ve owned it, and it was quiet when new, the most likely cause is a clogged air filter rather than a failing fan. As the filter accumulates dust, the fan must spin faster to maintain adequate airflow, producing more noise. Cleaning or replacing the filter restores the original noise level in most cases. If the filter is clean and the fan is still louder than it used to be, the fan bearing may be wearing — a relatively uncommon issue in modern projectors but one that does develop over thousands of hours of use and requires manufacturer service to replace.
Image Edge Softness or Focus Inconsistency
If the center of the projected image is sharp but the edges are soft, the likely causes are lens quality limitations (more common in budget projectors with simpler lens designs), thermal lens shift (where the lens elements expand slightly as the projector heats up, shifting the focal point), or the projector not being perpendicular to the screen. The JVC, Sony, Epson, and BenQ models in this guide all use high-quality multi-element glass lens systems that minimize edge softness, but even premium lenses exhibit some degree of corner softness at the extreme edges of their zoom range. If you’re seeing edge softness on a premium projector, try zooming slightly inward from the lens’s maximum zoom extension — moving the projector a few inches further from the screen if needed — and verify that the projector is perfectly parallel to the screen surface using a level.
Future-Proofing Your Projector Purchase
A quality home theater projector is a purchase you’ll likely live with for 5 to 10 years — longer than most consumer electronics, and long enough that the content landscape and source device ecosystem will change meaningfully during your ownership. Buying with an eye toward the future doesn’t mean chasing every emerging technology; it means ensuring the projector you choose today has enough headroom to remain fully compatible with the devices and content formats you’ll be using two, three, and five years from now.
HDMI 2.1: The Single Most Important Future-Proofing Spec
If there’s one specification to prioritize for long-term compatibility, it’s full HDMI 2.1 support with 48 Gbps bandwidth. As gaming consoles, streaming devices, and media players increasingly adopt 4K/120Hz output as a standard capability, a projector limited to HDMI 2.0’s 18 Gbps ceiling will find itself unable to accept the highest-quality signal from those devices. This doesn’t matter much today for movie watching — no mainstream film content exceeds 4K/24Hz — but it matters enormously for gaming already, and as 120Hz content becomes more common in other contexts (sports broadcasts, high-frame-rate streaming experiments), having a projector that can accept the signal ensures you won’t need to upgrade just to stay compatible.
The JVC DLA-NZ7 and Epson LS11000 both include full 48Gbps HDMI 2.1 ports and are the most future-proof choices in this guide from a connectivity standpoint. The AWOL Vision LTV-2500 also includes HDMI 2.1 support. The Sony VPL-XW5000ES and BenQ HT4550i, with their HDMI 2.0/2.1 hybrid and HDMI 2.0b implementations respectively, are more limited in their future bandwidth headroom.
Solid-State Light Sources: Built-In Longevity
Laser and LED light sources don’t just outlast traditional lamps — they fundamentally change the projector’s aging profile. A lamp-based projector’s picture quality degrades from the first hour of use, with gradually declining brightness and shifting color temperature that eventually necessitates a $200 to $400 lamp replacement every few years. A laser or LED projector maintains consistent brightness and color throughout its rated 20,000+ hour lifespan, eliminating the recurring cost and gradual quality degradation entirely. All five projectors in this guide use solid-state light sources, which is one reason we chose them — a laser projector purchased today will look essentially the same in year eight as it does on day one, modulo any filter maintenance.
Resolution: How Much Is Enough?
The resolution question has a practical ceiling for most viewers. At normal viewing distances (1.5 to 2 times the screen width), the difference between 4K and 8K is imperceptible to the human eye on screen sizes under approximately 150 inches. JVC’s 8K e-shift on the DLA-NZ7 does add a subtle refinement to fine detail, but it’s an enhancement of native 4K content rather than a requirement for future 8K content — and given that 8K consumer content remains essentially nonexistent outside of a handful of YouTube demos and Japanese broadcast experiments, buying a projector based on 8K compatibility is premature. Native 4K is the resolution standard that will serve you well for the foreseeable future, and the pixel-shifted 4K implementations used by the Epson, BenQ, and AWOL are close enough in practice to remain satisfying for years to come.
Firmware Update Support: An Underappreciated Factor
A projector manufacturer’s track record of releasing firmware updates is a reasonable proxy for how long they’ll continue to support the product after launch. JVC and Epson both have strong reputations for issuing meaningful firmware updates for their projector lines — adding features, improving HDR processing, and fixing compatibility issues — over the multi-year lifespan of a product generation. Sony similarly provides firmware support through its standard product lifecycle. Smaller or newer manufacturers may provide less post-launch support, which can matter if a new source device or content format requires a compatibility fix that only a firmware update can provide.
What’s Coming Next: Trends to Watch
The projector technology trends most likely to affect your purchase over the next five years: continued migration from lamp to solid-state light sources (already well underway and reflected in this guide), increasing adoption of HDMI 2.1 as a standard feature across all price tiers, growing HDR format support (particularly Dolby Vision on projectors, which is currently rare), and the gradual emergence of 8K source content (still several years away from mainstream relevance). For most buyers, the best future-proofing strategy remains buying the highest-quality projector you can afford today — one with HDMI 2.1, a laser or LED light source, and excellent tone mapping — rather than waiting for the next technology generation, because the fundamental picture quality improvements between generations have been incremental rather than transformative.
Total Cost of Ownership — What a Home Theater Projector Really Costs Over Time
The purchase price of a projector is the most visible cost, but it’s rarely the only one. Between the screen, mounting hardware, cabling, potential calibration, electricity, and — for lamp-based models — replacement bulbs, the total cost of owning a home theater projector over a 5- to 10-year period can be meaningfully higher than the sticker price alone. Understanding these costs upfront lets you budget accurately and, in some cases, makes a more expensive projector with lower ongoing costs cheaper in the long run than a cheaper projector with higher maintenance requirements.
The Screen: Often the Second-Largest Investment
A quality projector screen sized for home theater use — 100 to 120 inches, fixed-frame or tensioned motorized — typically costs between $200 and $1,500 depending on size, material, and brand. A standard white 1.0-gain fixed-frame screen from a reputable manufacturer runs $250 to $500 for a 120-inch size. An ambient-light-rejecting screen for use with the BenQ or Epson in a room with some ambient light runs $500 to $1,200. A UST-specific ALR screen engineered for the AWOL Vision LTV-2500’s steep throw geometry starts around $600 and can exceed $2,000 for premium options with superior ambient rejection and wider viewing angles.
For the AWOL Vision specifically, the ALR screen isn’t optional — it’s part of the system. Pairing a UST projector with a standard screen wastes a significant portion of the projector’s capability, which means the real entry cost of the AWOL LTV-2500 as a system is the projector’s price plus $600 to $1,500 for an appropriate screen. This is worth factoring into your comparison with the long-throw models, which function adequately on less expensive screen surfaces.
Mounting Hardware and Cabling
A quality ceiling mount for a home theater projector costs $30 to $150 depending on weight capacity and adjustability. The JVC DLA-NZ7, being the heaviest projector in this guide at over 40 pounds, requires a mount rated for its weight class — generic lightweight mounts won’t provide the stability or adjustability needed. The Sony XW5000ES, being the lightest of the long-throw options, can use a more modest mount.
HDMI cabling is another variable cost that’s worth getting right. A certified Premium High Speed HDMI cable (sufficient for HDMI 2.0’s bandwidth requirements) costs $15 to $30 for a 15-foot run. For HDMI 2.1’s full 48 Gbps bandwidth over longer cable runs — which is what the JVC, Epson, and AWOL can take advantage of — a certified Ultra High Speed HDMI cable is necessary, and quality options for runs of 15 to 30 feet cost $30 to $80. Fiber-optic HDMI cables, which maintain signal integrity over runs exceeding 30 feet without signal degradation, cost $80 to $200 for the lengths typical in home theater installations. Avoid cheap, uncertified cables — HDMI signal integrity issues are one of the most common sources of intermittent picture dropouts and handshake failures, and they’re the hardest to diagnose because the cable looks physically fine.
Electricity Costs
Projector power consumption ranges from about 200 watts in eco mode to 400 watts or more at full brightness for the models in this guide. At the US national average electricity rate of roughly $0.16 per kilowatt-hour, running a projector for 4 hours per day at an average of 300 watts costs approximately $5.80 per month or $70 per year — a modest figure that’s unlikely to influence your purchase decision but worth being aware of for complete budgeting. Laser and LED projectors are generally more energy-efficient than lamp-based models producing comparable brightness, which is another incremental ownership cost advantage of solid-state light sources.
Lamp Replacement (Lamp-Based Projectors Only)
If you’re considering a lamp-based projector that’s not in this guide — or if you’re weighing a lamp-based model against one of the laser/LED options here — lamp replacement is the single largest ongoing ownership cost. Genuine OEM replacement lamps for mainstream home theater projectors cost $200 to $400 and need replacing every 3,000 to 5,000 hours (roughly every 2 to 4 years at typical viewing rates). Over a 10-year ownership period, you might replace the lamp two to three times at a total cost of $400 to $1,200 — which is often enough to close or eliminate the price gap between a lamp-based projector and a laser model that never needs a replacement. Our full laser vs. lamp cost comparison breaks down the exact breakeven point for different viewing habits.
Professional Calibration
As covered in the calibration section above, an ISF-certified professional calibration costs $300 to $600 and is a one-time expense that some dedicated theater enthusiasts choose to invest in. For most buyers, factory calibration and basic DIY adjustments are sufficient, making this an optional cost rather than a required one.
10-Year Cost Comparison: The Five Projectors in This Guide
| Cost Category | JVC NZ7 | Epson LS11000 | Sony XW5000ES | BenQ HT4550i | AWOL LTV-2500 |
|---|---|---|---|---|---|
| Light Source Replacement | $0 (laser) | $0 (laser) | $0 (laser) | $0 (LED) | $0 (laser) |
| Typical Screen Cost | $300–$600 | $300–$600 | $300–$600 | $400–$800 | $600–$1,500 |
| Mount / Hardware | $80–$150 | $50–$100 | $40–$80 | $40–$80 | $0 (console) |
| Electricity (10yr) | ~$650 | ~$700 | ~$580 | ~$620 | ~$650 |
| Filter Replacements | ~$60 | ~$60 | ~$60 | ~$60 | ~$60 |
When you include screen, mounting, and operating costs over a realistic ownership period, the total cost spread between the five projectors narrows somewhat from the raw projector price differences, particularly for the AWOL Vision LTV-2500 when its required ALR screen is included. The key takeaway is that all five of these solid-state projectors have remarkably similar ongoing ownership costs — the purchase price is the dominant expense, and there are no hidden cost traps waiting after the sale.
Frequently Asked Questions
Shop All Reviewed Projectors
Related Posts
Dive deeper into specific projector categories, brands, and troubleshooting topics: