Ultra Short Throw · Home Cinema
Hisense Laser TV Review: Is This 100-Inch Giant Worth Replacing Your Television?
A deep, room-tested look at Hisense’s laser TV: picture quality in daylight and at night, sound performance, gaming lag, setup realities, and whether it actually beats a traditional flat-panel or a standard home theater projector.

The phrase ”
What a Laser TV Actually Is (and Whylaser TV” sounds like marketing spin, and in a sense it is, but it also describes a genuinely different category of display technology than anything sitting in a typical living room. Rather than a wall of LEDs pushing light through liquid crystal, a laser TV is built around an ultra short throw projector engine that sits on a low console just inches from the wall and fires a picture upward onto a screen that can stretch anywhere from 90 to 120 inches diagonally. Hisense didn’t invent this format, but it has spent years refining it into something that behaves far more like a television in daily use than a traditional projector ever did.
The key distinction from a conventional projector is throw distance and light source. A standard home theater projector typically needs to sit six to fifteen feet from the screen, mounted on a ceiling or a shelf at the back of the room, and it usually relies on a lamp or an LED engine that struggles once ambient light enters the picture. Hisense’s laser engine sits directly beneath the screen, throws the image at a steep angle, and produces enough brightness that the picture holds up reasonably well with the blinds open, something lamp-based projectors have never been good at.
The “laser” part refers to the light source itself. Instead of a traditional lamp bulb that dims over a few thousand hours and eventually needs replacing, Hisense uses a laser phosphor light engine rated for tens of thousands of hours of use, often quoted at 25,000 or more. In practice that means the unit is designed to outlast the ownership window of most households, and the color output stays more consistent over time than lamp-based projection ever managed.
Where this gets interesting for buyers comparing options is that Hisense positions this product directly against large flat-panel televisions, not against traditional projectors. The pitch is simple: for the price of a premium 85-inch OLED or a high-end 98-inch LED panel, you can get a laser TV that projects a 100- or 120-inch image, with a form factor that takes up a fraction of the floor space a giant flat panel would require. Whether that trade-off makes sense depends heavily on your room, and that’s exactly what the rest of this review digs into.
How Laser Phosphor Light Engine Technology Actually Works
To understand what makes a laser TV fundamentally different from a lamp-based projector, it helps to peel back the chassis and look at how the light is actually generated. In a traditional home theater projector, a high-pressure mercury lamp creates an extremely bright white light that passes through a series of color filters, mirrors, or a spinning color wheel to produce the red, green, and blue components of the image. This approach works, but it’s inherently inefficient: a significant portion of the lamp’s energy is wasted as heat rather than usable light, the color filters absorb additional brightness, and the lamp itself physically degrades with each hour of operation, dimming noticeably by the time it reaches a few thousand hours of runtime.
A laser phosphor engine, which is what Hisense uses in its laser TV lineup, takes a fundamentally different approach. Instead of a broad-spectrum white lamp, the system uses a bank of blue laser diodes as its primary light source. Blue laser diodes stable wavelength. Some of that blue laser light is directed straight into the imaging system as the blue primary color, while the rest strikes a yellow phosphor wheel or plate, a specially formulated ceramic compound that absorbs the blue laser energy and re-emits it as broad-spectrum yellow light.
< light at a very specific, are efficient, long-lived, and producep>That yellow phosphor-generated light is then split into its red and green components through dichroic mirrors and color filters, and all three primary colors, red, green, and blue, are combined and directed onto the imaging chip. The imaging chip itself may be a DLP (Digital Light Processing) device using millions of microscopic mirrors or an LCoS (Liquid Crystal on Silicon) panel depending on the specific model, and it modulates the light on a pixel-by-pixel basis to form the picture you see on screen.Why Lasers Beat Lamps for Everyday Use
The practical advantages of this approach are substantial for long-term owners. The laser diodes themselves don’t have a filament or electrode that erodes, so they maintain their brightness and spectral purity far longer than any mercury lamp. Where a lamp-based projector might lose 30 to 50 percent of its initial brightness within the first 2,000 hours of use, a laser phosphor engine maintains a much flatter brightness curve over tens of thousands of hours. This means the picture you enjoy in year five of ownership looks much closer to what you saw on day one than it would with a lamp replacement cycle you might or might not have kept up with.
Color consistency follows the same advantage. As mercury lamps age, their spectral output shifts, often drifting toward green, which means the color balance of the picture changes over time unless the projector has sophisticated auto-calibration features. Laser diodes maintain a stable output wavelength, so the color accuracy you calibrate on day one stays relevant for far longer. For buyers who value a consistent, predictable picture year after year without recurring lamp purchases and recalibration sessions, the laser phosphor approach is a genuinely meaningful upgrade over traditional projection.
Heat management is another factor that matters in a living room setting. Laser phosphor engines are more electrically efficient than mercury lamps, converting a larger percentage of input power into visible light rather than waste heat. The cooling systems required are therefore somewhat smaller and quieter, which contributes to the lower fan noise levels that ultra short throw laser TVs generally achieve compared to traditional lamp projectors running at full brightness. This efficiency gain doesn’t eliminate heat entirely, the unit still requires active cooling and adequate ventilation clearance, but it does mean the thermal load on your media room is lower during a long movie marathon than it would be with a high-powered lamp projector running in the same space.
For a comprehensive side-by-side on how laser and lamp light sources compare across brightness, lifespan, total cost, and color performance across the broader projector market, this laser vs lamp projector comparison is a useful companion resource. And for readers curious about how the underlying projection chip technology works, whether DLP, 3LCD, or LCoS, this 3LCD vs DLP projector breakdown provides a clear technical explainer on the imaging approaches different manufacturers use.
Understanding ANSI Lumens: What Brightness Numbers Really Mean
Every projector and laser TV ships with a brightness specification measured in lumens, and for most buyers this number is one of the first things they compare between models, but what the number actually represents and how it translates into real-world viewing is less straightforward than the spec sheet implies. The industry standard for measuring projector brightness is the ANSI lumen, a standardized test established by the American National Standards Institute that measures light output at nine specific points across the projected image in a controlled environment. This standardized method is supposed to allow apples-to-apples comparisons between projectors, but in practice the numbers on a spec sheet don’t always tell the whole story.
The first thing to understand is that a higher ANSI lumen rating doesn’t automatically mean a better-looking picture. Brightness is one ingredient in image quality, alongside color accuracy, contrast ratio, black level, and resolution. A projector that pushes a very high lumen count but achieves it by sacrificing color saturation or contrast will look worse in a dark room than a lower-lumen unit with better-balanced output. For laser TVs specifically, which are designed to operate in rooms with some ambient light, having sufficient brightness is more important than it is for a dedicated dark-room theater projector, but chasing the highest number on the spec sheet isn’t the right approach.
What the Number Means in Your Room
In practical terms, a laser TV rated at around 2,700 to 3,000 ANSI lumens will produce a satisfying, watchable image on a 100-inch screen in a room with moderate ambient light, such as a living room with sheer curtains during the day or a few lamps on in the evening. Pushing past 3,000 ANSI lumens provides a meaningful margin for brighter environments, but it also generally increases fan noise and power consumption. For most households, the brightness level of a current-generation Hisense laser TV lands in a sweet spot that balances daytime watchability with reasonable noise and energy characteristics.
It’s also worth noting that some manufacturers quote brightness figures using less rigorous measurement methods than the ANSI standard, which can inflate the numbers on paper without delivering proportionally more light in practice. When comparing models across brands, ANSI lumens measured under standardized conditions are the most reliable figure to use. If a specification simply says “lumens” without the ANSI qualifier, or uses a proprietary measurement method, it’s worth treating the number with some skepticism. For a deeper explanation of how ANSI lumens are measured and what the figures mean across different projector categories, this ANSI lumens explainer covers the technical details in an accessible way.
Brightness and Screen Size: The Inverse Relationship
One relationship that catches some buyers off guard is the inverse connection between screen size and perceived brightness. The same projector engine producing the same number of lumens will look noticeably dimmer on a 120-inch screen than on a 90-inch screen, because the same amount of light is spread over a much larger area. This is worth understanding when choosing your screen size: if your room is very bright and you’re already on the edge of acceptable daytime performance, stepping down from a 120-inch to a 100-inch screen will make a more visible difference to perceived brightness than any firmware update or settings tweak. Conversely, if your room is well-controlled and you primarily watch in the evening, the larger screen size delivers a more dramatic experience without the brightness penalty being as noticeable.
For buyers specifically shopping for projectors that perform best in bright rooms, this curated best projectors for bright rooms guide compares models across the market on exactly this metric, and can help contextualize where the Hisense laser TV sits relative to other high-brightness options.

Check current pricing, available screen sizes, and customer Q&A directly on Amazon before you decide.
View Hisense Laser TV on AmazonQuick Verdict: Who This Laser TV Is Really For
Before wading through every technical detail, it’s worth being direct about the takeaway, because a laser TV is a genuinely different purchase decision than a normal television, and the review process should reflect that up front. In a dedicated media room, a den with controllable lighting, or a basement theater space, this Hisense laser TV is one of the most satisfying big-screen experiences available for the money, and it comfortably outperforms mid-range flat panels on sheer scale and cinematic presence.
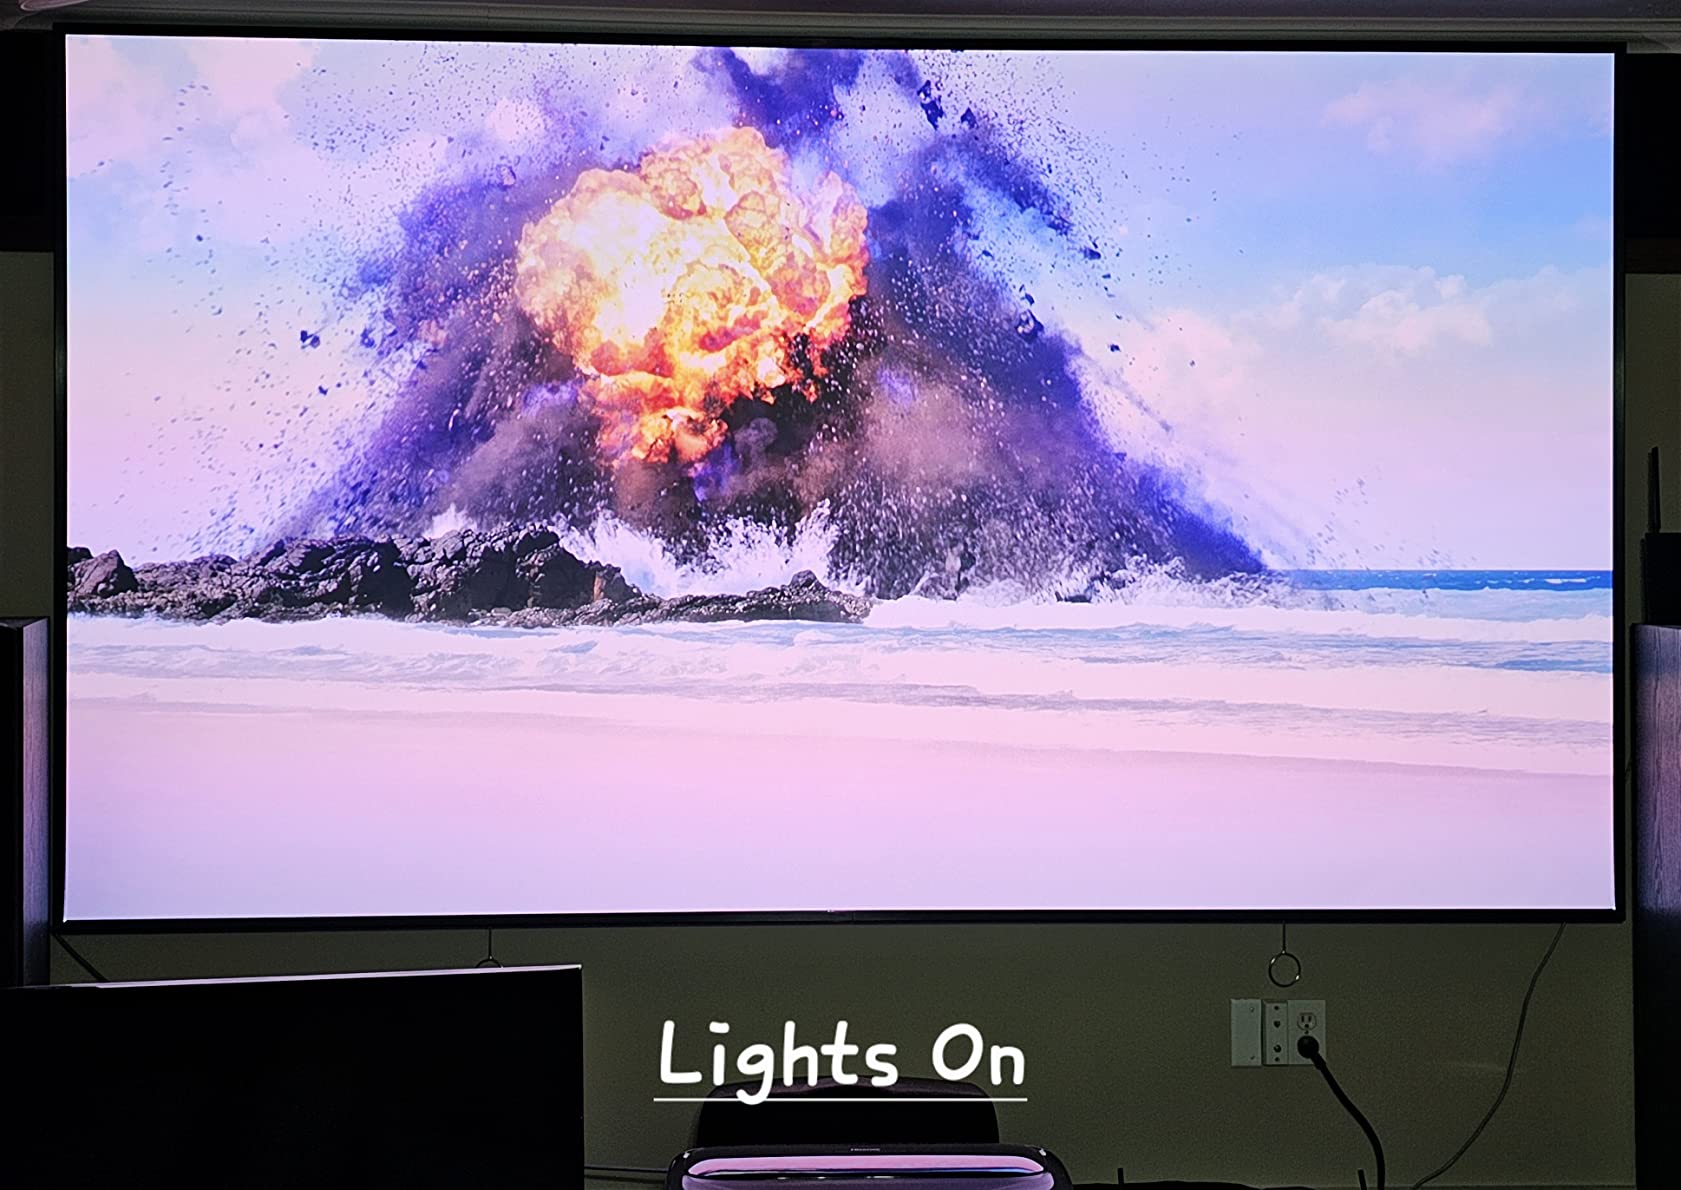
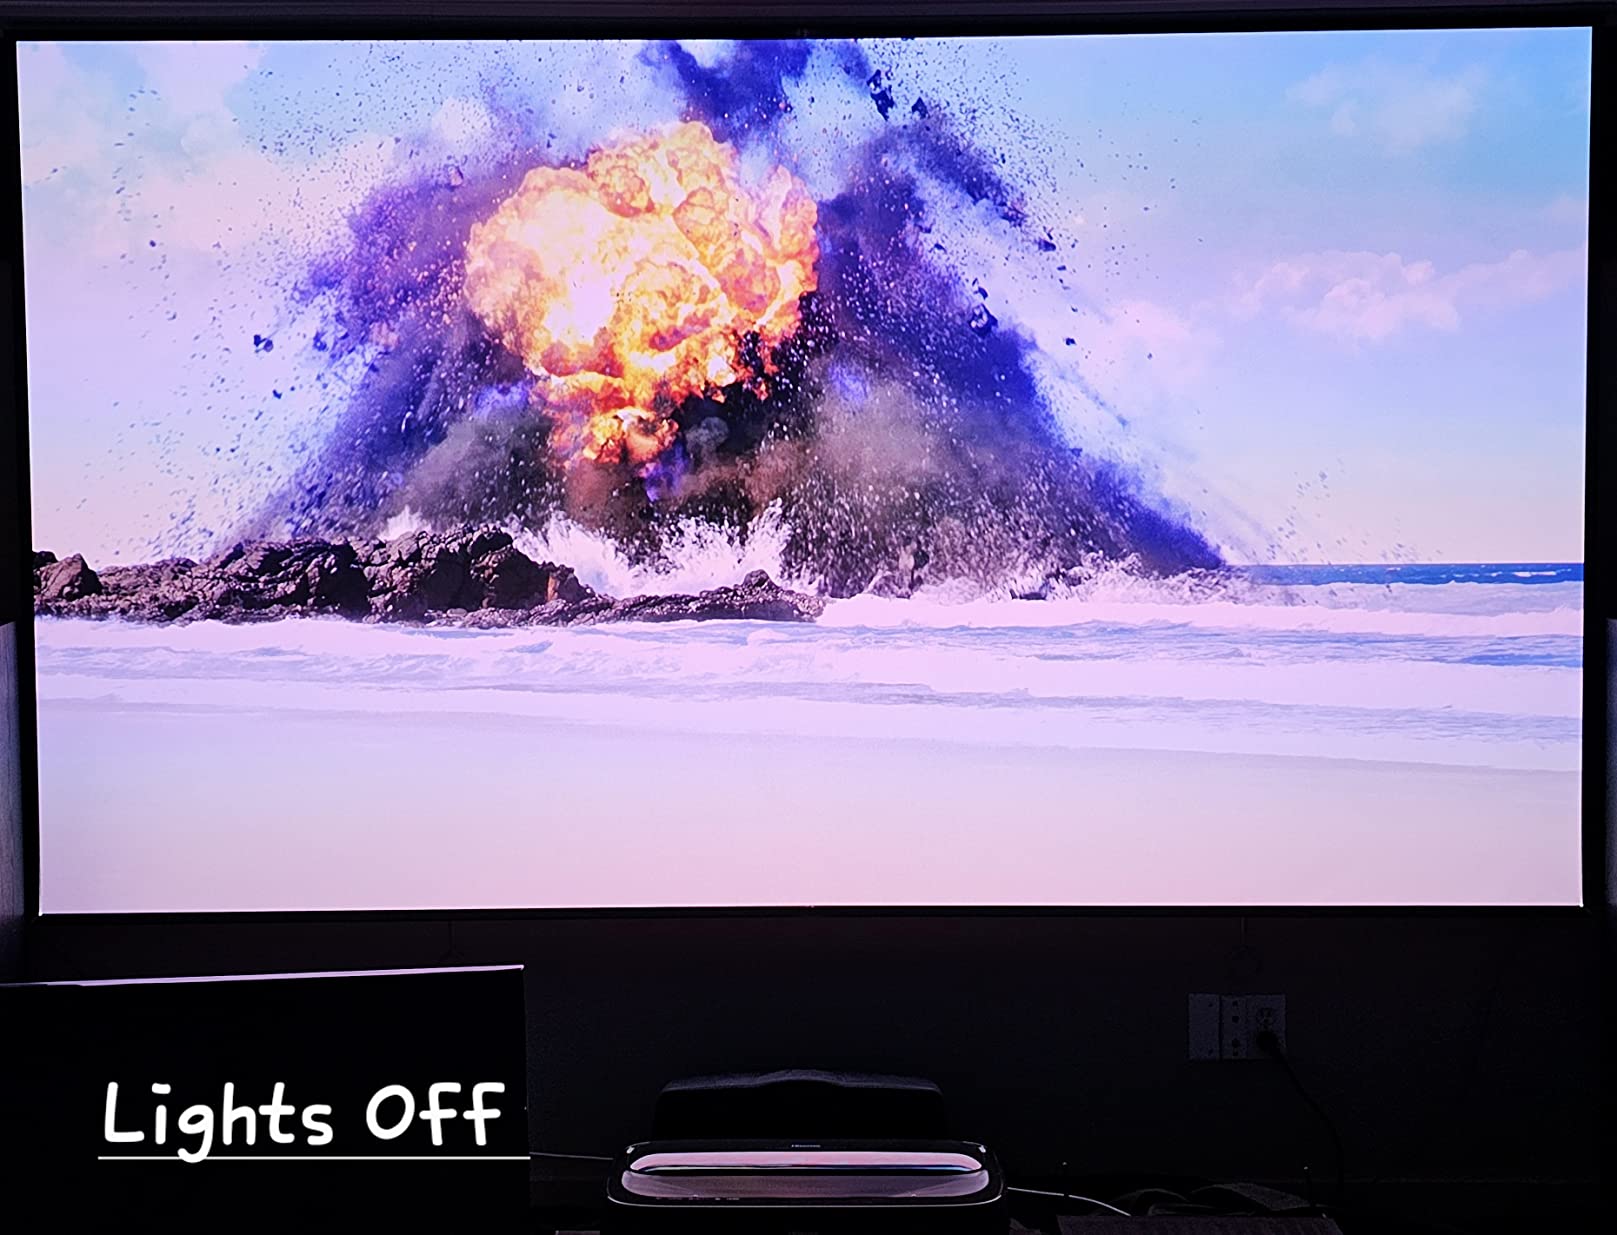
In a bright, south-facing living room with large uncovered windows, the picture holds up better than most people expect thanks to the laser brightness and, if paired with an ambient light rejecting screen, but it will still not match the punch of a good LED or OLED television in a sunlit room during the day. Buyers moving from a modest 55-inch flat panel to this laser TV consistently describe the jump as transformative, especially for movie nights, sports viewing with friends, and console gaming on a genuinely massive canvas.
The rest of this review breaks down exactly why, section by section, so you can decide whether your specific room and viewing habits line up with what this laser TV does best.
Design and Build Quality
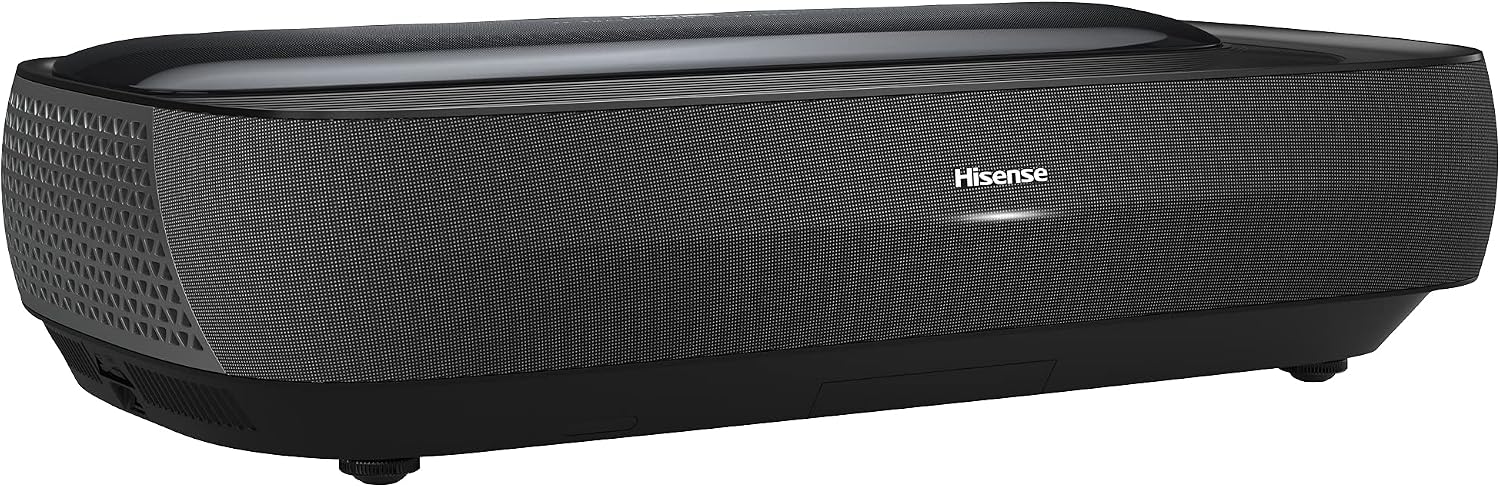
Hisense’s laser TV engine is a low, wide unit finished mostly in matte gray and black plastics with a metal grille on the front concealing the built-in speaker array. It’s meant to sit on a media console or a dedicated stand directly beneath the screen, and its footprint is closer to a soundbar-and-receiver combo than to anything resembling a projector. The top surface houses the lens assembly, which is angled to throw the image sharply upward, and a set of intake and exhaust vents that keep the laser engine cool during extended sessions.
Fit and Finish
Build quality feels solid rather than premium. The chassis doesn’t flex or creak, the control buttons on top are firm, and the overall impression is of a product designed for a stationary life on a console rather than something meant to be handled often. Ventilation noise is present but not intrusive; most owners report it fades into the background once dialogue or music starts playing, comparable to a quiet desktop PC fan under load.
The lens itself sits behind a small motorized or manually opened cover on most models, which slides away automatically on power-up and closes when the unit shuts down, protecting the optics from dust accumulation between viewing sessions. This small detail matters more than it might seem, since a scratched or dusty lens on an ultra short throw system is far more noticeable in the final image than it would be on a standard long-throw projector, simply because of how close and steep the projection angle is. Focus and geometry adjustments, where available, are accessed through a side or top panel and are typically a one-time setup task rather than something you’ll revisit often once the unit is correctly positioned.
Overall footprint is modest for what it delivers, generally comparable in size to a soundbar-and-console combo rather than anything resembling a traditional projector housing, and the matte finish resists fingerprints and dust better than a glossy alternative would across years of living room use.


Remote and Controls
The included remote is a fairly standard smart TV clicker with dedicated streaming app buttons, a directional pad, and voice assistant integration depending on the platform version installed. It pairs easily and, refreshingly, doesn’t require line-of-sight to a specific sensor location since the receiver sits low and forward-facing on the console.
Port Selection
Around the back you’ll typically find multiple HDMI inputs (with at least one supporting the higher bandwidth needed for 4K at higher refresh rates), USB ports for media playback or peripherals, an optical audio output, and an Ethernet jack for a more stable network connection than Wi-Fi alone provides. This is enough for a typical setup involving a streaming stick, a game console, and a soundbar or AV receiver, though enthusiasts running multiple 4K sources with high refresh rate gaming may want to plan their cable routing carefully given the low, forward position of the unit.
Picture Quality Deep Dive
Picture quality is where a laser TV lives or dies as a product category, and it’s also the area where Hisense has invested the most engineering effort. The laser phosphor light source pushes considerably more brightness than older LED or lamp-based projectors, which directly translates into richer color saturation and a picture that doesn’t wash out the moment a lamp turns on in the room.
Brightness and HDR Handling
In a fully darkened room, the image is vivid, punchy, and remarkably close to what a good LED television produces, with strong shadow detail and none of the grayish “washed black” look that plagued early ultra short throw projectors. HDR content benefits from the higher brightness ceiling, with highlights on bright content like sunlit landscapes or explosions carrying real impact rather than the flat, compressed look lower-brightness projectors tend to produce. It won’t match the absolute peak brightness of a high-end OLED television measured in isolated highlight windows, but in motion and across full scenes, most viewers won’t notice the gap.
Color Accuracy and Gamut
The laser light source enables a wider color gamut than lamp projection typically achieves, and out of the box the picture leans slightly warm and saturated, which most casual viewers find appealing for sports and streaming content. Calibration-minded users can dig into the picture settings menu to pull things closer to reference standards, and the panel responds well to adjustment without introducing banding or posterization in gradients like skies or skin tones.
Black Levels and Contrast
This is the one area where any projection technology, laser included, still trails behind a good LED or OLED flat panel, because projected light is inherently additive rather than emissive: black areas of the image are really just “no light,” reflected off whatever screen surface you’re using, and the surrounding room’s ambient light level determines how deep that black actually looks. Paired with a proper ambient light rejecting screen and a darkened room, black levels are genuinely impressive for projection. Paired with a basic white screen in a bright room, blacks lift toward gray, which is worth understanding before purchase rather than after.
For buyers specifically interested in the projectors with the deepest, most film-like blacks available today, this highest contrast ratio projectors roundup compares models that push the boundaries of projected black level performance, and provides useful context for understanding where the Hisense laser TV sits on the contrast spectrum.
| Picture Attribute | Dark Room Performance | Bright Room Performance |
|---|---|---|
| Peak Brightness | Excellent | Good with ALR screen |
| Black Level Depth | Very Good | Noticeably Reduced |
| Color Saturation | Excellent | Good |
| HDR Highlight Detail | Very Good | Moderate |
| Overall Sharpness | Excellent | Very Good |
For a broader technical breakdown of how laser and lamp light sources compare across brightness, lifespan, and color performance, this laser vs lamp projector comparison is a useful companion read.
Motion Handling and Upscaling
Fast motion, whether it’s a football game or a car chase, is a traditional weak point for projection technology, and it’s worth calling out specifically because it directly affects how satisfying sports and action content feels on a screen this large. The laser TV’s processing includes motion smoothing options that can be dialed up or down depending on preference; left at moderate settings, panning shots and fast camera movement stay clean without introducing the exaggerated “soap opera” look that aggressive interpolation can create on some televisions. Sports fans in particular will appreciate that fast-moving objects like a ball or a puck stay legible rather than blurring into a smear, something earlier generations of ultra short throw projectors struggled with noticeably more.
Upscaling of lower-resolution content, such as older cable broadcasts or standard-definition footage, is handled competently by the onboard processor, smoothing out jagged edges without introducing excessive softness. Native 4K sources, unsurprisingly, look the best the system is capable of, with fine textures like fabric, foliage, and skin detail rendering with genuine clarity at typical seating distances for a screen this size.
Resolution Deep Dive: Native 4K, Pixel Shifting, and What Hits Your Eyes
Resolution is one of the most heavily marketed specifications in any display purchase, and laser TVs are no exception, but the way resolution is achieved in projection is fundamentally different from how it works in a flat-panel television, and understanding that difference helps set realistic expectations for sharpness and detail. When a flat-panel TV claims 4K resolution, it means the panel physically contains 3,840 by 2,160 individual pixels that are each independently lit and colored. Each pixel exists as a discrete, permanent element of the display, and the image is formed directly by those pixels with no intermediary step.
In most laser TV and ultra short throw projector implementations, the path to 4K resolution is more nuanced. Many models, including configurations within the Hisense laser TV lineup, use a technique called pixel shifting or e-shift. The underlying imaging chip may physically have a native resolution of 2,716 by 1,528 (commonly called “wobulated” 4K or “pixel-shifted” 4K), and the chip rapidly shifts each pixel by a fraction of a pixel width between frames, effectively quadrupling the addressable resolution points on screen. The result is an image that resolves significantly more detail than native 1080p and, at normal viewing distances on a screen this size, looks functionally equivalent to native 4K to the vast majority of viewers.
Does Pixel Shifting Matter in Practice?
The honest answer for most living room and theater room setups is that pixel-shifting 4K is extremely difficult to distinguish from native 4K at the seating distances people actually use for screens in the 100-to-120-inch range. Sitting close enough to see individual pixel structure on a 100-inch screen means sitting roughly five to six feet away, which is uncomfortably close for most viewers and significantly closer than the eight-to-fourteen-foot range typical for rooms equipped with screens of this size. At those normal seating distances, the pixel-shifted image resolves fine text, hair strands, fabric weave, and foliage detail with a clarity that native 1080p simply cannot match.
For buyers who prioritize native 4K resolution as a firm requirement, perhaps for close-distance desktop projection or very large screen sizes beyond 120 inches where pixel structure might become more visible, some competing models across the market do offer true native 4K imaging chips. This native 1080p projector guide explains the resolution landscape at the 1080p tier, and reading it alongside the broader 4K laser projector roundup gives a useful frame of reference for how resolution specifications vary across the market and what each tier delivers in practice.
4K Upscaling for Non-Native Content
The reality of everyday viewing is that not all content is native 4K. Cable television still broadcasts mostly at 1080i or 720p, many streaming apps default to 1080p unless bandwidth conditions are ideal, and older content may be available only in standard definition. The Hisense laser TV’s onboard processor handles upscaling of lower-resolution content to fill the 4K panel, analyzing edge detail, texture patterns, and motion vectors to reconstruct a sharper image. The results are generally good: 1080p Blu-ray and high-quality streaming content upscales cleanly to the point where it’s difficult to distinguish from native 4K at typical distances, while lower-quality cable and standard-definition content shows more visible softness but remains perfectly watchable without distracting artifacts.
HDR Format Support: Dolby Vision, HDR10, and HDR10+ Explained
High Dynamic Range, or HDR, is one of the most significant picture quality improvements of the past decade, and understanding which HDR formats a laser TV supports matters because it directly affects how much of the HDR mastering information from your content actually reaches the screen. HDR content is mastered with a wider range between the darkest shadows and the brightest highlights than standard dynamic range content, and an HDR-capable display needs to both support the metadata format the content uses and have enough brightness headroom to reproduce those expanded highlights convincingly.
HDR10: The Baseline
HDR10 is the most widely supported HDR format and the one that essentially every HDR-capable display, including the Hisense laser TV, supports. It uses static metadata, meaning the brightness and color information is set once for the entire piece of content and remains constant from beginning to end. This works well for most content, but it means the display applies the same tone-mapping curve to a bright outdoor scene and a dark interior scene within the same movie, which can result in some compromises in scenes that differ significantly from the overall average brightness the metadata was set for.
Dolby Vision and HDR10+: Dynamic Metadata Formats
Dolby Vision and HDR10+ both address the static metadata limitation by using dynamic metadata that adjusts the tone-mapping curve on a scene-by-scene or even frame-by-frame basis. This allows the display to optimize its brightness and color reproduction for each individual scene, pulling out more highlight detail in bright moments while preserving shadow detail in dark moments. Whether a specific Hisense laser TV model supports Dolby Vision, HDR10+, or both depends on the model generation and regional software configuration, so it’s worth confirming support for the specific formats your preferred streaming services and disc player use before purchasing.
In practice, the difference between static HDR10 and dynamic metadata formats like Dolby Vision is most visible in content with a wide range of brightness levels, such as movies that alternate between sunlit exteriors and candlelit interiors. On a display with sufficient brightness headroom like a laser TV, Dolby Vision content often shows noticeably better shadow detail in dark scenes without blowing out highlights in bright scenes, though the degree of improvement varies by content and is subtler than the jump from standard dynamic range to any HDR format in the first place.
HLG and Broadcast HDR
HLG, or Hybrid Log-Gamma, is an HDR format developed primarily for live broadcast content, particularly sports. It’s backward-compatible with standard dynamic range displays, meaning the same broadcast signal looks acceptable on non-HDR TVs while showing enhanced dynamic range on HDR-capable sets. For buyers who watch a lot of live sports, HLG support is a useful feature, and its presence on the Hisense laser TV means live broadcast HDR content from compatible services will display with the expanded brightness range it was captured in.
Color Science: From Rec.709 to DCI-P3 and the Laser Advantage
Color performance in a display is defined not just by how saturated the most vivid colors look, but by how accurately the display reproduces the specific color values the content was mastered in. This accuracy is measured against standardized color spaces, which are essentially maps defining the range of colors a display should be able to reproduce, and the laser light source in the Hisense laser TV gives it a meaningful advantage in color volume and saturation over lamp-based projectors.
Understanding Color Space Standards
Rec.709 is the color space standard used for high-definition television content, and it defines a relatively modest range of colors that any decent modern display can cover completely. DCI-P3 is the wider color space used for digital cinema mastering and increasingly for premium streaming and disc content mastered in 4K HDR. It extends significantly beyond Rec.709, particularly in the red and green regions of the spectrum, and a display that can reproduce a high percentage of the DCI-P3 gamut will show noticeably richer, more nuanced color in content mastered to that standard.
Rec.2020 is the widest commonly referenced color space and represents the theoretical target for future ultra-high-definition content, though no current consumer display technology can fully reproduce the entire Rec.2020 gamut. The laser phosphor light source in the Hisense laser TV covers a high percentage of DCI-P3 and extends meaningfully into the Rec.2020 space, particularly in the green and red regions where the laser’s spectral purity provides a natural advantage over broader-spectrum lamp sources. This means HDR content mastered in DCI-P3 displays with the full richness the colorist intended, and the wider gamut coverage contributes to the overall impression that the picture looks more vivid and lifelike than what most lamp-based projectors at a similar price point can produce.
Color Volume: Why It Matters at 100 Inches
Color volume refers to a display’s ability to maintain color saturation not just at a single brightness level, but across the full range of brightness from the darkest shadows to the brightest highlights. This is where the laser’s brightness advantage interacts directly with its color advantage: at the high brightness levels needed to fill a 100-plus inch screen, the laser maintains strong color saturation where a dimmer lamp-based projector would begin to desaturate colors as it pushes toward its brightness ceiling. The practical effect is that bright reds, greens, and blues in HDR content look genuinely vivid rather than washed out, even at the high brightness levels needed to produce a watchable image in a room with ambient light.
Eye Health and Viewing Comfort: Projected Light vs Emissive Displays
One aspect of laser TV ownership that rarely appears in specification sheets but matters for long-term viewing comfort is how the eye interacts with projected light versus the direct-emitted light from a flat-panel television. This distinction has practical implications for marathon movie sessions, all-day sports events, and households where children spend extended periods watching content on the big screen.
Reflected Light vs Direct Emission
A flat-panel television, whether LED, OLED, or QLED, produces light that travels directly from the panel surface into the viewer’s eyes. This is direct-emission light, and at the brightness levels modern televisions operate at, particularly in HDR mode, it can contribute to eye fatigue during extended viewing sessions, especially in an otherwise dark room where the pupils are dilated and the bright panel creates a strong contrast against the dark surroundings.
A laser TV, by contrast, projects its image onto a screen surface that reflects light toward the viewer, much the way a movie screen in a cinema works. This reflected-light approach means the light reaching the viewer’s eyes has already been diffused by the screen surface, resulting in a softer, more evenly distributed light field than the concentrated point-source emission of a panel display. Many owners report noticeably less eye strain during long viewing sessions compared to watching a comparably sized flat panel, and this difference becomes more pronounced as screen size increases, since the light intensity per unit area on a properly sized projection screen is typically lower than the peak brightness of a direct-view television panel.
Blue Light Considerations
Blue light exposure is a topic that comes up frequently in discussions about screen time and eye health. While the laser light engine does use blue laser diodes as its primary light source, the blue light that ultimately reaches the viewer’s eyes after passing through the phosphor conversion, color splitting, imaging chip, and screen reflection is comparable in spectral composition to the blue light output of a standard LED-backlit television. The screen reflection step further diffuses the light, meaning the peak blue light intensity reaching the eye is generally lower per unit area than it would be from a direct-view panel of comparable brightness. For viewers who are particularly sensitive to blue light or who do significant evening viewing before sleep, the reflected-light approach of a laser TV is generally considered a gentler viewing experience, though individual sensitivity varies.
Viewing Distance and Comfort
The larger screen sizes enabled by a laser TV also naturally encourage greater viewing distances than a smaller flat panel, which some optometrists consider beneficial for long-term visual comfort. A 100-inch screen viewed from ten to twelve feet fills the field of view comfortably without requiring the close-focus effort that sitting three to four feet from a monitor demands. For households where the laser TV replaces a smaller screen that family members were sitting close to, the shift to a larger image at a greater distance is a subtle but meaningful improvement in everyday viewing ergonomics.
The Screen Question and Ambient Light Performance
One detail that surprises first-time laser TV buyers is how much the screen itself determines the final picture quality. Unlike a flat panel television, where the display and the light source are one sealed unit, a laser TV is really two separate purchases functioning as one system: the projection engine and the screen surface it projects onto.
Ambient Light Rejecting (ALR) Screens
An ALR screen uses a specially engineered surface, often with a fine ridged or fresnel structure, that reflects light coming from the steep upward angle of an ultra short throw projector directly back toward the viewer while absorbing or redirecting light coming from other angles, such as windows or ceiling fixtures. This is the single biggest lever for improving daytime and bright-room performance, and most serious laser TV setups pair the Hisense engine with a dedicated ALR screen rather than a plain painted wall or a generic projector screen.
Using a Painted Wall or Standard Screen
It’s technically possible to project directly onto a flat, light-colored wall, and some buyers do this initially to save money. The results are watchable in a dark room but noticeably softer and less vibrant than what the engine is capable of, since a standard wall surface scatters light in every direction rather than concentrating it back toward the seating area. For anyone planning to use the laser TV as a genuine television replacement watched during the day, budgeting for an ALR screen is close to essential rather than optional.
Readers weighing screen options in more depth may find this dedicated guide to ALR screens for ultra short throw projectors helpful for choosing sizing, gain, and mounting hardware.
Room Lighting Strategy
Even with an ALR screen, direct sunlight hitting the screen surface head-on will wash out the image more than side or overhead ambient light. Rooms with sheer curtains, blackout blinds, or windows positioned to the side rather than directly facing the screen will get noticeably better daytime results than rooms with unobstructed south- or west-facing glass. This is genuinely the single biggest factor in whether a laser TV purchase feels like a triumphant living room upgrade or a source of daytime frustration, and it’s worth an honest assessment of your room before buying.
Screen Types and Materials: Fixed Frame, Motorized, ALR, and Fresnel Explained
Choosing the right screen for a laser TV is arguably as important as choosing the projector engine itself, and the range of screen types available can be confusing for first-time buyers. The screen surface you project onto determines not just the size of the image but its brightness uniformity, contrast performance, viewing angle, and how well the picture holds up under ambient light. Understanding the main categories of screen technology helps you match the screen to your specific room conditions and viewing priorities.
Fixed-Frame Screens
A fixed-frame screen is a rigid frame, usually aluminum, that holds the screen material taut and flat against the wall at all times. These screens produce the flattest, most uniform image surface of any screen type, since the tensioning system eliminates any possibility of waves, ripples, or curling that can plague other screen formats. For ultra short throw projection in particular, where the steep throw angle makes any surface irregularity more visible than it would be with a long-throw projector, a fixed-frame screen is the gold standard for image quality. The trade-off is that a fixed-frame screen occupies wall space permanently and can’t be retracted when not in use, which makes it best suited for dedicated media rooms or spaces where the screen is a permanent design element rather than something you want to disappear when guests visit.
Motorized and Pull-Down Screens
Motorized screens roll up into a ceiling-mounted housing at the press of a button, making them a practical choice for multi-purpose rooms where the screen needs to disappear when the room serves other functions. Pull-down manual screens achieve the same concealment at a lower price point but require physical effort to deploy and retract. The main concern with motorized or pull-down screens for ultra short throw use is surface flatness: over time, the screen material can develop slight waves or a “memory curl” from being stored in a rolled position, and these imperfections are more visible with UST projection than with traditional long-throw setups. Higher-quality motorized screens use tensioned tab systems or weighted bottom bars to minimize this issue, but buyers should expect to pay more for a motorized screen that maintains the flatness a UST laser TV demands.
Fresnel ALR Screens
Fresnel screens represent the most advanced ambient light rejection technology available for ultra short throw projectors. The screen surface contains a series of concentric micro-ridges, similar in principle to a lighthouse lens, that are precisely angled to catch the steep upward light path from the UST projector and redirect it forward toward the viewer while rejecting light arriving from other angles. The result is dramatically improved contrast and perceived brightness in rooms with ambient light, often approaching the visual punch of a flat-panel television in daytime conditions. The trade-offs are narrower optimal viewing angles compared to a simple matte white screen, meaning viewers seated far off to the side see a somewhat dimmer image, and a higher price point that can represent a significant percentage of the total system cost. For detailed specifications and comparisons across Fresnel and other ALR screen types, the ALR screen for UST projector guide covers the nuances that matter most for matching a screen to your room.
White, Gray, and Specialty Screen Surfaces
Standard white screen surfaces (often rated at 1.0 to 1.3 gain) provide the widest viewing angles and most natural color reproduction but offer no ambient light rejection and can make blacks look washed out in any room lighting beyond total darkness. Gray screen surfaces improve perceived black levels by absorbing some ambient light and reducing overall screen reflectivity, which can help in moderately lit rooms, but they also reduce overall brightness, which is a significant consideration for a laser TV that needs to fill a large screen area. Specialty screen materials designed specifically for ultra short throw projection, including the Fresnel and lenticular ALR types discussed above, represent the best current solution for buyers who want to use their laser TV as a genuine daytime television replacement.
Screen Size vs Viewing Distance: Finding the Right Match for Your Room
One of the most common questions from buyers considering a laser TV is how far they should sit from the screen and how to choose the right screen size for their specific room dimensions. Unlike a flat-panel television, where the screen size is fixed by the panel you buy, a laser TV offers some flexibility in screen size, and the viewing distance relationship is slightly different because of the immersive, cinema-like nature of a projected image this large.
The General Guidelines
The Society of Motion Picture and Television Engineers (SMPTE) recommends a viewing angle of approximately 30 degrees for a comfortable, immersive cinema experience, which for a 100-inch screen translates to a viewing distance of roughly 10 to 12 feet. For a more immersive, front-row experience with a wider field of view, sitting at 1.2 to 1.5 times the screen diagonal, roughly 10 to 12.5 feet for a 100-inch screen, fills peripheral vision and creates a genuinely enveloping picture. For a more relaxed, casual viewing arrangement, 1.5 to 2.0 times the diagonal, roughly 12.5 to 17 feet for a 100-inch screen, provides a comfortable picture that doesn’t demand constant eye movement across the frame.
Matching Throw Distance to Screen Size
The throw distance, the space between the laser TV engine and the screen, is dictated by the optics and determines what screen size you get at a given placement distance. Unlike a traditional projector with a zoom lens that allows some flexibility, the ultra short throw optics in a laser TV have a fixed throw ratio, meaning the engine must be placed at a very specific distance from the screen to produce the desired image size. This distance is typically specified in the product manual and is usually in the range of a few inches to about two feet from the screen surface, depending on the target size. Before purchasing, measure the depth of your media console or intended placement surface and compare it against the manufacturer’s throw distance chart for your target screen size. This single step, as simple as it sounds, prevents the single most common setup frustration reported by first-time laser TV owners. For a precise way to calculate these distances for any projector or laser TV, this throw distance calculator guide walks through the math and provides practical examples.
Room Layout Considerations
Beyond the pure distance math, consider the physical layout of your room. The screen needs to be centered on or near the primary seating position, with enough side clearance that the image doesn’t wrap around a corner or collide with a door frame. Ceiling height matters too: the bottom edge of a 100-inch screen mounted at an ergonomically comfortable height for seated viewing, typically with the center of the screen at or slightly below eye level, will sit roughly 24 to 30 inches above the floor. Make sure the laser TV engine on its console below the screen has adequate ventilation clearance above and behind it, and that no furniture, shelving, or decor obstructs the light path between the engine and the screen surface.
Screen Gain: What the Number Means and Why You Should Care
Screen gain is a specification that appears on every screen product listing but is frequently misunderstood or ignored by buyers, and for a laser TV system it has real implications for brightness, viewing angle, and how the picture looks from different seating positions in the room. In simple terms, screen gain is a measurement of how much light the screen surface reflects back toward the viewer compared to a reference standard matte white surface, which is assigned a gain of 1.0.
High Gain vs Low Gain
A screen with a gain of 1.3, for example, reflects 30 percent more light back toward the viewer along the central viewing axis than a 1.0 gain reference surface, making the image appear brighter from directly in front of the screen. This brightness boost comes with a trade-off: high-gain screens achieve their reflectivity by concentrating the reflected light into a narrower cone, which means viewers seated far off to the side see a dimmer, sometimes color-shifted image compared to those seated in the center. For a laser TV positioned in a room where all the primary seating is roughly centered in front of the screen, a moderate gain of 1.1 to 1.3 can provide a useful brightness boost without meaningful viewing angle sacrifice.
Ultra Short Throw Specific Considerations
For ultra short throw projection specifically, screen gain interacts with the steep angle of the incoming light in ways that matter more than they do for traditional long-throw setups. A high-gain screen designed for long-throw projection may not perform as expected when light hits it from the nearly horizontal angle of a UST projector, potentially creating hot spots or uneven brightness. Screens specifically designed and marketed for UST use are engineered with the incoming light angle factored into their reflectivity pattern, ensuring that the brightness gain is directed toward viewers seated at normal room positions rather than toward the ceiling where a UST projector’s light would otherwise concentrate it.
The general recommendation for Hisense laser TV owners is to choose a screen with a gain between 0.8 and 1.3, with the lower end of that range favoring wider viewing angles and the higher end favoring maximum brightness for rooms with ambient light. ALR screens designed for UST projection typically fall within this range and add the ambient light rejection benefit on top of their gain specification. Understanding what the gain number means helps you read screen spec sheets with more confidence and choose a surface that complements your specific room and seating layout rather than simply picking the highest number available.

See real customer photos of room setups, screen pairings, and current bundle pricing on Amazon.
Check Hisense Laser TV PricingSound Quality: Built-In Speakers vs Going External
Because the laser engine sits low on a console rather than being mounted on a ceiling, Hisense has room to build genuinely capable speaker systems directly into the chassis, and most models in this line ship with a multi-driver array developed in partnership with a known audio brand, often including forward-firing and up-firing drivers to approximate a wider soundstage.
Out-of-the-Box Performance
Straight out of the box, the built-in sound system is a significant step up from what most flat-panel televisions offer, since ultra-thin TV chassis leave almost no room for meaningful speaker drivers or cabinet volume. Dialogue is clear and centered, midrange is full-bodied, and at moderate to high volumes the system fills a mid-size living room without obvious distortion. Bass extension is respectable for a built-in system but, as with virtually every all-in-one speaker solution, it won’t rattle furniture or deliver true low-end impact during action scenes.
When to Add an External System
For casual viewing, sports, and everyday streaming, many owners are content leaving the built-in speakers as their only audio solution. For dedicated movie nights or anyone who already has a receiver and speaker setup, connecting the laser TV through the optical output or HDMI ARC/eARC connection unlocks a noticeably more immersive experience, and the projector engine is happy to act purely as the image source while a proper sound system handles audio duties. Owners building a full home theater around this unit often pair it with a soundbar or a modest 5.1 setup, and the jump in bass weight and surround imaging is substantial.
Those exploring how this compares to dedicated home theater setups may also want to review this best home theater projectors roundup for context on how built-in audio stacks up against separate projector-and-receiver builds.
Format Support and Connectivity
The built-in system supports common surround formats passed through streaming apps and connected sources, and the presence of HDMI ARC or eARC on higher-end configurations means a modern soundbar or AV receiver can be added later with a single cable rather than a tangle of optical and auxiliary connections. Bluetooth audio output is also commonly supported, which is a convenient option for late-night viewing with wireless headphones without disturbing anyone else in the house, an underrated feature for households with different sleep schedules or shared living spaces.
Audio Deep Dive: Dolby Atmos, Surround Sound Formats, and Building a Sound System
While the built-in speaker system in the Hisense laser TV is more capable than what most flat-panel televisions offer, buyers who are serious about home theater audio will eventually want to connect an external sound system, and understanding the audio formats, connection standards, and speaker pairing options helps ensure you get the full benefit of a proper surround setup. The audio experience is half of the cinematic equation, and on a screen this large, a mismatch between the immersive visual scale and underwhelming audio undermines the whole effect.
Supported Audio Formats
The Hisense laser TV passes through common digital audio formats including Dolby Digital, Dolby Digital Plus, and depending on the specific model and connection type, Dolby Atmos via HDMI eARC. Dolby Atmos adds height channels to the traditional surround sound mix, creating a three-dimensional bubble of sound that places effects like rain, helicopters, or ambient music above and around the listener. For streaming content, Dolby Atmos is available through apps like Netflix, Disney+, and Apple TV+ when connected via HDMI eARC to a compatible soundbar or AV receiver, and the difference between standard surround and Atmos on content mastered for it is immediately audible in a properly set up room.
Choosing Between a Soundbar and a Full Surround System
For most living rooms, a high-quality soundbar with a wireless subwoofer and optional rear satellite speakers provides the best balance of immersive sound and practical simplicity. Modern soundbars from reputable manufacturers can simulate surround and even height effects using beam-forming drivers and psychoacoustic processing, and the improvement over the laser TV’s built-in speakers, particularly in bass weight and dialogue clarity at higher volumes, is substantial. A full 5.1 or 7.1 surround system with an AV receiver and separate speakers delivers the most immersive and customizable audio experience but requires more space, more wiring, and a larger budget. For a laser TV setup in a dedicated media room, this is the ultimate pairing; for a living room, a soundbar with Atmos support is usually the more practical choice.
Audio Calibration and Room Acoustics
Regardless of whether you choose a soundbar or a full speaker system, most modern audio equipment includes some form of room correction or calibration, using a microphone to measure how sound behaves in your specific room and adjusting the output to compensate for reflections, standing waves, and frequency imbalances caused by furniture and wall surfaces. Running this calibration after setting up your audio system, usually a five-to-ten-minute automated process, is one of the highest-impact, lowest-effort improvements you can make to the listening experience, and it’s frequently skipped by buyers eager to start watching rather than tuning. The combination of a properly calibrated external sound system and the Hisense laser TV’s massive projected image produces an experience that genuinely rivals a commercial cinema for movie nights and delivers sports viewing with a crowd-like energy that no flat panel and soundbar pairing at a comparable total cost can match.
Smart Platform, Apps, and Streaming
Depending on the specific model and region, Hisense laser TVs ship with either the company’s own smart platform or a licensed system like Google TV, both of which bring a familiar app-grid interface, voice search, and direct access to the major streaming services without needing an external streaming stick.
App Availability
Core streaming apps are present and generally perform well, launching quickly and playing 4K HDR content without buffering issues on a stable connection. Casting from a phone works reliably over Wi-Fi, and built-in voice search speeds up finding specific shows or movies compared to typing with a directional remote.
Interface Responsiveness
The interface itself is snappy for day-to-day navigation, though heavier app updates or first-time app installs can occasionally introduce a short pause. This is broadly in line with what buyers should expect from mid-to-premium smart TV platforms in this price range rather than a specific weakness of the laser TV format.
For readers comparing platform experiences across different premium large-format displays, the best smart projectors with built-in streaming guide offers a useful side-by-side of how different manufacturers handle onboard apps.
Picture Mode Customization
Beyond the standard preset picture modes like Vivid, Standard, and Movie, the settings menu exposes enough manual control over brightness, contrast, color temperature, and gamma that more particular viewers can dial in a preference without needing a professional calibration. A dedicated ambient light or daytime mode, where available, automatically boosts brightness and adjusts color balance to compensate for a lit room, and switching between this and a dedicated dark-room movie mode based on time of day becomes second nature within the first week of ownership.
Network and Bandwidth Requirements for Buffer-Free 4K HDR Streaming
A laser TV with a built-in smart platform is only as good as the network connection feeding it, and for a display this large, the quality demands on your internet connection are higher than they might be on a smaller screen where compression artifacts and resolution drops are harder to notice. Understanding the bandwidth requirements and network best practices for 4K HDR streaming ensures you get the picture quality you paid for rather than a compressed, artifact-ridden image that undermines the laser engine’s capabilities.
Bandwidth Requirements by Content Type
Standard-definition streaming content requires roughly 3 to 5 Mbps and will look soft and visibly compressed on a 100-inch screen, making it a poor match for a laser TV’s capabilities. Full HD (1080p) streaming requires approximately 5 to 10 Mbps depending on the service and compression algorithm, and while it’s a significant improvement, fine detail and color gradients still show compression artifacts at screen sizes this large. 4K HDR streaming, the format that best showcases what the Hisense laser TV can do, requires a sustained connection speed of at least 25 Mbps per stream, with most services recommending 40 to 50 Mbps or higher for consistent quality without buffering or adaptive resolution drops.
Wi-Fi vs Ethernet
While Wi-Fi is convenient and generally sufficient for 4K streaming in homes with a strong router signal, an Ethernet connection to the laser TV provides a more stable, consistent data flow that eliminates the variable latency and occasional dropouts that can affect Wi-Fi in homes with multiple connected devices competing for bandwidth. For the most reliable 4K HDR streaming experience, particularly in households where several family members may be streaming, gaming, or video calling simultaneously, connecting the laser TV directly to the router via Ethernet cable is the most reliable approach. If running an Ethernet cable to the console location is impractical, a powerline adapter or a mesh Wi-Fi node placed near the laser TV can improve wireless performance substantially compared to relying on a distant router signal.
Streaming Stick vs Built-In Apps
Some owners prefer using an external streaming device like an Apple TV 4K, Roku, or Amazon Fire TV Stick rather than the built-in smart platform, either because they prefer a specific interface or because the external device offers features or app versions not available on the built-in platform. The Hisense laser TV’s HDMI inputs make this straightforward, and the external device simply becomes the content source while the laser TV handles the display and audio output. There’s no meaningful picture quality penalty for using an external streamer versus the built-in apps, as long as the external device supports 4K HDR output and is connected to an HDMI port that supports the necessary bandwidth.
Professional Calibration vs DIY Picture Settings
Out of the box, the Hisense laser TV ships with several preset picture modes designed for different viewing scenarios, and for most buyers, simply selecting the most appropriate preset, typically Movie or Cinema mode for dark-room viewing and Standard or Vivid for daytime use, produces a satisfying picture. But for viewers who want to extract the maximum accuracy from the display, or who notice that skin tones look slightly off or that shadows are either too dark or too bright for their taste, there’s a meaningful gap between what the presets deliver and what the display is capable of after careful adjustment.
What Professional Calibration Involves
A professional video calibrator uses a colorimeter or spectrophotometer, a precision instrument that measures the actual light output of the display, along with specialized software and test patterns to adjust the display’s white balance, color temperature, gamma curve, and color gamut tracking to match industry reference standards. The process typically takes two to four hours and involves measuring dozens of data points across the brightness range, adjusting internal service menu parameters that aren’t accessible through the consumer settings menu, and producing a detailed report showing before-and-after measurements. For a display in this price range, professional calibration costs typically several hundred dollars and is most worthwhile for buyers who have invested in a proper screen, controlled room lighting, and who watch a lot of content that was professionally mastered, such as films on disc or premium streaming services.
DIY Calibration: What You Can Achieve Without Equipment
For buyers who want better accuracy than the default presets without the cost of a professional calibration session, there’s a surprising amount of improvement available through the consumer settings menu alone. Start by selecting the Movie or Cinema preset, which is almost always closer to the D65 white point and 2.4 gamma standard that content is mastered in than the Vivid or Standard modes that retail displays typically default to. From there, adjusting brightness and contrast using publicly available test patterns, many of which are free on YouTube or through calibration discs, can fine-tune shadow detail and highlight clipping. Color and tint adjustments are more subjective and harder to get right without a measurement instrument, but the warm/cool color temperature presets are usually labeled clearly enough that selecting the warmest setting that doesn’t look excessively yellow gets you close to the intended mastering temperature.
For those who want to go further without hiring a professional, affordable USB colorimeters paired with free calibration software like HCFR or DisplayCAL can provide objective measurements that guide more precise adjustments, and the learning curve, while real, is manageable for technically inclined buyers willing to spend an afternoon with the tool and a tutorial. The combination of a well-chosen preset, careful brightness and contrast adjustment, and an appropriate color temperature setting delivers roughly 80 percent of the improvement a full professional calibration would achieve, at no cost beyond an hour or two of focused attention.
Gaming and Input Lag
Gaming on a 100-inch or larger screen is one of the most talked-about use cases for laser TVs, and it’s a genuine strength here as long as expectations are set correctly around refresh rate and input lag figures.
Input Lag in Game Mode
With the display’s dedicated game mode enabled, input lag drops into a range that’s comfortable for the vast majority of players, including fast-paced shooters and competitive titles, though dedicated esports players chasing the lowest possible numbers on a specialized gaming monitor will still notice a gap compared to purpose-built gaming displays. For story-driven and open-world console gaming, which represents the bulk of living-room gaming sessions, the responsiveness is genuinely good.
Refresh Rate Support
Higher-end configurations support elevated refresh rates over HDMI for compatible sources, which noticeably smooths fast camera pans and motion in supported titles. Buyers focused heavily on the highest possible refresh rate gaming experience at 4K should confirm the exact specification on the model and configuration they’re considering, since capability can vary between screen size variants and generations.
Readers building a dedicated gaming setup around a large-format display may want to cross-reference this best 4K 120Hz gaming projectors guide before finalizing a purchase.
The Scale Advantage
What no flat panel at a comparable price point can match is sheer immersion: a 100- or 120-inch open-world game fills peripheral vision in a way that transforms exploration and cinematic sequences, and this scale advantage is consistently the single most-cited reason gamers choose a laser TV over expanding to a large flat panel.
HDMI 2.1, eARC, and Connectivity Standards: What the Ports Actually Deliver
The connectivity options on the back of a laser TV determine what sources you can connect, what features those sources can take advantage of, and how future-proof the system is as new devices and content formats arrive. For buyers connecting game consoles, streaming devices, and audio systems, understanding what each port and standard delivers prevents frustration and ensures you’re getting the full performance the system is capable of.
HDMI 2.0 vs HDMI 2.1
HDMI 2.0, the standard that’s been common for the past several years, supports 4K resolution at up to 60 frames per second with HDR metadata, which is sufficient for the vast majority of streaming content, broadcast television, and many console games. HDMI 2.1 increases the available bandwidth from 18 Gbps to 48 Gbps, enabling 4K at 120 frames per second, variable refresh rate (VRR), auto low-latency mode (ALLM), and enhanced audio return channel (eARC). For gamers with a PlayStation 5 or Xbox Series X, having at least one HDMI 2.1 port on the laser TV means you can take full advantage of those consoles’ 4K 120Hz output in supported titles. For buyers who primarily stream content and watch at standard frame rates, the difference between HDMI 2.0 and 2.1 is largely irrelevant to their daily experience.
ARC vs eARC
Audio Return Channel (ARC) allows the TV to send audio downstream to a soundbar or AV receiver through the same HDMI cable that carries video from a source device to the display. Standard ARC supports compressed surround formats like Dolby Digital 5.1, which is adequate for most streaming content. Enhanced Audio Return Channel (eARC) increases the available bandwidth for audio and supports lossless, uncompressed formats including Dolby TrueHD and Dolby Atmos delivered as a lossless bitstream, which matters for buyers using a Blu-ray player or a high-quality media server who want the absolute best audio fidelity through their external sound system. If you plan to pair the laser TV with an Atmos-capable soundbar or AV receiver and want lossless audio from disc-based content, confirming that the specific model supports eARC on at least one HDMI port is worth the effort.
USB, Optical, and Other Connections
Beyond HDMI, the USB ports on the laser TV serve double duty for media playback from USB drives and for powering small devices like streaming sticks or LED bias lighting strips. The optical audio output provides a digital audio connection to older soundbars or receivers that lack HDMI ARC, though it’s limited to compressed surround formats and is being superseded by HDMI ARC/eARC for new equipment purchases. An Ethernet jack provides a wired network connection that, as discussed in the network section, delivers more consistent streaming performance than Wi-Fi in many home environments. Some models also include a 3.5mm analog audio output for connecting headphones or a basic powered speaker system, though this is increasingly rare as Bluetooth audio takes over that role.
Setup and Placement Realities
One of the most genuinely appealing aspects of the ultra short throw laser TV format is how much simpler setup is compared to a traditional ceiling-mounted projector, but it’s still meaningfully more involved than unboxing a flat-panel television.
Distance and Positioning
The engine needs to sit on a low, sturdy, and perfectly level surface a specific distance from the screen or wall, typically defined in the manual based on your target screen size. Because the throw ratio is fixed by the optics, you can’t simply place the unit anywhere and zoom to fit, the way you might with a traditional projector; positioning has to be reasonably precise, generally within an inch or two, to avoid visible keystoning or a soft focus at the edges.
Screen Mounting
If pairing with a dedicated ALR screen, that screen needs to be mounted flat, straight, and free of ripples, which for larger sizes often benefits from a second set of hands or professional installation, particularly for wall-mounted fixed-frame screens in the 100-to-120-inch range.
For a step-by-step walkthrough of sizing and positioning math, this throw distance calculator guide is a genuinely useful planning tool, and the general how to choose a projector resource covers broader room-planning considerations worth reading before you buy.
Cabling and Power
Because the unit sits low near the screen rather than on a ceiling, cable runs to game consoles, streaming devices, and power outlets are considerably easier than with a traditional projector setup, and most owners can complete a basic single-source installation in under an hour once the screen itself is mounted.
DIY Installation vs Hiring a Professional
Once the laser TV engine and screen arrive, the next decision is whether to handle installation yourself or bring in a professional installer. The answer depends on the screen type, the complexity of your room, and your comfort level with precise measurement and physical mounting tasks. For many buyers, a self-install is entirely achievable and saves several hundred dollars; for others, professional installation removes a significant source of stress and ensures the system performs at its best from day one.
When DIY Makes Sense
If you’ve chosen a portable, free-standing, or easy-to-assemble screen rather than a large fixed-frame wall mount, and your console-to-wall distance matches the laser TV’s throw requirements without needing custom furniture or structural modifications, a self-installation is straightforward. The laser TV engine itself requires no mounting, simply place it on the console at the specified distance, connect power and HDMI, power it on, and run through the on-screen alignment and focus adjustments. For most buyers pairing the laser TV with a screen in the 90-to-100-inch range on a standard media console, the entire process from unboxing to watching content takes one to two hours, with the screen mounting being the most time-consuming step. Online video tutorials and the manufacturer’s installation guide cover the process in detail, and many buyers report the experience is similar in complexity to wall-mounting a television, not trivial but well within the capability of a reasonably handy person with a second pair of hands for the screen.
When Professional Installation Is Worth the Cost
Large fixed-frame ALR screens in the 100-to-120-inch range, particularly Fresnel screens that require extremely precise alignment with the laser TV engine, are where professional installation adds the most value. A Fresnel screen that’s mounted even slightly off-axis relative to the projector’s light output will show visible brightness uniformity issues, hot spots, or edge softness that a professional installer knows how to avoid through careful measurement and adjustment. Rooms that require custom cabinetry to house the console at the correct height and depth, or setups that involve routing cables through walls and integrating with an existing home automation or AV system, also benefit significantly from professional expertise. The cost of professional installation for a laser TV system typically ranges from a few hundred to around a thousand dollars depending on scope, and for a system that will serve as the primary entertainment display for years, many buyers consider it money well spent for the peace of mind that every component is positioned and calibrated correctly.
Finding a Qualified Installer
For buyers who decide professional installation is the right call, look for installers with specific experience with ultra short throw projectors and ALR screens rather than general handymen or traditional AV installers whose experience may be limited to ceiling-mounted projectors. Many Hisense authorized dealers can recommend or bundle installation services, and online home theater forums maintain lists of qualified installers by region. The key qualification to verify is hands-on experience with UST projector alignment and ALR screen mounting, since the precision requirements are meaningfully different from traditional projector installation. For general reference on ceiling mounting as an alternative approach for traditional projectors, this ceiling mounting guide illustrates the type of precision and planning involved in projector installation and helps explain why UST alignment, while different, benefits from the same careful, measurement-first approach.
Console Furniture, Cable Management, and Room Optimization
Because a laser TV engine sits on furniture directly below the screen rather than on a ceiling mount, the console or media stand you choose becomes a functional part of the system, not just a piece of decor. The right furniture makes setup easier, improves ventilation, hides cables, and ensures the engine sits at the correct height and distance for your target screen size. The wrong furniture leads to ventilation issues, cable clutter, and positioning problems that are frustrating to fix after the fact.
Choosing the Right Console
The ideal console for a laser TV is low-profile, typically 15 to 22 inches tall, sturdy enough to support the engine’s weight without flexing or vibration, and deep enough to position the engine at the correct distance from the screen wall. Open shelving or ventilated sides are preferable to fully enclosed cabinets, since the laser engine generates heat during operation and needs airflow around the intake and exhaust vents to maintain safe operating temperatures. Measure the engine’s footprint and compare it against the console’s top surface area, leaving at least two to three inches of clearance on all sides for ventilation and cable routing.
Cable Management Strategies
With the laser TV sitting low near the screen, cable runs from game consoles, streaming devices, and the power outlet are relatively short compared to a ceiling-mounted projector, but they can still create visual clutter if not managed. The simplest approach is to route cables along the back edge of the console using adhesive cable clips or a cable management sleeve, keeping everything bundled and out of sight. For a cleaner look, some consoles include built-in cable routing channels or grommets in the back panel. If the console sits against a wall, a single cable raceway running from the console down to a power outlet and along the baseboard can hide the power cable entirely. The key is planning cable routing before connecting everything, since rearranging cables after the system is in place is significantly more annoying than doing it right the first time.
Room Lighting Optimization
Beyond furniture placement, optimizing the room’s lighting makes a measurable difference in picture quality. Bias lighting, a soft, indirect light placed behind the screen, reduces the perceived contrast between the bright screen and the dark surrounding wall, which decreases eye strain during extended viewing and can improve perceived black levels by preventing the viewer’s pupils from fully dilating. LED bias light strips are inexpensive and easy to install, typically adhering to the back of the screen frame and powered by a USB port on the laser TV itself. For daytime viewing, the previously discussed strategy of curtains, blinds, or positioning the screen on a wall that doesn’t face direct sunlight remains the most impactful room optimization available.
Long-Term Ownership and Maintenance
A major selling point of laser light sources over traditional lamp-based projection is the dramatically reduced maintenance burden over the life of the product, and this holds up well in practice for the Hisense laser TV line.
Light Source Longevity
The laser phosphor engine is rated for tens of thousands of hours before brightness degrades meaningfully, which at typical household viewing habits translates to well over a decade of regular use before any noticeable dimming occurs. This eliminates the recurring lamp replacement cost that made older projectors expensive to own long-term, often $200 to $300 every one to two years for heavy users.
Dust and Filter Care
Like any actively cooled electronic device, periodic cleaning of intake vents and any dust filters helps maintain consistent airflow and brightness over time. This is a light maintenance task, generally a few minutes with a vacuum brush attachment every few months depending on your home’s dust levels, rather than anything requiring technical expertise. For the lens itself, a periodic gentle cleaning with a microfiber cloth and appropriate lens cleaning solution prevents dust buildup from softening the image over time, and this projector lens cleaning guide covers the safe, correct technique for maintaining optical clarity without risking scratches or coating damage.
Software Updates
Being a smart, connected device, the unit periodically receives firmware and app platform updates over Wi-Fi, which is worth budgeting a few minutes for occasionally rather than a concern, since these updates typically improve stability and occasionally add new supported features rather than removing them.
Power Consumption
Running a laser light engine at the brightness levels needed to fill a 100-plus inch screen does draw more power than a typical flat-panel television, and buyers coming from an LED set should expect a noticeably higher wattage draw during active use, generally comparable to a mid-size window air conditioner running on a low setting. Standby power draw is minimal, and most owners don’t report a meaningful impact on their overall electricity bill given typical daily viewing hours, but it’s a fair consideration for anyone doing a strict side-by-side cost comparison against a smaller flat panel.
Warranty and Support
Standard coverage typically includes a limited warranty on parts and labor for a defined period after purchase, with the laser light engine itself often covered separately given its expected long service life. As with any major electronics purchase, registering the product and retaining proof of purchase makes any future warranty claim considerably smoother, and checking current warranty terms on the listing itself is worthwhile since coverage details can be updated between production runs.
Total Cost of Ownership: Laser TV vs Lamp Projector vs Flat Panel Over a Decade
The purchase price of a display is only part of the financial picture, and for buyers making a long-term investment in their home entertainment setup, understanding the total cost of ownership over five to ten years reveals meaningful differences between a laser TV, a lamp-based projector, and a flat-panel television. These differences extend beyond the initial hardware cost to include replacement parts, energy consumption, screen accessories, and the practical lifespan of the technology.
Upfront Costs
A laser TV plus a dedicated ALR screen represents a higher upfront investment than a comparably sized flat-panel television, but a lower upfront investment than a large premium OLED panel in the 85-inch and above range. A lamp-based home theater projector is typically the least expensive entry point for a 100-plus inch image, but it requires a separate screen purchase, often a ceiling mount, and a longer cable run that adds to the installation cost. When comparing total upfront system costs including the screen, mounting hardware, and any necessary cabling, the laser TV with an ALR screen frequently lands in a similar range to a high-quality 85-inch LED television while delivering a significantly larger image.
Running Costs: Lamps, Electricity, and Replacement Parts
This is where the laser TV’s advantage over lamp-based projectors becomes stark. A traditional projector lamp costs between $100 and $300 to replace, and heavy users who watch four or more hours per day may need a replacement every 18 to 24 months. Over ten years, that’s five to seven lamp replacements totaling $500 to $2,100 in lamp costs alone, not counting the inconvenience of ordering and installing the replacement. A laser TV engine needs no lamp replacement over the same period, which effectively reduces its long-term cost relative to a lamp projector by the full amount of those replacements.
| Cost Factor | Hisense Laser TV | Lamp Projector | 85″ Flat Panel |
|---|---|---|---|
| Initial Hardware + Screen | $$ | $$$$ | $$$ |
| Lamp Replacement (10 yrs) | $0 | $500–$2,100 | $0 |
| Annual Energy Cost (4 hrs/day) | $60–$90 | $70–$110 | $30–$50 |
| Screen Replacement/Maintenance | Minimal | Minimal | N/A |
| Expected Useful Life | 10+ years | 5–7 years | 7–10 years |
| Estimated 10-Year TCO | Medium | Medium-High | Medium |
Electricity costs are higher for a laser TV than for a flat panel of similar brightness, since the laser engine draws more wattage to fill a 100-plus inch image, but the difference amounts to roughly $30 to $50 per year for typical viewing habits, a small fraction of the total cost equation. Over ten years of ownership, the total cost of a laser TV system is competitive with a premium flat panel while delivering a substantially larger image, and significantly more economical than a lamp projector when replacement lamp costs are factored in. This financial context matters because it reframes the laser TV’s higher initial price point as a long-term investment that amortizes favorably against the alternatives rather than a premium you pay purely for the novelty of projection.
Troubleshooting the Most Common Laser TV Problems
No display technology is completely free of occasional issues, and knowing how to diagnose and resolve the most common problems that laser TV owners encounter saves time, frustration, and potentially the cost of an unnecessary service call. Most issues that arise during ownership have straightforward solutions that can be addressed at home without specialized tools or technical expertise.
No Signal or Blank Screen on Startup
If the laser TV powers on but displays a “no signal” message or a blank screen, the most common cause is an input selection or cable connection issue rather than a problem with the laser engine itself. Verify that the correct HDMI input is selected on the laser TV, that the source device is powered on and actively outputting a signal, and that the HDMI cable is firmly seated at both ends. HDMI handshake issues, where the source device and the display fail to negotiate a compatible resolution or refresh rate, can sometimes be resolved by powering off both devices, disconnecting the HDMI cable for ten seconds, and reconnecting it before powering everything back on in sequence. For a more detailed walkthrough of HDMI signal issues, this no signal HDMI troubleshooting guide covers the diagnostic steps in depth and addresses edge cases like HDCP compliance issues that can affect certain source devices.
Image Is Blurry or Soft at the Edges
Because ultra short throw optics project at a steep angle, even small deviations in the engine’s position relative to the screen can cause softness or geometric distortion at the edges of the image. If the center of the picture is sharp but the edges or corners are noticeably soft, first verify that the engine is positioned at the exact distance from the screen specified in the manual for your screen size, and that it’s sitting perfectly level on the console. Small adjustments to the engine’s distance or angle, sometimes as little as a quarter of an inch, can resolve edge softness that seems minor in position but is clearly visible in the image. If the model includes electronic focus or keystone correction, ensure these are set to their default or neutral position before attempting physical adjustments, as electronic correction can introduce its own softness if over-applied.
Unit Powers On but Produces No Picture
If the laser TV powers on, the indicator lights respond normally, and audio may even be present, but no image appears on the screen, the issue may be with the lens cover mechanism, a failed light source, or an internal processing error. First, check whether the lens cover has opened fully, some models have a small mechanical or motorized cover that should retract automatically on startup, and a stuck cover prevents any light from reaching the screen. If the lens cover is open and the lens is clean, a factory reset through the settings menu or the physical reset button (consult the manual for location) can resolve software-related display failures. For persistent issues where the unit powers on but no light is produced from the lens, this projector turns on but no picture guide walks through additional diagnostic steps before concluding whether a service call is needed.
Unit Shuts Off Unexpectedly During Use
Unexpected shutdowns during viewing are almost always thermal in origin. If the laser TV shuts itself off after thirty minutes to an hour of use, the most likely cause is overheating due to blocked ventilation, a dusty filter, or the unit being placed in an enclosed cabinet without adequate airflow. Ensure the intake and exhaust vents are unobstructed, the unit has at least several inches of clearance on all sides, and the room temperature is within the operating range specified in the manual. Cleaning dust from the intake vents and any accessible filters with a vacuum brush attachment resolves most thermal shutdown issues. For units that shut off immediately on startup or after only a few minutes despite adequate ventilation, there may be an internal component issue requiring service, and this projector keeps turning off troubleshooting guide provides a systematic diagnostic approach for identifying whether the problem is environmental or hardware-related.
Color Shifting or Uneven Brightness
If the picture develops a noticeable color tint, such as a green or magenta shift, or if one area of the screen appears brighter or differently colored than the rest, the cause could range from a source or cable issue to an internal optical problem. Start by testing with a different source device and HDMI cable to rule out the signal chain. If the issue persists across all sources and inputs, try performing a factory reset of the picture settings to rule out a misconfigured color adjustment. Persistent color uniformity issues that survive a factory reset and different sources may indicate a problem with the laser engine’s phosphor wheel or the imaging chip, which would require professional service. This type of issue is uncommon in well-maintained units but worth knowing about so you can identify it early and seek warranty service if applicable.
Preventive Maintenance Summary
Most troubleshooting situations can be prevented entirely through a simple maintenance routine: keep the vents clean, ensure adequate airflow around the unit, use a surge protector to guard against power spikes, and keep the lens clean and the lens cover mechanism functioning properly. These five-minute tasks performed a few times per year prevent the vast majority of issues that new owners encounter, and they extend the effective lifespan of the unit well beyond its already generous rated hours. For general projector maintenance guidance applicable across display types, the projector lens cleaning guide and the broader how to choose a projector resource both include maintenance considerations worth reviewing before and after purchase.
Fan Noise: How Loud Is It Really and What Can You Do About It
Fan noise is one of the most common concerns prospective laser TV buyers have, and it’s a fair question because any actively cooled display with a high-powered light engine produces audible noise during operation. The honest answer is that the Hisense laser TV does produce measurable fan noise, but for most owners it’s less of an issue in practice than the concern suggests on paper.
What to Expect in Decibels
Typical fan noise from a laser TV in normal operation falls in the range of 28 to 35 decibels measured at a standard one-meter distance, which is roughly equivalent to a quiet library or a whisper. At the actual seating position eight to twelve feet away, the noise drops to the low-to-mid twenties in decibels, well below the threshold of conscious perception for most people when any content with dialogue, music, or ambient sound is playing. During quiet scenes, such as a pause in dialogue or a silent moment in a thriller, the fan is audible if you listen for it, but it presents as a constant, smooth white noise rather than an intrusive whine or rattling, which most people find easy to acclimate to.
Fan Noise Compared to Alternatives
Compared to a traditional lamp-based home theater projector running at full brightness, the laser TV’s fan noise is generally lower, since the laser engine is more efficient and produces less waste heat that needs to be dissipated. Lamp projectors, especially those rated at 3,000 or more ANSI lumens, can produce 35 to 45 decibels of fan noise, which is clearly audible even during content playback and can be genuinely distracting during quiet scenes. Compared to a flat-panel television, which produces essentially zero audible noise, the laser TV’s fan is the one area where the flat panel has a clear, if minor, ergonomic advantage.
How to Minimize Fan Noise Perception
Several practical steps can reduce the perceived impact of fan noise in your viewing environment. First, ensure the unit has adequate ventilation clearance, a unit that’s overheating will ramp its fans to maximum speed, producing more noise than necessary. Second, placing the laser TV on a solid, vibration-dampening surface rather than a hollow or resonant piece of furniture prevents the console from amplifying fan vibrations. Third, using an external sound system rather than the built-in speakers means the audio source is positioned closer to the viewer and can be played at a lower absolute volume while still filling the room, which effectively masks the fan noise better than the built-in speakers, which project sound from the same location as the fan. Finally, engaging the eco or low-brightness mode during evening viewing in a fully dark room reduces the laser engine’s power output and correspondingly reduces fan speed and noise, since less cooling is required to dissipate less heat. The brightness reduction in eco mode is often imperceptible in a dark room, making it a practical everyday setting for noise-sensitive viewers who watch primarily at night.
Laser TV vs Flat-Panel TV vs Traditional Projector
Buyers comparing this laser TV against other big-screen options are usually weighing it against one of two alternatives: a large flat-panel television, or a traditional ceiling-mounted home theater projector. Here’s how the three categories stack up across the factors that matter most.
| Factor | Hisense Laser TV | Large Flat-Panel TV | Traditional Projector |
|---|---|---|---|
| Typical Screen Size | 100–120 inches | 65–98 inches | 100–150+ inches |
| Daytime Brightness | Good with ALR screen | Excellent | Poor to Fair |
| Black Level Depth | Very Good (dark room) | Excellent | Good (dark room) |
| Setup Complexity | Moderate | Low | High |
| Light Source Lifespan | 25,000+ hours | N/A (panel wear) | 3,000–5,000 hrs (lamp) |
| Built-In Audio Quality | Very Good | Fair to Good | Fair (varies widely) |
| Footprint | Small console | Wall or stand | Ceiling mount + AV cabinet |
The practical takeaway is that a laser TV occupies a genuine middle ground: it delivers most of the plug-and-play convenience of a flat panel while approaching, though not fully matching, the sheer scale advantage of a dedicated projector setup. For a deeper dive specifically framed around this trade-off, the projector vs 85-inch TV comparison and the UST vs standard throw projector breakdown both cover related ground worth reading.
Cost is another angle worth weighing carefully. A flat panel in the 85-to-98-inch range at a comparable price point to a laser TV plus screen bundle will generally deliver better daytime brightness and deeper blacks, but a laser TV pushing past 100 inches diagonal simply isn’t matched by any flat panel at a similar budget, since panel pricing scales steeply with size in a way projection technology does not. For buyers whose priority is maximum screen size for the money in a room that can be reasonably darkened, the math consistently favors the laser TV; for buyers prioritizing daytime brightness above all else, a flat panel remains the safer choice.
Hisense Laser TV Model Lineup: Sizes, Specs, and Choosing the Right Configuration
Hisense offers several configurations within its laser TV lineup, and understanding the differences between them helps buyers choose the model that best matches their room, budget, and viewing priorities without overspending on features they won’t use or undersizing the screen for their space. The lineup generally spans from compact, entry-level models designed for smaller rooms and lighter use to flagship configurations with the brightest light engines, the most capable smart platforms, and bundled premium ALR screens.
Screen Size Options: 100-Inch vs 120-Inch
The two most common screen sizes for Hisense laser TVs are 100 inches and 120 inches diagonally, and the choice between them comes down to room dimensions and viewing distance more than any inherent quality difference between the sizes. A 100-inch screen is the more versatile choice for most living rooms, fitting comfortably on a standard wall and providing an immersive experience at viewing distances of eight to twelve feet. A 120-inch screen demands more wall space, a longer console-to-wall throw distance, and a viewing position at least ten to fourteen feet back for comfortable viewing, but delivers a noticeably more cinematic, theater-like experience for rooms that can accommodate it. The same laser engine typically powers both sizes, with the throw distance adjusted to match the target screen, so the picture quality characteristics, brightness, color accuracy, and sharpness are broadly comparable between the two sizes, with the smaller screen appearing slightly brighter per unit area due to the concentrated light output.
Brightness Tiers and Model Differentiation
Within the lineup, models are often differentiated by the brightness output of the laser engine, measured in ANSI lumens, and by the smart platform and features included. Entry-level models typically offer slightly lower brightness and a more basic smart platform, while mid-range and flagship models push higher brightness for better ambient light performance, add features like Dolby Vision and eARC support, and may include premium bundled screens specifically matched to the engine’s output and throw characteristics. For most buyers, the mid-range configuration hits the sweet spot of brightness, features, and value, delivering enough light output for a satisfying experience in a moderately lit room with an ALR screen, without the price premium of the flagship configuration. Buyers with very bright rooms or who want the absolute best daytime performance may find the higher brightness of a flagship model worth the investment, while those with a dedicated dark room can save meaningfully with an entry-level model without sacrificing noticeable picture quality in their specific use case.
Bundled Screens vs Separate Purchase
Some Hisense laser TV configurations are sold as bundles that include a matched ALR screen alongside the projector engine, while others are sold as standalone engines with the screen purchased separately. Bundled packages offer the convenience of guaranteed compatibility and typically represent a lower total cost than purchasing the components individually, but they limit your screen choice to whatever Hisense includes in the bundle. Purchasing the engine separately allows you to choose from the full range of third-party ALR screens, including Fresnel screens, lenticular screens, and specialty surfaces that may outperform the bundled option for your specific room conditions. For most buyers, the bundled option is the simpler and more cost-effective path; for enthusiasts who want to optimize every aspect of the system, purchasing separately and selecting a screen based on a careful assessment of room conditions, viewing angles, and ambient light levels is the more thorough approach.
Regional and Year-over-Year Differences
Hisense updates its laser TV lineup periodically with new models that may feature improved light engines, updated smart platforms, or revised designs. It’s worth checking whether the model you’re considering is the current generation or a previous-year model that may have been discounted as new stock arrives, since the year-over-year improvements, while meaningful, are often incremental enough that a previous-generation model at a significant discount represents a strong value for budget-conscious buyers. Regional variations in model naming and feature availability can also create confusion, so confirming the exact specifications of the specific listing you’re considering rather than relying on general product line descriptions is always worth the extra minute of research. The current listing on Amazon includes the most up-to-date model information, available configurations, and pricing for your region.
Pros and Cons
What Works Well
- Massive 100+ inch image from a compact, low-profile console unit
- Laser light source rated for tens of thousands of hours with minimal maintenance
- Strong built-in speaker system that outperforms most flat-panel TVs
- Noticeably brighter and more color-accurate than older lamp-based projectors
- Smart platform with responsive navigation and full app support
- Game mode input lag suitable for the vast majority of console gamers
- Reflected light viewing is gentler on the eyes during long sessions
- Total cost of ownership over a decade is competitive with flat panels
Where It Falls Short
- Best picture quality requires a dedicated ALR screen, adding to total cost
- Black levels can’t fully match a good OLED or premium LED panel
- Direct, unobstructed sunlight noticeably reduces picture punch
- Setup and screen mounting take more effort than a standard TV
- Not the ideal pick for the fastest, most competitive esports gaming
- Higher power consumption than a comparable flat-panel television
- Pixel-shifting 4K, while visually excellent, is not native 4K on all models
How This Compares to Other Large-Format Options
Hisense isn’t the only company building ultra short throw laser projection systems, and it’s worth understanding where competing products sit before committing. Samsung’s premium entry, reviewed in depth in this Samsung Premiere LSP9T review, targets a similar audience with a somewhat different design philosophy and price point. Buyers interested in more compact, portable alternatives rather than a fixed installation may prefer exploring options covered in the Anker Nebula projector review or the XGIMI Horizon review, though neither matches the brightness or built-in sound of a dedicated laser TV console.
For those still undecided between an ultra short throw laser system and a traditional long-throw home theater projector, the Optoma projector review, BenQ projector review, and Epson Home Cinema 1080 review each represent strong alternatives at different price tiers, generally trading the laser TV’s convenience for a lower up-front cost and, in some cases, superior black level performance in fully darkened rooms.
Buyers wanting a broader market overview before narrowing down a specific model should start with the best projectors for every budget and room size guide, which frames how a laser TV like this Hisense model fits into the wider landscape of large-screen options.
For those specifically interested in the premium end of the home cinema market, where dedicated rooms, high-end screens, and reference-grade calibration converge, this best high-end home cinema projectors guide covers the top-tier options for buyers whose priority is absolute picture quality regardless of budget, while the Epson LS12000 vs JVC NZ500 comparison dives deep into two flagship projectors that represent the current state of the art for dedicated theater rooms.
Buyers working within a specific budget may also find value in the tiered guides: the best projectors under $1,000, best projectors under $500, and best projectors under $100 guides provide context on what’s available at lower price points for secondary rooms, outdoor movie nights, or portable use cases where a full laser TV installation isn’t practical.
Three-Way Shootout: Hisense Laser TV vs LG CineBeam vs Samsung Premiere
For buyers committed to the ultra short throw laser TV format, the choice typically comes down to three major brands: Hisense, LG with its CineBeam lineup, and Samsung with The Premiere series. Each takes a somewhat different approach to the same fundamental concept, and understanding the key differences helps you choose the right fit for your room and priorities.
Hisense Laser TV
Hisense has been the most aggressive in pushing the laser TV format into the mainstream market, offering a wide range of configurations at various price points and screen size options, including bundled packages with matched ALR screens that simplify the purchase decision. The company’s strength is in delivering a complete, ready-to-watch system at competitive pricing, with strong built-in speakers, a capable smart platform, and a focus on the overall user experience rather than bleeding-edge specifications in any single category. For buyers who want a well-rounded laser TV that’s straightforward to buy, set up, and live with, Hisense represents the most accessible entry point into the format.
LG CineBeam
LG’s CineBeam lineup, reviewed in detail in this LG CineBeam review, brings the company’s display expertise to the ultra short throw space with models that often emphasize sleek industrial design, webOS smart platform integration familiar to LG television owners, and strong color performance backed by LG’s experience in panel and display manufacturing. LG’s CineBeam models tend to target the premium end of the market with higher price points and design-forward aesthetics, making them a strong fit for buyers who value the living room appearance of the unit as much as its picture performance and who are already embedded in the LG ecosystem.
Samsung Premiere
Samsung’s Premiere, covered in the Samsung Premiere LSP9T review, competes at the premium tier with a focus on Samsung’s smart platform ecosystem, Filmmaker Mode support, and a triple-laser light engine that uses separate red, green, and blue lasers rather than the laser-phosphor approach Hisense and some LG models use. The triple-laser approach can deliver a wider color gamut and more precise color, but it typically comes at a higher price point. Samsung’s strength is in platform integration for buyers already using Samsung devices and services, and in the visual design of the unit itself.
How to Choose Between Them
For most buyers, the decision comes down to budget, room conditions, and ecosystem preference. If you want the best value and a complete system out of the box with minimal research, Hisense is the strongest starting point. If design, premium build quality, and the LG webOS experience matter most, the CineBeam lineup is worth the premium. If you want the widest possible color gamut from a triple-laser engine and are already invested in the Samsung ecosystem, The Premiere offers a compelling package. All three deliver a genuinely impressive 100-plus inch viewing experience that transforms a living room in ways no flat panel at a comparable total cost can match, and all three benefit enormously from a proper ALR screen and controlled room lighting.

Compare current configurations, screen size options, and verified buyer reviews on Amazon.
See Hisense Laser TV OptionsWho Should (and Shouldn’t) Buy This Laser TV
Great Fit
This laser TV makes the most sense for households with a room that can be reasonably darkened, whether that’s a finished basement, a den with heavy curtains, or a media room built specifically for movie and sports watching. It’s also a strong pick for anyone already comparing the cost of a premium 85-to-98-inch flat panel, since a laser TV plus ALR screen frequently lands in a similar or lower total price range while delivering meaningfully more screen real estate.
Proceed With Caution
Buyers whose primary television lives in a bright, open-concept living space with large uncovered windows and no realistic way to control daytime light should think carefully, since picture quality in those conditions, while improved over older projection technology, still won’t match a bright flat panel at midday. Competitive gamers chasing the absolute lowest input lag numbers for ranked play may also be better served by a dedicated gaming monitor as a secondary display.
Room Planning Checklist
- Confirm you have enough wall space for a 100-to-120-inch screen, including side clearance
- Measure available console-to-wall throw distance against the size you want
- Assess how much control you have over daytime light in that specific room
- Budget for a dedicated ALR screen rather than treating it as optional
- Decide upfront whether built-in audio is sufficient or an external system is planned
Real-World Viewing Scenarios
Specification sheets only tell part of the story, so it helps to walk through how this laser TV actually performs across the situations that matter most to typical households, drawing on the same evaluation criteria used across other 4K laser projectors in this category.
Sunday Afternoon Football with Friends
This is arguably the single scenario where a laser TV earns its keep the fastest. A 100-plus inch image turns a normal living room into something closer to a sports bar, with enough brightness in a moderately lit room to keep the picture readable even with a few lamps on and friends milling around. Fast motion during plays stays clean thanks to the motion processing discussed earlier, and the built-in speaker system is more than capable of carrying commentary and crowd noise clearly across a room full of conversation.
Weeknight Movie Watching After Dark
With the sun down and lights dimmed, this is where the picture quality genuinely shines, delivering rich color, strong detail, and a scale that makes even familiar streaming content feel like a proper theatrical experience. This is the scenario the engineering team clearly optimized around, and it shows.
Saturday Morning Cartoons with Curtains Open
This is the toughest real-world test for any projection-based display, and it’s where an ALR screen earns its cost. With a plain wall and bright morning light, the picture is watchable but noticeably flatter than an LED television would deliver in the same conditions. With a proper ALR screen and curtains providing even partial diffusion of direct sunlight, the gap narrows considerably, though a premium flat panel will still edge it out for sheer daytime punch.
Late-Night Solo Gaming Session
In a dark room with headphones or the built-in speakers at a lower volume, response feels tight and the massive canvas makes exploration-heavy and cinematic titles genuinely more absorbing than the same game on a 55-inch panel across the room. This is consistently the scenario owners describe as the most unexpectedly transformative after switching from a standard television.
Backyard Movie Night
While the Hisense laser TV is designed primarily for indoor use with its fixed console placement and reliance on a screen surface for optimal picture quality, buyers occasionally ask whether it can serve double duty for outdoor movie nights. The short answer is that it’s not ideally suited for outdoor use the way a portable projector is, since the console design assumes a flat, stable surface at a fixed distance from a wall-mounted screen, and outdoor conditions introduce dust, humidity, and ambient light challenges the unit isn’t designed to handle long-term. For buyers who want a dedicated outdoor movie setup alongside their indoor laser TV, a separate portable projector paired with an inflatable outdoor screen is the more practical and cost-effective solution. This best outdoor movie projectors guide covers purpose-built options designed for backyard viewing, and this best portable mini projectors roundup compares compact options that can travel between indoor and outdoor use without the setup demands of a full laser TV installation.
Frequently Asked Questions
Is a Hisense laser TV actually a projector?
Yes, functionally it is an ultra short throw projector paired with a purpose-built console housing the laser light engine, speakers, and smart platform. Hisense markets it as a “laser TV” because it’s designed and positioned to replace a traditional television rather than function as a portable or occasional-use projector.
Do I need a special screen, or can I project onto a wall?
You can project onto a flat, light-colored wall, and the results are watchable in a dark room. For the best picture, especially with any ambient light present, a dedicated ambient light rejecting screen makes a significant difference in brightness, contrast, and color accuracy, and most owners consider it close to a required accessory rather than a luxury upgrade.
How bright does the room need to be for good picture quality?
The picture looks best in a room with controllable lighting, meaning curtains or blinds that can block direct sunlight during the day. Some ambient light, like a lamp in the evening or indirect daylight, is handled reasonably well, particularly with an ALR screen, but direct sunlight hitting the screen surface will noticeably wash out the image.
How long does the laser light source last?
Laser phosphor light engines in this category are typically rated for well over 20,000 hours of use before brightness degrades meaningfully. At average household viewing habits, that translates to over a decade of regular use, which is dramatically longer than traditional projector lamps that often need replacement every one to two years.
Is the built-in sound good enough, or do I need a soundbar?
The built-in speaker system is genuinely strong for an all-in-one device and outperforms most flat-panel television speakers thanks to the extra cabinet volume available in the console design. Casual and everyday viewing is well served by the built-in audio, though dedicated home theater enthusiasts will still get a noticeably fuller experience by adding an external sound system.
Is it good for gaming?
Yes, for the majority of console and casual PC gaming. With the dedicated game mode enabled, input lag is low enough to feel responsive across most genres, and the sheer scale of the image is a major draw for open-world and cinematic titles. The most competitive esports players chasing the absolute lowest lag figures may still prefer a specialized gaming monitor.
How much space do I need for installation?
Unlike a ceiling-mounted projector, the laser TV engine sits on a low console close to the wall, typically a specific distance determined by your target screen size, often somewhere in the range of a few inches to a couple of feet depending on the model and desired diagonal size. You’ll also need enough wall or screen space to accommodate the 100-to-120-inch image itself.
Can I mount the screen and engine myself, or do I need professional installation?
Many owners handle installation themselves, particularly for smaller screen sizes, though larger fixed-frame ALR screens often benefit from a second person or professional help to mount level and wrinkle-free. The projection engine itself simply needs to sit on a stable, level surface at the correct measured distance.
How does it compare to a high-end OLED television?
An OLED television will still win on absolute black level depth, peak highlight brightness, and daytime viewing in bright rooms. Where the laser TV wins decisively is sheer scale, delivering a 100-plus inch image at a price and footprint no OLED panel of comparable size can currently match.
Does it support 4K and HDR content?
Yes, current-generation Hisense laser TVs support native 4K resolution and HDR formats through the built-in smart platform and connected HDMI sources, delivering sharp detail and expanded color and contrast range on supported streaming content, discs, and consoles.
Is it noisy during operation?
There is audible fan noise from the cooling system, similar in character to a quiet desktop computer under load, but most owners report it becomes unnoticeable once content with dialogue or music is playing. It’s worth noting if you’re especially sensitive to background fan noise during silent scenes.
What’s the total realistic cost including a screen?
Pricing varies by screen size and current promotions, so checking the current listing is the most accurate way to see up-to-date pricing for the engine itself, and a dedicated ALR screen typically represents a meaningful additional investment on top of the projector unit, which is worth budgeting for from the outset rather than treating as an afterthought.
Can I use it for business presentations or as a monitor?
While technically possible to connect a laptop or computer via HDMI for presentations, the laser TV is optimized for video and entertainment content rather than displaying fine text and static spreadsheets. For dedicated business or education projection needs, purpose-built presentation projectors with features like wireless screen sharing, high brightness for lit conference rooms, and optimized text rendering are a better fit. This best business presentation projectors guide covers options specifically designed for that use case, and specialized applications like golf simulators have their own unique requirements covered in this golf simulator projector guide.
Does it support 3D content?
3D support varies by specific model and generation within the Hisense laser TV lineup, and it’s worth confirming whether the specific configuration you’re considering includes 3D compatibility if that’s a feature you plan to use. For buyers specifically interested in 3D home cinema projection, this best 3D home cinema projectors guide covers models that prioritize 3D capability alongside their other features.
How does the laser TV handle power outages or surges?
Like all sensitive electronics, a laser TV benefits from being connected through a quality surge protector rather than plugged directly into a wall outlet. A sudden power loss during operation will shut the unit down, and when power returns the unit typically remains in standby rather than automatically powering back on, which protects the laser engine from unexpected restarts. Using an uninterruptible power supply (UPS) provides the additional benefit of allowing the unit to power down gracefully during an outage rather than cutting abruptly, though this is an optional precaution rather than a requirement.
Final Verdict
The Hisense laser TV succeeds at exactly what it sets out to do: deliver a genuinely massive, vibrant, and reasonably practical home theater image from a compact console that lives on furniture rather than a ceiling. It isn’t a universal replacement for every living room television, and buyers in bright, sun-drenched spaces should go in with realistic expectations about daytime performance. But in a den, media room, or any space where lighting can be controlled even loosely, it delivers an experience that a flat panel simply can’t match at a comparable price, and it does so with a light source built to outlast the ownership cycle of most households without the recurring maintenance that made earlier projectors a hassle to own long-term.
For the right room, this is one of the more satisfying big-screen upgrades available today, striking a rare balance between the convenience buyers expect from a modern television and the scale that only projection can deliver.
Ready to see current pricing and available configurations?
Check Latest Price on Amazon