How to Calculate Projector Throw Distance Before You Buy or Mount Anything
One formula, three variables, and about five minutes with a tape measure — that’s the entire process standing between you and knowing exactly where your projector needs to sit.
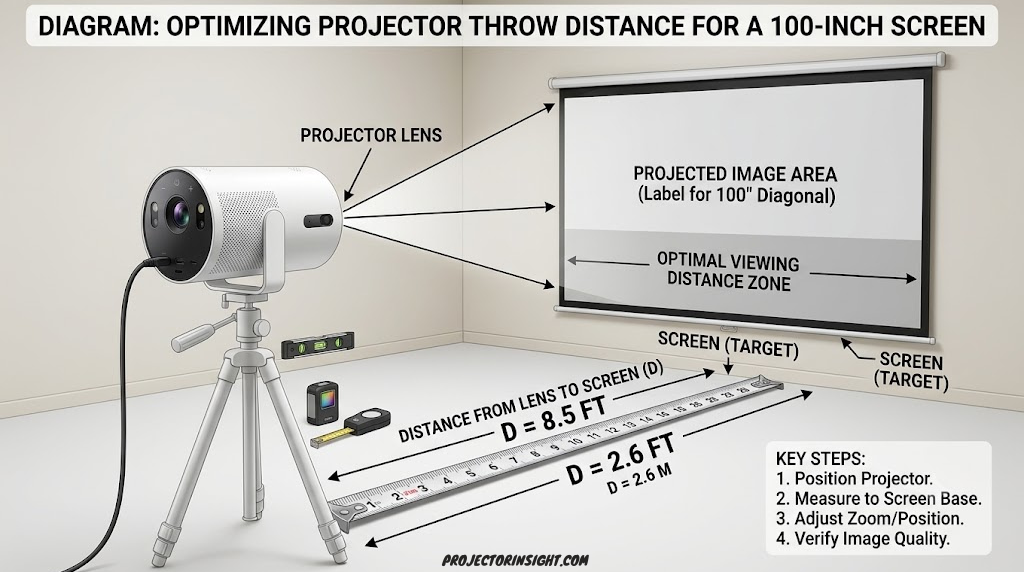
There’s a specific kind of frustration that comes from mounting a projector exactly where you planned, plugging it in, and watching the image spill several feet past the edges of your screen — or worse, barely fill half of it. Almost every version of this problem traces back to the same root cause: nobody calculated throw distance before committing to a mounting point. The good news is that the actual math behind this is genuinely simple, and once you understand the one formula involved, you can plan an installation with total confidence before a single screw goes into the ceiling.
This guide walks through exactly how to calculate projector throw distance, starting with what the term means, why it’s worth doing this math before you buy rather than after, and then a clear six-step process you can follow with nothing more than your projector’s spec sheet and a tape measure. We’ll also cover the most common mistakes people make with this calculation, work through several real examples across different throw ratio categories, and give you a quick-reference table to check your own numbers against.
What Throw Distance Actually Is
Throw distance is simply the measurement from a projector’s lens to the screen it’s projecting onto. That’s the whole definition — but the reason it deserves an entire guide is that throw distance and image size are directly, mathematically linked through a single property of the projector’s lens called the throw ratio. Move the projector closer, and the image shrinks. Move it farther away, and the image grows. The throw ratio tells you exactly how much the image grows or shrinks for a given change in distance, which is what makes the whole relationship predictable rather than something you have to discover through trial and error.
Every projector lens has a throw ratio, whether it’s printed prominently on the box or buried a few pages into a spec sheet PDF. It’s expressed as a single number (like 1.5:1) or, for projectors with a zoom lens, as a range (like 1.2:1 to 1.8:1). That number is the key that unlocks the entire calculation, and once you have it, figuring out where your projector needs to sit becomes a matter of simple multiplication rather than guesswork.
The relationship in plain terms: Throw ratio is the relationship between how far away a projector sits and how wide the image becomes at that distance. A throw ratio of 1.5:1 means the projector needs to sit 1.5 feet away for every 1 foot of image width it produces.
This concept becomes especially important when you’re comparing different projector categories, since ultra-short-throw, short-throw, and standard-throw models can have wildly different throw ratios — sometimes differing by a factor of five or more — which means the exact same room can call for completely different mounting strategies depending on which type of projector you choose. Our guide on UST vs. standard throw projectors covers how these categories differ beyond just the distance math.
Why Getting This Calculation Right Actually Matters
It’s tempting to treat this as an afterthought you can sort out after the projector arrives, but throw distance is one of the few projector specs that genuinely can’t be fixed after the fact with a software setting or a firmware update. Here’s what’s actually at stake.
This is also why throw distance compatibility deserves a spot early in the shopping process, right alongside resolution and brightness. Our broader walkthrough on how to choose a projector treats this as one of the foundational checks before you ever get to comparing image quality between models.
Calculating Throw Distance: A Step-by-Step Walkthrough
Here’s the complete process, broken into six clear steps. Each one builds on the last, and by the end you’ll have a verified, room-specific number rather than a rough guess.
Find Your Projector’s Throw Ratio
Locate the throw ratio specification on your projector’s official spec sheet or in its manual — it’s usually listed under “Projection” or “Lens” specifications, expressed as a number followed by “:1” (such as “1.4:1”) or, for zoom lenses, as a range (such as “1.2:1–1.5:1”). If you can’t find it listed directly, manufacturer product pages and retailers like ProjectorCentral typically list this figure prominently, since it’s one of the most frequently searched specs for installation planning.
Convert Your Target Diagonal Screen Size to Width
Screen sizes are almost always advertised by diagonal measurement (a “100-inch screen” means 100 inches corner to corner), but the throw distance formula needs horizontal width, not diagonal. For the common 16:9 aspect ratio, multiply the diagonal by approximately 0.872 to get the width. For 4:3 aspect ratio screens, multiply by approximately 0.8 instead. A 100-inch diagonal 16:9 screen, for example, works out to a width of about 87.2 inches.
Apply the Throw Distance Formula
With your throw ratio and image width in hand, multiply them together: Throw Distance = Throw Ratio × Image Width. Using the 87.2-inch width from the previous step and a throw ratio of 1.2:1, the calculation looks like this: 1.2 × 87.2 = 104.6 inches, or roughly 8.7 feet. That’s the distance from the projector’s lens to the screen required to produce exactly a 100-inch diagonal image at that throw ratio.
D = TR × W
Throw Distance = Throw Ratio × Image Width
Throw ratio: 1.2:1 · Target screen: 100″ diagonal, 16:9 · Width: 87.2″ · Throw Distance = 1.2 × 87.2 = 104.6″ (≈8.7 ft)
Account for Zoom Lens Range, If Applicable
If your projector has a zoom lens with a throw ratio range rather than a single fixed number, run the calculation twice — once using the lower ratio and once using the higher ratio — to find your minimum and maximum usable throw distance for that screen size. Using the same 87.2-inch width with a 1.2:1–1.5:1 zoom range: the minimum distance is 1.2 × 87.2 = 104.6 inches, and the maximum is 1.5 × 87.2 = 130.8 inches. Anywhere within that span, you can use the zoom ring to dial in exactly a 100-inch image.
Zoom range: 1.2:1 to 1.5:1 · Width: 87.2″ · Minimum distance = 104.6″ · Maximum distance = 130.8″ · Usable range: ~8.7 ft to ~10.9 ft
Measure Your Actual Room
Now take a tape measure (or a laser distance meter, which is faster and more accurate for longer distances) and measure the real, physical distance from your planned projector position to the screen wall. Measure horizontally at roughly lens height, not diagonally across the room. If you’re planning a ceiling mount, measure the horizontal distance the lens will sit at once mounted, not simply the floor-to-wall distance, since ceiling-mounted projectors are often pulled back slightly from where a shelf-mounted unit would sit.
Cross-Check Against the Manufacturer’s Official Chart or Calculator
Finally, before finalizing anything, verify your hand calculation against the projector manufacturer’s official throw distance chart or online calculator for your exact model. Most manufacturers, and third-party resources like ProjectorCentral’s calculator tools, publish exact distance-to-screen-size tables that account for lens-specific quirks your basic calculation might not capture perfectly. This step takes thirty seconds and catches the rare case where a projector’s real-world lens behavior deviates slightly from the simple published ratio.
That’s the complete process. Six steps, one formula, and a final sanity check against official documentation. Once you’ve done this once, the math becomes second nature, and you’ll find yourself running this quick calculation almost instinctively whenever you’re evaluating a new projector against a specific room.

Measure your room with precision
A laser distance meter makes throw distance verification fast and accurateThrow Ratio Categories Explained
Not all projectors are built around the same throw ratio, and understanding which category yours falls into helps make sense of why two seemingly similar projectors can demand wildly different room setups.
| Category | Typical Throw Ratio | Distance for 100″ Screen | Best Suited For |
|---|---|---|---|
| Ultra-Short Throw (UST) | Below 0.4:1 | Roughly 4–14 inches | Placing right below or beside the screen, no ceiling mount needed |
| Short Throw | ~0.4:1 to 1.0:1 | Roughly 3–7 feet | Smaller rooms, classrooms, tighter living spaces |
| Standard / Long Throw | Above 1.0:1 | Roughly 8–13 feet+ | Dedicated theater rooms with more depth available |
Note that these category boundaries are general industry conventions rather than strict regulatory definitions, so always verify the actual specified throw ratio rather than assuming based on a marketing label like “short throw.” For more on how ultra-short-throw models specifically compare to standard setups beyond just the distance math, see our guide on best ultra-short-throw projectors.
Ultra-Short Throw in Practice
UST projectors are specifically engineered to sit just inches from the screen, often on a low cabinet or shelf directly beneath a wall-mounted screen. This eliminates the need for ceiling mounting and the associated cable routing, but typically requires a specially designed ALR (ambient light rejecting) screen to perform well, since the extreme projection angle interacts differently with a standard screen surface. The guide on ALR screens for UST projectors covers this pairing in detail.
Standard Throw in Practice
Standard and long-throw projectors need significantly more room depth, but offer broader installation flexibility in terms of zoom range and lens shift, which can make fine-tuning image position considerably easier in a dedicated theater room. These are the most common type found in premium home cinema setups; our guide on best home theater projectors and the comparison piece on Epson LS12000 vs. JVC NZ500 both feature standard-throw models extensively.
More Worked Examples Across Different Scenarios
Seeing the formula applied to a few different real-world scenarios tends to cement the concept faster than reading about it abstractly. Here are several additional worked examples covering different screen sizes, aspect ratios, and throw ratio categories.
Example: A Smaller Room with a Short Throw Projector
Throw ratio: 0.8:1 · Target screen: 90″ diagonal, 16:9 · Width: 90 × 0.872 = 78.5″ · Throw Distance = 0.8 × 78.5 = 62.8″ (≈5.2 ft)
Example: A Large Dedicated Theater with a Standard Throw Projector
Throw ratio: 1.6:1 · Target screen: 130″ diagonal, 16:9 · Width: 130 × 0.872 = 113.4″ · Throw Distance = 1.6 × 113.4 = 181.4″ (≈15.1 ft)
Example: A 4:3 Aspect Ratio Classroom Screen
Throw ratio: 1.5:1 · Target screen: 80″ diagonal, 4:3 · Width: 80 × 0.8 = 64″ · Throw Distance = 1.5 × 64 = 96″ (8 ft)
Example: Working Backward — Known Room, Unknown Screen Size
Sometimes you know exactly how much room depth you have available and need to find the largest screen size that will fit, rather than starting from a target screen size. In this case, rearrange the formula to solve for width instead: Image Width = Throw Distance ÷ Throw Ratio.
Available throw distance: 10 feet (120″) · Throw ratio: 1.4:1 · Image Width = 120 ÷ 1.4 = 85.7″ · Diagonal (16:9) = 85.7 ÷ 0.872 = ~98.3″ diagonal screen
⚠️ Remember the rearranged formulas: If you know distance and width, find throw ratio with TR = D ÷ W. If you know throw ratio and distance, find width with W = D ÷ TR. All three versions come from the exact same underlying relationship — just solve for whichever variable you don’t already know.

Found your ideal screen size?
Browse fixed-frame and motorized projector screens sized to match your calculationCommon Mistakes to Avoid When Calculating Throw Distance
Even with a simple formula, a handful of recurring mistakes trip people up consistently. Watching for these specifically will save you from having to redo measurements later.
- Using diagonal screen measurement directly in the formula instead of converting to width first
- Forgetting that 4:3 and 16:9 aspect ratios use different diagonal-to-width conversion factors
- Measuring floor-to-wall distance instead of actual lens-height horizontal distance for ceiling mounts
- Assuming a single throw ratio number when the projector actually has a zoom range
- Ignoring the minimum focus distance, which can prevent some lenses from focusing properly at extremely short distances
- Not accounting for furniture, light fixtures, or other obstacles that might sit in the actual projection path
- Skipping the manufacturer’s official chart cross-check, especially for projectors with unusual lens designs
Why the Diagonal-vs-Width Mistake Is So Common
Screen sizes are marketed by diagonal measurement almost universally, since it produces a bigger, more impressive-sounding number than width alone. That marketing convention is so deeply ingrained that it’s genuinely easy to plug a diagonal figure directly into the throw distance formula without converting first, which produces a meaningfully incorrect result — often overestimating the required distance by 13 to 20 percent depending on aspect ratio.
Why Minimum Focus Distance Matters for Very Short Throws
Beyond the throw ratio itself, most projector lenses have a minimum focus distance below which the image can’t be brought into sharp focus, regardless of what the throw ratio math suggests. This becomes especially relevant with ultra-short-throw projectors operating near the edge of their design range; always check this secondary spec alongside throw ratio for UST installations specifically.
Quick Reference: Throw Distance by Common Screen Size and Ratio
Use this table as a fast lookup for some of the most commonly requested screen size and throw ratio combinations, all calculated for standard 16:9 aspect ratio screens.
| Screen Size (Diagonal) | Width (16:9) | Distance @ 0.4:1 (UST) | Distance @ 1.0:1 | Distance @ 1.5:1 |
|---|---|---|---|---|
| 80″ | 69.8″ | 27.9″ | 69.8″ (5.8 ft) | 104.7″ (8.7 ft) |
| 100″ | 87.2″ | 34.9″ | 87.2″ (7.3 ft) | 130.8″ (10.9 ft) |
| 120″ | 104.6″ | 41.9″ | 104.6″ (8.7 ft) | 156.9″ (13.1 ft) |
| 150″ | 130.8″ | 52.3″ | 130.8″ (10.9 ft) | 196.2″ (16.4 ft) |
Figures rounded for readability. Always verify against your specific projector’s official throw distance chart before finalizing a purchase or installation, since real lenses can vary slightly from theoretical ratio math.
If you’re trying to decide between a few different throw ratio categories for your specific space, the comparison breakdown in UST vs. standard throw projectors walks through additional tradeoffs beyond distance alone, including installation complexity and screen compatibility.
Frequently Asked Questions
What is the formula for projector throw distance?
Throw distance equals throw ratio multiplied by image width (D = TR × W). If you know the throw distance and image width instead, you can find the throw ratio by dividing distance by width (TR = D ÷ W). All three values stay proportional to one another.
How do I convert screen diagonal size to width?
For the common 16:9 aspect ratio, multiply the diagonal measurement by approximately 0.872 to get the horizontal width. For example, a 100-inch diagonal screen has a width of about 87.2 inches. For 4:3 aspect ratio screens, multiply the diagonal by approximately 0.8 instead.
What throw ratio is considered ultra-short throw?
Ultra-short throw (UST) projectors typically have a throw ratio below 0.4:1, meaning they can produce a large image from just inches away from the screen. Short throw projectors generally fall between roughly 0.4:1 and 1.0:1, while standard or long throw projectors usually sit above 1.0:1.
Why does my projector show a range of throw ratios instead of one number?
Projectors with a zoom lens list a throw ratio range, such as 1.2:1 to 1.5:1, rather than a single fixed number. The lower number represents the widest zoom setting (largest image from a given distance) and the higher number represents the most telephoto setting (smallest image from that same distance), giving you flexibility within a range of usable distances.
Can I use throw distance calculations for any screen size?
Yes, the throw ratio formula scales proportionally to any screen size, since throw ratio itself is a fixed property of the projector’s lens, not the screen. The same projector at the same distance will simply produce a smaller or larger image depending on zoom setting, but the underlying ratio math applies whether you’re calculating for an 80-inch or a 150-inch screen.
Do I measure throw distance to the wall or to the actual screen surface?
Throw distance should be measured from the projector’s lens to the actual screen surface, not necessarily the wall behind it, since some screens (especially fixed-frame or motorized models) sit slightly forward of the wall. For most setups the difference is negligible, but it can matter in precise installations with very short throw ratios.
What happens if I place my projector too close or too far from the screen?
If the projector is too close, the image will be smaller than desired and may not fill the screen, or in extreme cases may not focus properly within the lens’s minimum distance. If it’s too far, the image will overflow past the edges of your screen or wall space. Both situations require physically moving the projector or screen, since most zoom lenses only correct image size within a limited range.
Does lens shift affect throw distance calculations?
Lens shift adjusts the position of the image without moving the projector itself, but it doesn’t change the underlying throw distance calculation. You still need the projector positioned at roughly the correct distance from the screen for your desired image size; lens shift then fine-tunes vertical and horizontal placement within that constraint.
Is throw ratio the same for every projector at a given price point?
No, throw ratio varies significantly even among similarly priced projectors, since it’s determined by the specific lens design rather than overall projector quality or cost. Two projectors at the same price can have very different throw ratios, which is exactly why checking this spec against your room before buying matters more than comparing price alone.
How accurate do I need to be when measuring my room for throw distance?
Aim for accuracy within an inch or two when measuring your intended throw distance, since small errors compound less at standard throw ratios but can meaningfully shift image size at very short throw ratios. Always build in a few inches of flexibility if your projector has a zoom lens, since that range gives you room to correct for minor measurement imprecision.
Can I calculate throw distance for a ceiling-mounted projector the same way?
Yes, the horizontal throw distance formula works the same way regardless of whether the projector sits on a shelf, a ceiling mount, or a stand, since throw distance is measured as the horizontal distance from lens to screen, not the vertical drop from the ceiling. You will, however, need to separately account for vertical offset and lens shift range when ceiling mounting.
What’s the difference between throw distance and viewing distance?
Throw distance is the distance from the projector’s lens to the screen, used to determine image size. Viewing distance is the distance from the seating area to the screen, used to determine comfortable viewing ergonomics and recommended screen size for your seating. The two are related but calculated independently using different formulas.
Conclusion: A Five-Minute Calculation That Prevents a Frustrating Installation
The entire throw distance calculation comes down to one formula, applied carefully: multiply throw ratio by image width to get distance, and rearrange as needed if you’re solving for a different variable. Everything else in this guide — converting diagonal to width, handling zoom ranges, measuring your actual room, and cross-checking against the manufacturer’s chart — exists to make sure that one formula gets applied to accurate numbers rather than rough guesses.
Do this math before you buy, not after the projector arrives and the return window is already ticking. A few minutes with a calculator and a tape measure is a small price for the confidence of knowing your chosen projector and your actual room are mathematically compatible before you commit to anything — and once you’ve worked through the steps here once, you’ll find the whole process takes only a few minutes the next time around.
Ready to Measure and Shop?
Browse projectors filtered by throw ratio and room compatibility to find the right match for your space.
Browse Projectors on AmazonIf you’re still narrowing down which projector category fits your room, the comprehensive guide to best projectors for every budget and room size is a strong next step, and the focused comparison in UST vs. standard throw projectors can help you decide between the two major installation approaches before you finalize your throw distance math.