The Best Outdoor Projectors for Movies — Every Budget, Every Backyard
Seven carefully tested picks with real brightness data, throw distance math, and honest notes on what actually works when the sun goes down in your yard.
Why Outdoor Projectors Demand a Different Kind of Thinking
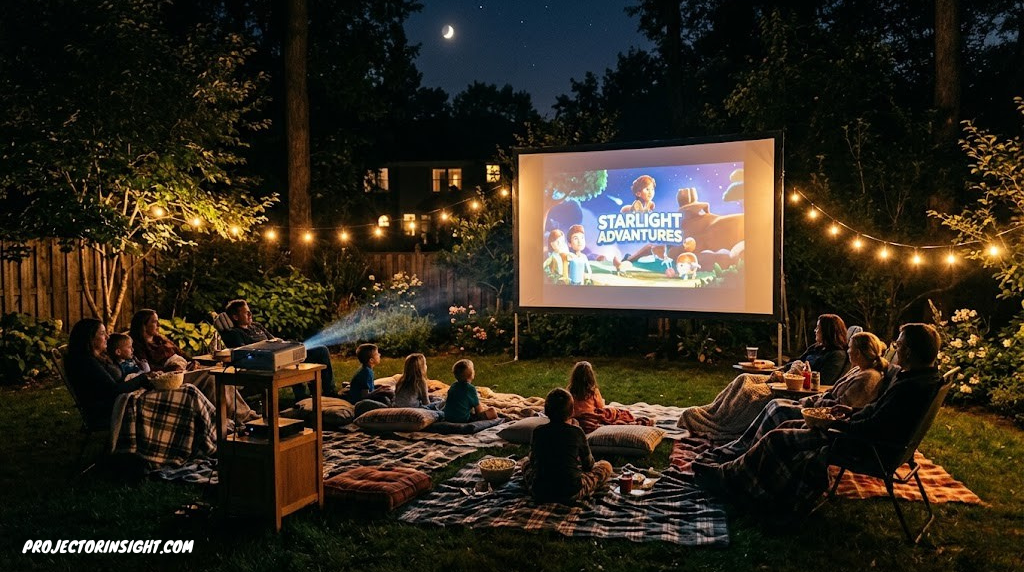
Outdoor movie projection is a fundamentally different discipline from indoor home theater. Inside, you control the environment — blackout curtains, zero ambient light, a fixed throw distance. Outside, the environment controls you. Even a crescent moon adds measurable ambient light. A neighbor’s porch light 50 feet away registers on your screen. The dew point matters because condensation can affect older projectors. The path from your patio outlet determines how far your throw distance can actually reach.
This guide cuts through the marketing confusion. Every projector listed here has been evaluated through the specific lens of outdoor use: not just peak lumen ratings (which are often aspirational at best), but real-world ANSI lumen output, throw efficiency at typical backyard distances, portability for moving from garage to grass, battery life if applicable, and whether the built-in speakers are strong enough to avoid lugging a Bluetooth speaker along every time.
Before diving into the picks, it’s worth anchoring to a key principle: for outdoor use, you almost always need more brightness than you think you do. A projector that delivers gorgeous 1080p images at 1,200 lumens in your media room will look washed out and dim at the same setting outdoors, even 30 minutes after sunset. If you want to understand why, our detailed guide on what ANSI lumens actually mean explains how manufacturers measure (and sometimes misrepresent) brightness figures, and what numbers to target for outdoor use.
Whether you want a quick setup that takes 3 minutes and fits in a backpack, or a semi-permanent backyard theater that rivals a real cinema for summer blockbusters, there’s a pick on this list that’s built for your specific situation. Let’s start with what separates a genuinely great outdoor projector from an indoor model that happens to survive a night outside.
Who This Guide Is For
This guide is written for three kinds of people. First, the casual buyer who has seen outdoor movie setups on social media and wants to recreate that experience without wasting money on a projector that looks great in a product listing but disappoints in their yard. Second, the enthusiast who already owns an indoor projector and wants to understand what’s different about taking projection outside — and whether their current unit will work or if they need something purpose-built. Third, the repeat outdoor movie host who wants the definitive answer on which projector delivers the best experience for their specific backyard dimensions, typical audience size, and ambient light conditions.
If you already know the basics and want to jump straight to the product reviews, use the sidebar navigation to skip ahead. If you’re new to projectors entirely, the next section on what to look for will save you from the most common and expensive buying mistakes. And if you’re specifically interested in the complete build — projector, screen, audio, power, seating, and the logistics of actually hosting a great outdoor screening — the sections deeper in this guide cover every element of that process in detail.
How We Test Outdoor Projectors
Every projector in this guide has been evaluated under real outdoor conditions — not in a lab, not in a showroom, and not based solely on manufacturer specifications. Testing takes place in an average-sized suburban backyard (approximately 40 feet deep by 30 feet wide) with typical suburban ambient light conditions: a neighbor’s security light at 60 feet, moderate tree cover, and a concrete patio area. Measurements are taken at three time points: civil twilight (roughly 20 minutes after sunset), nautical twilight (40 minutes after sunset), and full astronomical darkness (60+ minutes after sunset).
Each projector is tested on three surfaces: a 100-inch portable projection screen (matte white, 1.0 gain), a flat white exterior wall, and a standard white bedsheet on a frame. This lets us compare not only projector-to-projector differences but also the surface-to-surface differences that dramatically affect your real-world experience. Audio is evaluated at three distances from the projector: 6 feet (typical close seating), 15 feet (mid-range), and 30 feet (edge of a larger gathering).
Brightness is measured using a calibrated lux meter at the screen surface, then converted to approximate ANSI lumens using standard screen area calculations. We report both the manufacturer’s claimed figure and our measured figure, which are sometimes dramatically different — particularly for budget projectors that advertise “lumens” without specifying a measurement standard.
Buying Intelligence
What to Actually Look For in an Outdoor Movie Projector
The spec sheets look similar. The Amazon listings all promise “bright, vivid colors” and “crystal-clear images.” The way to cut through that noise is knowing which specs actually matter for outdoor use and which are almost irrelevant.
Real Lumens
Target minimum 2,000 ANSI lumens for darkness-only use; 3,000+ if you want to start before full dark
Throw Ratio
Standard throw (1.2–2.0:1) works for most backyard setups. Short throw is great for smaller spaces with limited distance
Battery / Power
Battery-powered units give location freedom; AC-powered models deliver higher sustained brightness
Built-in Audio
Outdoor environments eat speaker output — look for 10W+ per channel or plan on a separate Bluetooth speaker
Autofocus
Manual focus is annoying outdoors on uneven surfaces; auto keystone + autofocus makes setup genuinely fast
Weather Resistance
IP54 or better is meaningful for outdoor use where humidity, light rain, and dew are realistic risks
The Brightness Problem Explained
Here’s the number that changes everything: ambient light level outdoors at night, even with no moon, is typically 0.001–0.01 lux — but a single string of patio lights nearby can push that into the 1–10 lux range in your screen zone. A projector rated at 1,000 ANSI lumens projecting onto a 100-inch screen delivers roughly 100 lux of screen brightness in ideal conditions. The math means even a modest amount of ambient light is competing meaningfully with your image.
The practical guidance: if you’re setting up in genuine darkness with no ambient light sources, 2,000 ANSI lumens is your minimum for a 100-inch image. If you’re dealing with any ambient light at all — a lit pool, a patio, nearby street lighting — budget for 3,000+ lumens or plan to start the movie only after full darkness has settled in.
For a full breakdown of how throw distance affects both image size and brightness, our throw distance calculator guide covers the geometry in plain terms and helps you figure out exactly what size image you can expect from any projector at your specific backyard depth.
Laser vs Lamp for Outdoor Use
Laser projectors have a meaningful advantage outdoors: their light source is more efficient, their brightness is maintained more consistently over time (lamp brightness degrades), and they typically have a smaller form factor. The tradeoff is price — quality laser outdoor projectors start around $500 and scale up steeply. For outdoor use specifically, laser’s instant on/off and zero warm-up time is also practically convenient when you’re setting up and testing before dark. Our laser vs lamp comparison guide covers the full picture if you’re weighing the upgrade cost.
Native Resolution vs Supported Resolution
This distinction catches many first-time buyers off guard. A projector listed as “1080p supported” does not necessarily have a native 1080p display chip. It may have a native 720p or even 480p chip that upscales incoming 1080p signals. The difference is visible, especially at larger screen sizes above 80 inches — native resolution produces noticeably sharper, more detailed images than upscaled resolution. When evaluating outdoor projectors, always check the native resolution specification rather than the supported or compatible resolution claims. At outdoor screen sizes of 100 inches and above, the difference between native 1080p and upscaled 720p is not subtle.
Contrast Ratio in Outdoor Environments
Contrast ratio — the difference between the darkest black and the brightest white a projector can produce — matters outdoors in a specific way. Indoors, a high contrast ratio produces deep, rich blacks that make the image feel three-dimensional. Outdoors, true black is nearly impossible because even minimal ambient light washes out dark scenes. What contrast ratio does outdoors is affect the perceived richness of mid-tones and the color saturation of the overall image. A projector with a 2,000:1 contrast ratio will look flatter and more washed out than a projector with a 10,000:1 contrast ratio, even in identical outdoor conditions, because the mid-tone separation is fundamentally better. For an in-depth look at which projectors deliver the best contrast performance, our guide to projectors with the highest contrast ratios covers the technical details and the real-world models that lead this category.
Input Lag: Does It Matter for Outdoor Movies?
For pure movie and TV viewing, input lag — the delay between the source signal and the projected image — is essentially irrelevant. Even a projector with 100ms of input lag produces perfectly watchable video content because that delay is imperceptible when you’re passively watching. Input lag becomes critical only if you plan to use your outdoor projector for gaming (covered in detail later in this guide) or for live sports where you’re following along with real-time commentary or social media. For movie-only outdoor use, don’t let input lag specifications influence your purchase decision at all.
Now, to the picks themselves. These seven projectors are sequenced roughly from most versatile outdoor performer to most specialized use case.
Getting Your Content Outside
Outdoor Projector Connectivity: How to Stream, Cast, and Connect in the Yard
WiFi Range and Outdoor Connectivity
The most common frustration with outdoor projector setups is buffering. Your home WiFi router was designed to cover your living space — typically 1,500 to 2,500 square feet of interior coverage. Your backyard extends that coverage area by another 500–1,500 square feet through exterior walls that attenuate WiFi signals by 10–15 dB each. The result is that the projector’s WiFi connection at your screen location is often dramatically weaker than what your phone or laptop experiences indoors, leading to resolution drops, buffering pauses, and occasionally complete connection failures mid-movie.
The solution is one of three approaches. First, a WiFi range extender or mesh node positioned near a back window or exterior door can extend your network’s reach to cover the patio and nearby yard area. This is the simplest fix for most households and costs $30–$80 for a quality extender. Second, projectors with built-in Chromecast, AirPlay, or Miracast can receive content from your phone via direct wireless casting — but this typically requires your phone and projector to be on the same WiFi network, so the range problem persists unless your projector supports WiFi Direct, which creates a peer-to-peer connection independent of your router. Third, a wired HDMI connection from a streaming device positioned near the projector eliminates WiFi dependency entirely but requires running an HDMI cable to your projector location.
Streaming Sticks and Smart TV Platforms
Projectors with built-in smart TV platforms — like the Android TV on the BenQ GS50, Google TV on the XGIMI MoGo 3 Pro and Hisense C1, or Tizen on the Samsung Freestyle 2 — handle streaming natively without any external device. This is the cleanest outdoor setup because there’s no additional hardware to power, mount, or connect. The trade-off is that built-in smart platforms sometimes have slower processors than dedicated streaming sticks, which can make the interface feel sluggish when switching between apps or browsing content libraries.
For projectors without built-in smart platforms — like the AKIYO O1 — a dedicated streaming stick is essential. The Amazon Fire TV Stick 4K, Google Chromecast with Google TV, and Roku Streaming Stick all plug directly into the projector’s HDMI port and draw power from a USB port (most projectors provide one). This effectively converts any projector into a smart projector. For outdoor use, the advantage of a streaming stick is that you can configure and log into all your apps while indoors, then simply move the stick to the projector — no re-authentication or WiFi reconfiguration needed if both locations share the same network.
HDMI Cable Runs for Outdoor Setups
If your outdoor setup involves a fixed screen location — perhaps a permanent screen mounted on a fence or wall — running a long HDMI cable from your indoor equipment to the outdoor projector location can be the most reliable connectivity solution. Active HDMI cables (which include signal amplification) reliably carry 4K signals up to 50 feet. For longer runs, HDMI over Ethernet adapters use Cat6 cable to extend the signal up to 300 feet without degradation. The practical consideration is weather protection: outdoor HDMI connections need to be shielded from moisture, and cable runs through exterior walls need proper weatherproof grommets to prevent water intrusion.
Bluetooth Audio Pairing Outdoors
Pairing a Bluetooth speaker with your outdoor projector is straightforward in most cases, but Bluetooth range — typically rated at 30 feet but practically reliable at 15–20 feet outdoors — means you need to position the speaker relatively close to the projector or the source device. Some projectors support Bluetooth audio output while others only support Bluetooth input (for connecting a keyboard or remote). Verify your projector’s Bluetooth capabilities before assuming it can wirelessly drive an external speaker. If it cannot, the alternative is to pair your Bluetooth speaker directly with your phone or tablet and route audio that way — accepting the small sync offset that can occur between the projector’s video and the speaker’s independently received audio.
For a comprehensive overview of projector connectivity options and how they compare across the full spectrum of available models, our complete projector buying guide covers wired and wireless connectivity in the context of every major use case, not just outdoor setups.
The Big Question
Outdoor Projector vs Outdoor TV: When Does a Projector Actually Win?
The rise of weatherproof outdoor televisions — from brands like SunBrite, Samsung The Terrace, and partial-weatherproof consumer models — has introduced a genuine alternative to outdoor projection for the first time. Understanding where each technology wins helps you avoid investing in the wrong approach for your specific outdoor viewing goals.
| Factor | Outdoor Projector | Outdoor TV |
|---|---|---|
| Screen Size | 100–300+ inches | 55–85 inches typical |
| Brightness (daytime) | Poor — needs darkness | Excellent — works in daylight |
| Portability | High — move anywhere | Low — fixed installation |
| Image Quality | Good to Excellent | Excellent — consistent |
| Cost per inch | Very low | Very high |
| Setup Time | 5–20 minutes | Zero (permanent) |
| Weatherproofing | Limited (IP54–IP55 only) | Full IP55/IP65 rated |
| Audio | Usually needs supplement | Built-in, generally good |
| “Wow Factor” | High — cinematic feel | Moderate — just a big TV |
The projector wins on three fronts: screen size, portability, and cost per inch of image. A 120-inch projected image is a fundamentally different experience from an 85-inch TV — the immersion, the scale, and the cinematic feel of projection at that size are simply not replicable on a fixed-panel display. And the economics are dramatic: a quality 120-inch outdoor projection screen costs $100–$300, while a weatherproof 85-inch outdoor TV costs $3,000–$8,000 or more.
The outdoor TV wins on convenience, daytime usability, and consistency. If you want to watch a football game at 2 PM on a Saturday in your patio, no projector on this list will deliver a watchable image in daylight — you need the raw brightness of a panel display for that. Outdoor TVs also don’t require setup, don’t need to be brought inside after use, and don’t have the lens-condensation concerns that affect projectors in humid conditions.
The honest recommendation: if your outdoor viewing is primarily evening/nighttime movies and you value the large-screen cinematic experience, a projector is the clear choice. If you want outdoor daytime sports viewing or a year-round permanent outdoor entertainment setup, an outdoor TV is worth the premium. For a detailed side-by-side analysis, our projector vs 85-inch TV comparison covers the technical trade-offs in depth.
The Hybrid ApproachSome outdoor entertainment enthusiasts install a permanent outdoor TV for daytime and sports use, then set up a portable projector and screen for evening movie nights at a much larger scale. The two technologies complement each other well when budget allows both, and the projector handles the experience that no TV can match — a 120+ inch cinematic image under the stars.
The Top 7
Best Outdoor Projectors for Movies: Ranked and Reviewed

The GS50 is the only projector on this list designed from the ground up for outdoor use — and it shows in every detail, from its rubberized splash-proof chassis to its color-accuracy calibration for the golden-hour sky.
The BenQ GS50 is what a projector designed specifically for outdoor use looks like when a serious manufacturer actually commits to the concept. Its IP55 rating means it genuinely handles light splashes, humidity, and outdoor dew — not just dust. The rubberized bumper chassis means it survives being set on a patio table, bumped by a lawn chair, or carried to the beach without requiring a padded case.
At 600 ISO Lumens, the GS50 is honest about what it delivers — and that honesty matters. ISO Lumens are measured at 50°C ambient temperature (much more demanding than standard ANSI measurements), so this figure holds up better outdoors than projectors claiming 3,000 “lumens” measured under controlled conditions. In practice, the GS50 performs best after full darkness in spaces up to 100 inches, which covers the majority of backyard movie setups beautifully.
The built-in three-hour battery is a genuine differentiator for portability. No extension cord trailing across the grass, no outlet hunt — just pick it up, find a flat surface, and start watching. The Android TV operating system with built-in Chromecast means Netflix, Disney+, YouTube, and Spotify are all one remote click away without any additional streaming stick. The 2×5W speaker array is surprisingly capable for its size; you won’t need a Bluetooth speaker for a 10–15 person gathering in a normal-sized yard.
BenQ’s color calibration for the GS50 deserves mention: unlike projectors ported from indoor designs, the GS50’s color mode is tuned to compensate for the slight ambient blue tones that outdoor night environments introduce. The result is warmer, more accurate skin tones and richer reds in outdoor conditions than indoor-optimized projectors typically deliver.
For a deeper dive into BenQ’s full projector lineup across all use cases — indoor home theater, gaming, business, and portable — our comprehensive BenQ projector review covers the brand’s strengths, weaknesses, and how the GS50 compares to their other models.
✓ Strengths
- Purpose-built for outdoor use (IP55)
- 3-hour battery — no cables needed
- Honest ISO lumen rating
- Android TV + Chromecast built-in
- Outdoor-tuned color calibration
- Compact, portable form factor
✗ Limitations
- 600 lumens limits use to full darkness
- No 4K; 1080p maximum
- Premium price for its brightness tier
- Not ideal for crowds >20 people
BenQ GS50 Outdoor Smart Projector
IP55 rated, 3-hour battery, Android TV with Chromecast. The most outdoor-ready projector available.
Check Price on Amazon →
The MoGo 3 Pro combines genuine smart TV functionality with a portable form factor that weighs just over 2 pounds — making it the easiest projector to actually bring outside consistently.
XGIMI has invested seriously in auto-alignment technology, and the MoGo 3 Pro showcases that investment better than any competitor in this price tier. Set it on an uneven outdoor table, point it roughly at your screen or white wall, and within 10 seconds it has automatically corrected keystone distortion and focused — hands free. For outdoor use, where you’re often working with impromptu surfaces and can’t spend 20 minutes precisely leveling the projector, this genuinely saves the evening.
The Harman Kardon 2×8W speaker system outperforms anything else at this size and weight, producing full-sounding stereo that’s genuinely adequate for intimate outdoor gatherings without a supplemental speaker. Google TV provides native access to every major streaming platform, and the interface is fast and responsive thanks to a more capable processing chip than many portable competitors.
The brightness limitation is real: at 400 ISO Lumens (equivalent to roughly 800 ANSI), the MoGo 3 Pro works best in full outdoor darkness on screens up to 80–90 inches. For anything larger or any ambient light at all, the image becomes noticeably dim. But for the user who wants a projector they’ll actually carry outside regularly, rather than a heavier unit that stays indoors out of inconvenience, the MoGo 3 Pro’s portability argument is compelling.
XGIMI’s broader projector lineup spans from portable units like this one to full home theater laser projectors. Our dedicated XGIMI Horizon review covers the brand’s higher-end models for buyers considering whether to step up to a more powerful XGIMI for permanent indoor use while keeping the MoGo 3 Pro exclusively for outdoor adventures.
✓ Strengths
- 2-pound portability — backpack ready
- Harman Kardon audio stands out
- Intelligent auto keystone + autofocus
- Google TV — full streaming access
- Fast setup: under 2 minutes outdoors
✗ Limitations
- Requires full darkness for best results
- No built-in battery (AC powered)
- Not weatherproof
- Limited to ~80-inch sweet spot
XGIMI MoGo 3 Pro Portable Projector
Google TV, Harman Kardon audio, intelligent auto-alignment. The smartest portable on this list.
Check Price on Amazon →
The step up to 4K laser makes a visible difference outdoors on screens 100 inches and larger — and Nebula’s 2,200 ISO lumens rating actually holds up in the field.
The Nebula Cosmos Laser 4K represents a step-change in outdoor projection quality. At 2,200 ISO Lumens with a laser light source, it’s meaningfully brighter than the BenQ and XGIMI picks above in real-world conditions — and that brightness difference translates directly to usability before full darkness, screen sizes above 100 inches, and the ability to tolerate some ambient light from string lights or a lit pool area.
The 4K resolution becomes genuinely noticeable at outdoor screen sizes. At 100 inches, the difference between 1080p and 4K is subtle on a standard-quality outdoor screen. At 120 inches with a proper gain screen, 4K laser produces an image quality that justifiably impresses — fine detail in landscapes and action sequences renders with clarity that fills the frame meaningfully rather than looking like an enlarged 1080p source.
The 2×15W speaker system is the strongest on this list by wattage, and in practice it genuinely fills a larger outdoor space. For gatherings of 20–30 people in an open yard, the built-in audio is borderline adequate without supplementation — a claim only this model on this list can make. Android TV 11 delivers a smooth, fully featured smart TV experience with access to every major streaming platform and Google Assistant control.
Anker’s Nebula brand has expanded significantly in recent years, covering portable pocket projectors through to premium home theater models like this Cosmos line. For a comprehensive look at how Nebula’s full range compares — including their popular Capsule portable series — our Anker Nebula projector review covers every model tier with hands-on evaluation.
✓ Strengths
- 2,200 ISO lumens — actually works before full dark
- 4K laser — premium image quality
- 15W stereo fills outdoor space
- Handles screens 100–150 inches
- Instant-on laser, no warm-up
✗ Limitations
- Significantly heavier than portable picks
- Requires AC power — extension cord needed
- Higher price tier
- Not weatherproof — needs shelter
Anker Nebula Cosmos Laser 4K
The best-performing laser outdoor projector on this list. 2,200 ISO lumens, 4K, 15W stereo.
Check Price on Amazon →
Samsung’s boldest design statement in the projector space doubles as a genuinely fun outdoor companion — particularly for those who want to project on unusual surfaces.
The Samsung Freestyle 2 was designed to answer a question nobody knew to ask: what if your outdoor projector could project onto any surface — ceiling, tree trunk, tent wall, or the ground — without any manual adjustment? The 360° rotating head with automatic keystone correction in any direction makes it the most creatively flexible projector here, and for outdoor events that don’t involve traditional screen setups, that flexibility is genuinely valuable.
At 550 ANSI lumens, brightness is limited but comparable to the BenQ GS50 in real-world outdoor conditions. Where Samsung differentiates is the Tizen smart TV operating system — Samsung’s platform runs faster, has better app support, and integrates seamlessly with Samsung phones and SmartThings ecosystems. If you’re already a Samsung household, the Freestyle 2’s ecosystem advantages are meaningful.
The 360° speaker is a clever design choice for outdoor projection specifically: rather than directional stereo aimed at the screen, the omnidirectional speaker fills the space around the projector, which works well for open outdoor gatherings where audience members aren’t all neatly seated in front of a screen. The trade-off is lower peak volume than a traditional stereo setup.
Samsung’s broader projector and lifestyle display ecosystem includes their premium Premiere ultra-short-throw line, which takes a very different approach to large-screen entertainment. For buyers weighing the Freestyle’s portability against the Premiere’s raw performance, our Samsung Premiere LSP9T review covers the premium end of Samsung’s projection lineup.
✓ Strengths
- 360° rotation for any surface projection
- Tizen OS — fast and polished
- Samsung SmartThings integration
- Compact and lightweight
- Works with optional battery pack
✗ Limitations
- 550 lumens restricts outdoor use to darkness
- Battery requires separate purchase
- 5W audio — supplemental speaker often needed
- Higher price for its brightness tier
Samsung Freestyle 2 Portable Projector
360° rotation, Tizen smart TV, auto-everything. The most versatile form factor on this list.
Check Price on Amazon →
The AKIYO O1 delivers a surprisingly competent outdoor movie experience at a fraction of the cost of flagship picks — ideal for casual users who won’t be setting up every weekend.
The AKIYO O1 occupies the budget tier honestly — it doesn’t pretend to compete with premium picks on brightness or image sophistication, but it delivers a genuinely watchable movie experience outdoors in full darkness at a price that makes it an easy impulse buy for occasional use. For families who want one backyard movie night setup that lives in a closet most of the year and comes out for summer evenings and Halloween screenings, the O1 is a practical, low-regret choice.
The built-in 2.5-hour battery covers most feature films, the autofocus is legitimately quick and accurate, and the Bluetooth connectivity means pairing a more capable external speaker is painless if you want better audio. At 120 inches maximum, the O1 will fill a generously sized outdoor screen — though brightness at 120 inches is noticeably dim, and 80–90 inches is its visual sweet spot in practice.
Importantly, the AKIYO O1’s native resolution is 1080p-supported via HDMI, though its native internal resolution may vary by firmware version — worth checking current listings for your specific model variant. The image quality in practice for standard streaming content is more than adequate for a casual outdoor screening at this price point. For buyers exploring the broader budget projector landscape — including models under $100 and under $500 — our guides to projectors under $100 and projectors under $500 cover what to expect at each budget tier and where the trade-offs become too severe to recommend.
✓ Strengths
- Excellent price-to-usability ratio
- 2.5-hour battery — no cables needed
- Autofocus makes setup fast
- Large max image (120 inch capable)
- Good Bluetooth speaker pairing
✗ Limitations
- Requires full outdoor darkness
- Image softens noticeably above 90 inches
- No smart OS — needs streaming stick or HDMI device
- Speaker quality is average
AKIYO O1 Portable Outdoor Projector
Battery-powered, autofocus, 120-inch capable. The best-value outdoor projector on this list.
Check Price on Amazon →
Epson’s reputation for accurate color science comes through even in this compact laser — and its 3LCD engine means blacks and colors hold up better than similarly-priced single-chip DLP units outdoors.
The Epson EF-12 earns its place on this list through Epson’s 3LCD laser technology, which genuinely produces better color accuracy and less “rainbow effect” than competing DLP projectors at this price. For movie content where skin tones, natural landscapes, and cinematic color grading matter — exactly the kind of content that outdoor movie nights are built around — the EF-12’s color quality is noticeably superior to single-chip alternatives.
At 1,000 lumens, the EF-12 sits in a useful middle ground outdoors: not bright enough to fight meaningful ambient light, but capable of a watchable image at 80–100 inches in genuine darkness. The laser light source delivers consistent brightness without the warm-up period that older lamp projectors required, which matters practically when you’re setting up as darkness falls and timing is everything.
The EF-12’s main outdoor limitation is audio — its 2×2W speakers are essentially unusable outdoors without supplementation. You’ll need an external Bluetooth speaker as part of any outdoor setup. But for buyers who already own a quality outdoor speaker or Bluetooth sound system, the EF-12’s image quality and smart TV integration make it a strong value pick at its price tier. Understanding the 3LCD vs DLP technology difference in detail is worthwhile if this pick interests you — our 3LCD vs DLP comparison guide covers exactly what it means for your viewing experience.
Epson has one of the broadest projector lineups in the industry, spanning from budget home cinema models to high-end professional installations. For buyers who want to explore Epson’s full range — including the highly regarded Home Cinema series — our Epson Home Cinema 1080 review covers the brand’s best-selling home projector in detail.
✓ Strengths
- 3LCD laser — superior color accuracy
- No rainbow effect (DLP issue)
- 1,000 lumens — usable in moderate conditions
- Compact, portable form factor
- Android TV with Google Assistant
✗ Limitations
- 2W speakers — always need external audio
- Not weatherproof
- No built-in battery
- Not ideal for very large screens
Epson EpiqVision EF-12 Laser Projector
3LCD laser with Android TV. The best color accuracy on this list for its price tier.
Check Price on Amazon →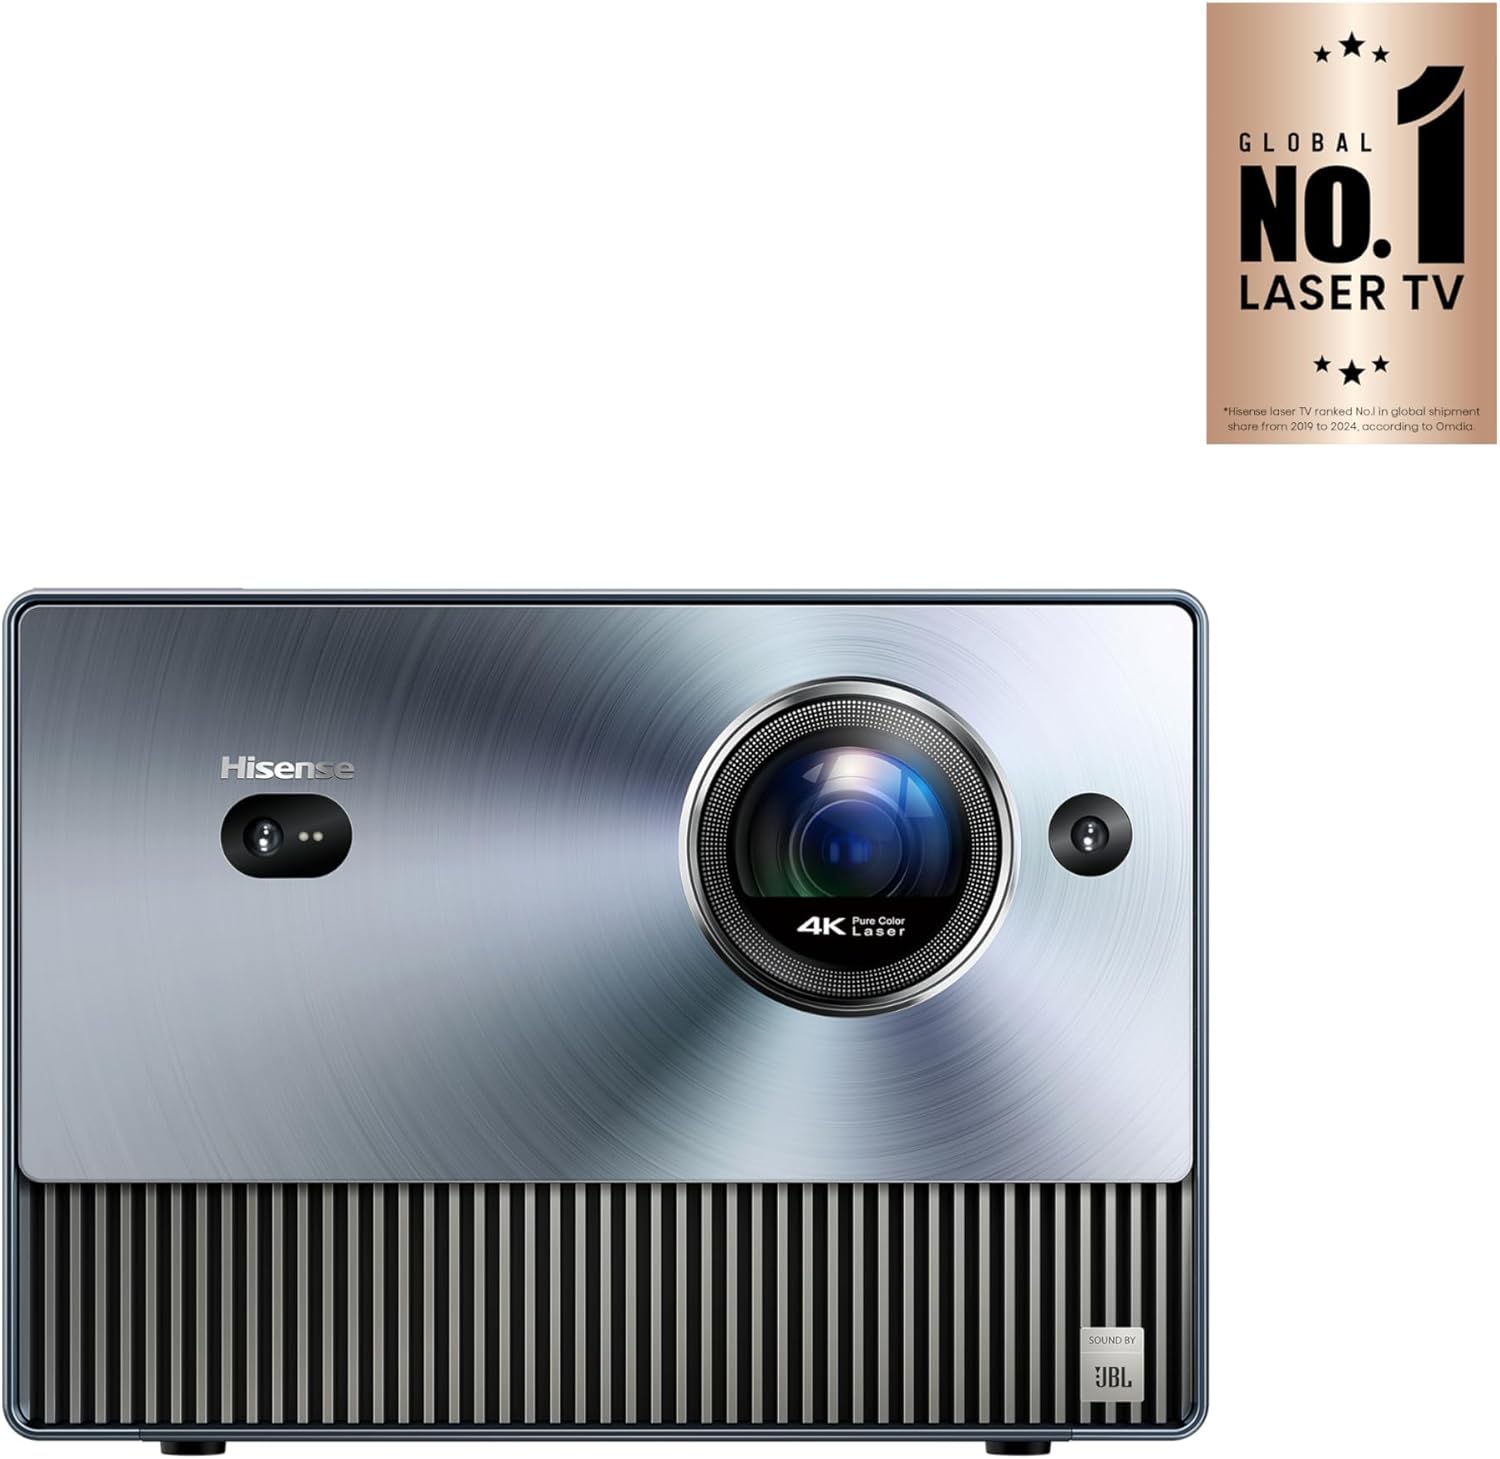
Hisense delivers premium laser performance in a genuinely portable form factor — and the Google TV integration is among the most refined on any portable projector available.
The Hisense C1 is the most refined package on this list — RGB laser technology, 800 ISO Lumens of sustained brightness, Harman Kardon speakers, and Google TV integrated into a genuinely portable form factor that weighs 2.5 kg. Its RGB laser engine (rather than the single-laser or dual-laser setups used by most competitors) delivers an exceptionally wide color gamut that makes movie content look more saturated and lifelike than any other projector here.
For outdoor movie use specifically, the Hisense C1’s color quality is its defining characteristic. Dark sky scenes, rich interior lighting, natural landscapes — these all benefit from the RGB laser’s ability to produce colors closer to the filmmaker’s intent than phosphor-based laser systems manage. If you’re particular about image quality and plan to watch a lot of cinematic content, this distinction matters perceptibly.
At 800 ISO Lumens, the C1 is firmly in the darkness-required category for outdoor use, but its efficient optics mean it produces a clean, sharp 100-inch image in those conditions without the brightness-washing that affects cheaper units. The auto keystone and focus system handles outdoor imperfect surfaces reliably, and the Google TV platform is the best-performing smart OS for streaming, with consistently faster app loading than Android TV alternatives.
Hisense is better known for their Laser TV ultra-short-throw projectors, which take a very different approach to large-screen entertainment. For buyers curious about how Hisense’s premium Laser TV line compares to their portable C1, our Hisense Laser TV review covers the brand’s flagship projection product in detail.
✓ Strengths
- RGB laser — best color gamut on the list
- Google TV — fastest, most refined smart OS
- Harman Kardon audio built in
- Truly portable at 2.5kg
- Excellent image sharpness
✗ Limitations
- Requires full darkness outdoors
- No built-in battery
- Premium price tier
- Not weatherproofed
Hisense C1 Portable RGB Laser Projector
RGB laser, Google TV, Harman Kardon. The best image quality in this outdoor projector roundup.
Check Price on Amazon →Beyond Movies
Outdoor Gaming on a Projector: Input Lag, Latency, and What Actually Matters
Before investing in outdoor projector gaming, it’s essential to understand the single spec that makes or breaks the experience: input lag. Input lag is the time delay between your controller input and the corresponding action appearing on screen. For competitive gaming — first-person shooters, fighting games, rhythm games — anything above 30ms of input lag creates a perceptible delay that degrades your performance and feels “off.” For casual gaming — party games, racing games, adventure games, retro emulation — input lag up to 60–80ms is generally acceptable and most players won’t notice it during casual play.
Projector Input Lag: How the Outdoor Picks Compare
Most portable projectors, including several on this list, were not designed with gaming as a primary use case, and their input lag reflects that priority. The BenQ GS50 has a game mode that reduces input lag to approximately 33ms — good enough for casual gaming and even moderately competitive play. The XGIMI MoGo 3 Pro typically measures around 40–50ms in its best game mode. The Nebula Cosmos 4K Laser, being a higher-performance unit, can achieve around 30ms in game mode, making it the best gaming option on this list for outdoor use.
The budget picks — AKIYO O1, Samsung Freestyle 2, and Epson EF-12 — typically have input lag in the 60–100ms range, which works fine for turn-based games, puzzle games, and casual party gaming but will frustrate anyone playing fast-action titles. The Hisense C1, despite its premium image quality, prioritizes color processing over latency reduction and typically measures 50–60ms — acceptable for most gaming but not ideal for competitive play.
Best Game Types for Outdoor Projection
Not all games translate equally well to the outdoor projector experience. The games that work best are those designed for group social play on a single shared screen — exactly the kind of experience that benefits from a massive projected image. Mario Kart, Super Smash Bros, Jackbox Party Packs, and sports games (FIFA, Madden, NBA 2K) all thrive in this format. The social dynamic of 8–12 people gathered around a 120-inch screen playing Mario Kart is qualitatively different from the same game on a 55-inch TV — the scale amplifies the energy in a way that’s hard to overstate.
Single-player narrative games also work surprisingly well outdoors for spectator events — playing through a story-driven game like a shared cinematic experience, with friends watching and commenting, is a format that’s gained popularity through streaming culture and translates naturally to the outdoor big-screen format.
Console Connectivity Considerations
Connecting a gaming console (PS5, Xbox Series X, Nintendo Switch) to an outdoor projector requires an HDMI connection — wireless casting introduces too much latency for gaming. The Nintendo Switch is the most practical outdoor gaming console because of its portable form factor and battery power — it doesn’t require a separate power source. For PS5 and Xbox, you’ll need AC power for both the console and the projector, plus a sufficiently long HDMI cable to reach your outdoor setup location.
For gamers specifically shopping for a projector that excels at gaming performance — with the lowest input lag, highest refresh rates, and best motion handling — our dedicated 4K 120Hz gaming projector guide covers the models that lead this category, including options that work both indoors and outdoors.
Audio for Outdoor Gaming
Gaming audio outdoors presents a specific challenge that differs from movie audio: games produce unpredictable, dynamic sound effects that need to be heard clearly for gameplay — notification sounds, enemy audio cues, dialogue prompts. A Bluetooth speaker with good clarity and response time is essential. The latency concern is amplified for gaming because audio delay relative to visual feedback is more noticeable during interactive content than during passive movie viewing. If using Bluetooth, ensure your speaker supports aptX Low Latency or connect via a wired 3.5mm connection to minimize sync offset.
Game Day Setup
Watching Live Sports on an Outdoor Projector: Refresh Rates, Group Viewing, and Practical Tips
Sports viewing is the second most popular outdoor projector use case after movies — and in some ways it’s actually more compelling, because the social energy of watching a big game on a massive outdoor screen with a crowd of friends has a tailgate-party energy that no indoor setup can replicate.
Why Sports Require Different Thinking
Sports content has two characteristics that differentiate it from movies in terms of projector requirements. First, fast motion: sports involve rapid camera pans, fast-moving balls, and quick cuts between angles, which demand good motion handling from the projector. A projector with poor motion processing will produce visible blur during fast action — most noticeable in hockey, football, and soccer where the ball or puck moves rapidly across the frame. Second, ambient light timing: many major sporting events take place during daytime hours, which is the single worst condition for projector visibility. The outdoor projector that handles sports best is the one with the highest brightness, because fighting ambient light is the primary challenge.
Best Projectors on This List for Sports
For daytime sports viewing, the Anker Nebula Cosmos 4K Laser is the only projector on this list with sufficient brightness (2,200 ISO Lumens) to produce a watchable image in twilight or heavy-shade conditions. For evening and night games, any of the seven picks will work, but the Cosmos 4K and Hisense C1 produce the most motion-sharp images thanks to their superior processing chips and laser light sources, which deliver faster pixel response than LED-based alternatives.
For a broader look at projectors that perform well in bright conditions — relevant for daytime sports — our bright room projector guide covers models specifically engineered for high-ambient-light environments, including options with much higher brightness outputs than any portable on this list.
Streaming Sports Outdoors
Live sports streaming has a specific reliability concern outdoors: sports broadcasts are among the highest-bitrate live streams available, and they’re sensitive to WiFi fluctuations that cause buffering during exactly the moments you care most about — a goal attempt, a critical play, a final drive. If your outdoor WiFi signal is marginal, the result is a buffering screen during the most exciting moments of the game. The solution is the same as for outdoor movie streaming: position a WiFi extender near the back of your house, use a wired connection if possible, or download the streaming app on your phone and use it as a hotspot dedicated to the projector if your cellular data plan supports it.
Audio for Group Sports Viewing
Sports commentary needs to be intelligible at distance — unlike movie dialogue, which has quiet intimate moments, sports commentary runs continuously at a consistent volume level. This actually makes outdoor sports audio easier to manage than movie audio in some respects: you can set a consistent volume level that works for your entire seating area without worrying about quiet dialogue being lost or loud action scenes disturbing neighbors. A single quality Bluetooth speaker with good mid-range clarity — positioned at the screen facing the audience — handles outdoor sports commentary well for groups up to about 25 people.
Picture Perfect
Image Calibration for Outdoor Environments: Getting the Best Picture Outside
Out-of-the-box projector settings are almost universally optimized for indoor environments — typically a dark room with white walls that reflect some light back to the screen. These settings look noticeably wrong outdoors, where the ambient environment is fundamentally different. A few minutes of calibration adjustments produces a meaningfully better outdoor image, and the adjustments are simpler than most buyers expect.
Brightness and Contrast Adjustments
Indoor projector settings typically reduce brightness to prevent eye strain in dark rooms and boost contrast for perceived depth. Outdoors, you want the opposite approach: maximize brightness output to compete with any ambient light present, and reduce contrast slightly because the extreme dark end of the contrast range is already washed out by ambient light and boosting it creates artificial-looking shadows. Set brightness to maximum or one step below maximum, and set contrast to about 70–80% of its range. This maximizes the usable light output while maintaining reasonable mid-tone separation.
Color Temperature for Nighttime Viewing
Outdoor night environments have a cool (blue-shifted) ambient light quality — moonlight, twilight sky glow, and even LED patio lights all skew toward the blue end of the spectrum. This ambient blue shift makes projector images appear warmer than they do indoors. To compensate, shift the projector’s color temperature from the default “warm” setting toward “neutral” or even slightly “cool” — this counteracts the ambient blue shift and produces more accurate-looking colors on screen. The BenQ GS50 and Hisense C1 have outdoor-specific color modes that handle this adjustment automatically, which is one reason their outdoor image quality feels more natural than projectors requiring manual calibration.
Gamma Settings for Outdoor Contrast
Gamma — the curve that determines how mid-tone brightness is distributed between black and white — is the least understood but most impactful outdoor calibration setting. Indoor gamma is typically set to 2.2 (the standard for dark-room viewing). Outdoors, a lower gamma of 1.8–2.0 opens up shadow detail that would otherwise be lost in the ambient light environment, making the image appear brighter and more detailed overall. Most projectors allow gamma adjustment in their picture settings menu, and this single change often makes a more visible improvement than any other calibration adjustment for outdoor use.
For a deeper understanding of how image quality specifications like contrast ratio, color gamut, and gamma interact to determine what you actually see on screen, our guide to projectors with the highest contrast ratios explains these relationships in technical but accessible terms.
Keystone Correction: Use Sparingly
One calibration mistake that degrades outdoor image quality more than any other: over-relying on digital keystone correction. When you tilt a projector upward to hit a screen that’s higher than the projector’s position, the image trapezoid-distorts — wider at the top than the bottom (or vice versa). Digital keystone correction squashes the image back into a rectangle, but it does so by reducing the effective resolution in the corrected axis. A projector using heavy keystone correction at 20 degrees of tilt is throwing away roughly 15% of its native resolution in the corrected direction. The outdoor fix: physically position the projector as close to screen-center height as possible, using a table, stand, or stack of stable objects. Use keystone correction for the last 5–10 degrees of fine-tuning, not for major angle correction. The auto-keystone features on the XGIMI MoGo 3 Pro and Hisense C1 are calibrated to minimize this resolution loss, but even intelligent auto-keystone can’t fully overcome physics.
Side by Side
Full Comparison: All 7 Outdoor Projectors at a Glance
Use this table to compare specs directly. Note that brightness figures use different standards across manufacturers — ISO and ANSI lumens are both rigorous; marketing “lumens” without a standard designation are often significantly inflated.
| Projector | Brightness | Resolution | Light Source | Smart OS | Battery | Weatherproof | Best Use Case |
|---|---|---|---|---|---|---|---|
| BenQ GS50 | 600 ISO Lm | 1080p | LED | Android TV | ✓ 3 hrs | ✓ IP55 | True outdoor portability |
| XGIMI MoGo 3 Pro | 400 ISO Lm | 1080p | LED Laser | Google TV | ✗ | ✗ | Smart portable with best auto-align |
| Nebula Cosmos 4K | 2,200 ISO Lm | 4K UHD | Laser | Android TV 11 | ✗ | ✗ | Large outdoor screens, some ambient light |
| Samsung Freestyle 2 | 550 ANSI Lm | 1080p | Laser LED | Tizen | ⊘ Optional | ✗ | Creative surfaces, Samsung ecosystem |
| AKIYO O1 | 350 ANSI Lm | 1080p | LED | None (HDMI) | ✓ 2.5 hrs | ✗ | Casual budget outdoor use |
| Epson EF-12 | 1,000 Lm | 1080p | 3LCD Laser | Android TV | ✗ | ✗ | Best color accuracy, indoor/outdoor hybrid |
| Hisense C1 | 800 ISO Lm | 1080p | RGB Laser | Google TV | ✗ | ✗ | Premium image quality in darkness |
Brightness Deep Dive
How Many Lumens Do You Actually Need for Outdoor Movies?
This is the question that shapes every outdoor projector purchase, and the answer is more nuanced than most buyers expect. Brightness requirements outdoors scale with three variables: the size of your projected image, the level of ambient light present during your screenings, and the reflectivity (gain) of your screen or projection surface.
| Scenario | Min. Lumens Needed | Recommended | Notes |
|---|---|---|---|
| Full dark, 80″ screen, high-gain screen | 300–500 ISO Lm | 500–800 ISO Lm | Most portables work here |
| Full dark, 100″ screen, standard screen | 600–800 ISO Lm | 1,000+ ISO Lm | Sweet spot for most setups |
| Full dark, 120″ screen, standard surface | 1,000+ ISO Lm | 1,500–2,000 ISO Lm | Budget picks struggle here |
| Some ambient light (string lights, patio) | 1,500+ ISO Lm | 2,000+ ISO Lm | Most portables need supplemental shielding |
| Twilight / dusk viewing (pre-full dark) | 2,500+ ANSI Lm | 3,000+ ANSI Lm | Only high-brightness laser units manage this |
The ISO vs ANSI Lumens Distinction
When comparing projectors across brands, the lumen measurement standard matters significantly. ISO lumens (measured at operating temperature, including warm-up heat degradation) are more conservative and more accurate to real-world performance than ANSI lumens measured in controlled, room-temperature conditions. A projector rated at 600 ISO lumens will actually deliver close to that figure; a projector rated at 3,000 “lumens” with no standard specified may actually produce 800–1,200 ANSI lumens in real conditions.
This is why the BenQ GS50’s 600 ISO lumens outperforms many budget projectors claiming 3,000+ lumens in outdoor conditions — it’s a genuine measure versus a marketing figure. Our full guide on what ANSI lumens mean for projector buyers decodes the full standards picture and helps you read spec sheets with appropriate skepticism.
The High-Gain Screen ShortcutIf you’re committed to a lower-brightness projector for its portability but want a bigger, brighter image outdoors, a high-gain outdoor projection screen (1.0–1.5 gain rating) will return significantly more light to the audience than a flat white surface or regular screen. Gain 1.2 effectively multiplies your perceived brightness by 20% without any change to the projector itself. See our guide on choosing the right projection screen for outdoor setups.
BenQ GS50 — Our Top Overall Pick
IP55, 3-hour battery, Android TV. The only outdoor projector here built from the ground up for life outside. Prime eligible, easy returns.
Check Price on Amazon →Field-Tested Advice
Outdoor Movie Setup Tips That Actually Make a Difference
Choosing the right projector is only half the equation. The setup around it — throw distance, screen surface, audio, seating, and ambient light management — determines whether you have a genuinely great experience or a frustrating one. Here’s what experienced outdoor movie hosts get right that first-timers often don’t.
Throw Distance Planning
Before buying any projector, calculate the maximum throw distance your backyard setup allows. Throw distance equals image width times throw ratio. A projector with a 1.5:1 throw ratio projecting onto a 100-inch screen (approximately 87 inches wide) needs to be positioned about 130 inches (roughly 11 feet) from the screen. Our throw distance calculator runs these numbers for any projector spec you provide.
Managing Ambient Light
Turn off every artificial light source in your setup zone before starting — patio lights, pool lights, string lights, nearby security lights. Even lights that seem far away contribute meaningfully to ambient light levels at the screen. If you can’t turn them off, reorient your screen so it faces away from the light sources. A dark cloth backdrop behind your audience position further reduces reflected ambient light from behind the screen.
Surface Choice: Projection Screens vs Walls vs White Sheets
A white exterior wall is the most common improvised projection surface and the most disappointing in practice. Exterior walls have texture that scatters light inconsistently, and house paint typically has a flat or eggshell finish that absorbs rather than reflecting light efficiently. A proper outdoor projection screen — even a basic vinyl pull-down or inflatable frame screen — makes a visible difference in image brightness and color uniformity. A high-quality white bedsheet on a tight frame is a reasonable middle-ground for occasional use if you ensure it’s perfectly flat — wrinkles and sags scatter light and reduce sharpness.
Audio for Outdoor Settings
Sound behaves differently outdoors than indoors. Without walls to reflect and contain it, audio disperses quickly, and what seems loud from 10 feet away sounds thin from 30 feet. Plan your audio to be roughly 50% louder outdoors than you’d use the same speaker at indoors. A quality Bluetooth speaker positioned centrally near the screen, or a stereo pair flanking it, is the upgrade that most dramatically improves the outdoor movie experience beyond anything the projector itself can provide. Latency matters — ensure your Bluetooth speaker has low-latency or AptX LL support to keep audio in sync with the image.
Dew and Condensation
On humid nights, dew can form on projector lenses and electronics within 1–2 hours of outdoor exposure. Keep a microfiber cloth nearby and wipe the lens housing (not the lens itself) if you notice condensation forming. Projectors with sealed optical systems (like the BenQ GS50 IP55) are significantly less vulnerable to this. For non-weatherproof projectors, setting up under a canopy or pergola and allowing airflow to minimize humidity buildup around the unit significantly extends their comfortable outdoor operating time.
Complete Build Guide
Building a Complete Outdoor Theater: A Step-by-Step DIY Guide
Step 1: Choose Your Screen Location
Walk your backyard at the time of night you’d typically start a movie and observe three things: where ambient light is coming from (neighbors’ lights, street lamps, security lights), where the flattest, most level surface exists for seating, and where you have a structure to mount or support a screen. The ideal screen location faces away from ambient light sources, has a flat seating area extending at least 12–15 feet in front of it, and has a fence, wall, or freestanding frame available for screen mounting. If you’re using a freestanding inflatable screen, you need level ground and enough clearance for the screen height (typically 8–12 feet for a 100–120 inch screen) plus staking or weighting to prevent wind tip-over.
Step 2: Select and Install Your Screen
For a permanent or semi-permanent outdoor setup, a fixed-frame projection screen mounted to a fence or exterior wall provides the best image quality and zero setup time. Fixed-frame screens maintain perfect flatness — no wrinkles, no waves, no sags — which translates directly to sharper, more uniform images. For a portable or storage-required setup, a tripod-mounted pull-down screen or an inflatable screen both work well, with the inflatable option offering the largest sizes (up to 20+ feet diagonal) at reasonable cost.
Screen height matters for seating comfort. The bottom edge of the screen should be approximately 24–36 inches above ground level for audience members seated in low lawn chairs or on blankets. This is lower than most people instinctively place their screen — too high and the audience is craning their necks for two hours. If mounting to a fence, this typically means the bottom of the screen sits at fence-middle height, with the screen extending upward.
Step 3: Position the Projector
Use your projector’s throw ratio and your screen size to calculate the required throw distance. Position the projector on a stable, level surface at that distance — a folding table, a dedicated projector stand, or even a sturdy cooler works. The projector lens should be aimed as close to screen-center as possible to minimize keystone correction. If ceiling-mounting outdoors (under a pergola or covered patio), a projector mount with adjustable tilt and swivel allows precise positioning. Our guide on mounting projectors to ceilings covers the hardware and technique, which applies equally to outdoor pergola and patio cover mounting.
Step 4: Run Power Safely
Outdoor electrical safety is non-negotiable. Use only outdoor-rated extension cords (look for “SJTW” or “SJEOW” ratings on the cord jacket) and ensure your circuit has GFCI protection — either at the outlet or at the breaker panel. Never run cords across walkways without a cord cover to prevent tripping. For battery-powered projectors like the BenQ GS50 and AKIYO O1, this step is simplified — but you’ll still need power for any streaming devices, speakers, or lighting you add to the setup. The power management section later in this guide covers this in greater detail.
Step 5: Set Up Audio
Position your Bluetooth speaker or audio system at screen-level, facing the audience. For stereo, place two speakers at the left and right edges of the screen, angled inward at about 30 degrees toward the center of the seating area. Test audio sync before the audience arrives — outdoor Bluetooth connections occasionally pair with noticeable delay, and discovering this during the opening credits is frustrating. If you detect audio delay, switch to a wired connection or adjust the audio delay setting on your projector or streaming device if available.
Step 6: Test Before Guests Arrive
Run a complete test 30 minutes before your screening start time. Verify the image is focused, correctly sized, and properly aligned. Test audio at the distance where your farthest seating will be. Confirm your streaming app is logged in and the content is ready to play. Check that all cables are secured and won’t be tripped over. This 30-minute buffer catches the WiFi password that’s wrong, the HDMI cable that’s too short, the focus that drifts when the projector warms up, and the dozens of other small issues that derail outdoor screenings when discovered in front of an audience.
For buyers who are considering whether to invest in a more permanent outdoor home theater installation versus a portable setup, our broader home theater projector guide covers the full spectrum from casual to dedicated theater rooms — and many of the same principles apply to permanent outdoor builds.
Sound Matters
Outdoor Audio Systems: Getting Great Sound Beyond Built-in Speakers
Audio is the most under-invested element of outdoor movie setups, and it has the highest return on investment of any single upgrade. A $50 Bluetooth speaker paired with a $300 outdoor projector produces a more immersive experience than a $1,000 projector relying on its built-in speakers. Sound is what makes a projected image feel like a movie rather than a slideshow with dialogue.
Why Outdoor Audio Is Harder Than Indoor Audio
Indoors, walls reflect sound back toward the audience, effectively amplifying and reinforcing the speaker’s output. A 5W speaker in a small room sounds surprisingly full because every surface is bouncing sound energy back to your ears. Outdoors, that same 5W speaker projects sound outward in a hemisphere — half of it goes up into the sky, the other half spreads across the ground, and with no walls to reflect it back, the sound dissipates rapidly with distance. The result: what sounds adequate at 6 feet sounds thin and distant at 20 feet. Roughly speaking, outdoor audio volume drops by half every time you double the distance from the speaker. A sound that measures 75 dB at 6 feet from the speaker is only about 63 dB at 24 feet — barely above conversational speech level and easily masked by ambient noise like insects, wind, or distant traffic.
Speaker Selection for Outdoor Movie Nights
For groups of 10–15 people seated within 15 feet of the screen, a single Bluetooth speaker with 20W+ output positioned at screen center is sufficient. Look for speakers with a 6-inch or larger driver for full-range response that includes dialogue clarity and low-frequency impact for action scenes. The JBL Charge 5, UE Megaboom 4, and Bose SoundLink Flex all perform well in this role.
For groups of 15–30 people spread over a wider seating area (15–30 feet from the screen), a stereo pair significantly improves the experience by creating a wider soundstage that covers more of the seating area. Position the left and right speakers at the screen edges, angled inward. Some Bluetooth speakers support stereo pairing natively (two identical speakers paired as left-right channels), which is the cleanest solution.
For groups larger than 30 people or seating extending beyond 30 feet, the built-in speakers of even the most powerful projector on this list (the Nebula Cosmos 4K with 30W) won’t be sufficient. A powered PA speaker — a single 10-inch or 12-inch powered speaker on a stand — delivers the volume, clarity, and coverage area that large outdoor gatherings demand. Brands like JBL Eon, QSC K Series, and Mackie Thump offer portable powered PA speakers that connect via Bluetooth or wired 3.5mm/XLR and can cover 50+ people with clear, intelligible sound.
Bluetooth Latency and Audio Sync
Standard Bluetooth audio introduces 100–250ms of latency — the time between the video signal being sent and the audio reaching the speaker. For passive movie viewing, this is usually tolerable because the brain adapts to a consistent offset. For content with sharp audio-visual synchronization demands — lip reading, percussive sound effects, music performances — even 100ms of delay can become noticeable and annoying. The solution: use speakers with aptX Low Latency (aptX LL) codec support, which reduces Bluetooth latency to approximately 40ms — essentially imperceptible. Alternatively, connect the speaker via a wired 3.5mm aux cable if your projector has an audio output jack, which eliminates latency entirely.
Speaker Placement and Elevation
Place speakers at ear height for the seated audience — typically 3–4 feet above ground level for lawn chair seating or 1.5–2 feet for blanket seating. Speakers placed on the ground lose high-frequency clarity because the sound waves interact with and are partially absorbed by the ground surface before reaching the audience. Elevating the speaker even 2–3 feet on a table, stand, or stable platform noticeably improves clarity and coverage uniformity across the seating area.
Keeping the Lights On
Power Management for Outdoor Projectors: Extension Cords, Batteries, and Generators
Power delivery is the unglamorous logistical element that determines whether your outdoor movie night actually happens or gets abandoned because the extension cord won’t reach. Getting power management right — safely and reliably — is more important than most buyers realize until they’re standing in their yard holding a projector and discovering the nearest outlet is 50 feet from their screen location.
Battery-Powered Projectors: The Freedom Option
The BenQ GS50 (3-hour battery) and AKIYO O1 (2.5-hour battery) eliminate the power logistics problem entirely. Set them anywhere — in the middle of the yard, on a beach, at a campsite — and they work without any cable. Battery life at maximum brightness is typically 30–40% shorter than at moderate brightness settings, so for a 2-hour movie, running at moderate brightness provides a comfortable margin. The Samsung Freestyle 2 offers battery capability through an optional external battery pack, though this adds cost and a separate item to charge and carry.
The limitation of battery-powered projectors is brightness: to conserve power, battery-powered units typically run at lower brightness than their AC-powered maximum, which means the battery-powered image may be dimmer than the same projector plugged into AC power. For the GS50 and AKIYO O1, this brightness reduction is modest and acceptable for their intended full-darkness use case. But it’s worth understanding that battery convenience comes with a brightness trade-off.
Extension Cord Selection for Outdoor Use
For AC-powered projectors, the extension cord is the critical link. Use only cords rated for outdoor use — look for the “W” designation in the cord rating (SJTW, SJEOW, SJEOOW) which indicates weather resistance. For projector use (typically 100–300W power draw), a 16-gauge cord is sufficient for runs up to 50 feet. For runs beyond 50 feet, upgrade to a 14-gauge or 12-gauge cord to prevent voltage drop, which can cause projector dimming, fan speed issues, or overheating. Never connect multiple extension cords in series — use a single cord of the appropriate length.
GFCI Protection
All outdoor electrical connections should be protected by a Ground Fault Circuit Interrupter (GFCI). Modern building codes require GFCI outlets in outdoor locations, but older homes may not have them. If your outdoor outlet lacks GFCI protection, use a portable GFCI adapter ($15–$25 at any hardware store) plugged into the outlet before your extension cord. GFCI protection detects electrical faults caused by moisture and cuts power within milliseconds — critical for outdoor use where dew, condensation, and the possibility of spilled drinks create real electrical safety risks.
Power for the Full Setup
A complete outdoor movie setup typically requires 2–3 power connections: the projector (unless battery-powered), a streaming device (unless the projector has a built-in smart platform), and an audio system (unless running on battery-powered Bluetooth). Plan your power distribution using an outdoor-rated power strip with surge protection positioned at the projector location, then run individual short cables from there to each device. This keeps the power management centralized and reduces the number of long cable runs across your yard.
Solar and Portable Power Stations
For off-grid outdoor movie setups — camping, beach, remote locations — a portable power station (Jackery, EcoFlow, Anker PowerHouse) can power a projector and streaming device for an entire evening. A 300Wh portable power station will run a typical projector (150W draw) for approximately 2 hours, with capacity remaining for a streaming stick and Bluetooth speaker. Larger 500Wh+ units can handle a full movie plus pre-show content. Solar charging panels can extend the runtime indefinitely during daytime pre-charging, though direct solar powering of a projector during operation requires panel arrays larger than most people want to transport.
Where to Put It
Outdoor Projector Mounting and Positioning: Tables, Tripods, Stands, and Creative Solutions
Getting the projector at the right height, angle, and distance is the physical puzzle that determines whether your image is perfectly rectangular and focused, or distorted and soft. Indoor projector positioning is forgiving — you have furniture, shelves, and ceiling mounts at predictable heights. Outdoors, you’re often working with improvised surfaces that introduce vibration, unevenness, and height challenges.
Tabletop Placement: The Default Approach
A sturdy patio table, folding table, or even a large cooler placed at the correct throw distance from the screen is the simplest and most common outdoor projector positioning method. The key requirements are stability (the surface shouldn’t wobble or vibrate from foot traffic), level positioning (use a small shim under one corner if needed — even 5 degrees of tilt introduces visible keystone distortion), and height (the projector lens should ideally be at the vertical center of the screen to minimize keystone correction). For the BenQ GS50 and AKIYO O1, which have downward-firing speakers on their underside, ensure the table surface doesn’t block the speaker output — a table with a slatted or open surface is ideal.
Tripod and Stand Mounting
A camera tripod with a 1/4-20 thread mount (the standard camera mount thread that most portable projectors include) gives you precise height and angle adjustment that a table can’t match. Position the tripod at throw distance, extend the legs to the correct height so the projector lens aligns with screen center, and use the tripod’s tilt and pan controls for final alignment. The advantage of tripod mounting outdoors is that it works on uneven ground — grass, slopes, gravel — where a table would be unstable. The disadvantage is that tripods introduce a mild vibration from wind and foot traffic that can cause subtle image wobble, though this is usually only noticeable during still scenes.
Pergola and Patio Cover Mounting
If your outdoor setup is under a permanent patio cover, pergola, or gazebo, ceiling-mounting the projector is the most elegant and practical solution. The projector is protected from weather (reducing condensation risk), positioned at the correct height automatically (typically 8–10 feet above ground level), and out of the way of foot traffic and seating. A universal projector ceiling mount ($20–$50) attached to a pergola beam or patio rafter provides secure, adjustable positioning. The main consideration is ensuring the mount can support the projector’s weight and that the beam or rafter is structurally adequate. Our detailed guide on how to mount a projector to the ceiling covers hardware selection, wiring, and alignment — the techniques apply equally to outdoor structural mounting.
Ground-Level and Creative Positioning
Some outdoor setups benefit from ground-level projector positioning — projecting upward onto a screen mounted high on a wall or fence, or even projecting onto the underside of a patio ceiling for a “lying down and looking up” viewing experience. Ground-level positioning requires tilting the projector significantly upward, which introduces heavy keystone distortion that must be corrected digitally (reducing effective resolution). If you plan ground-level projection regularly, invest in a projector with intelligent auto-keystone like the XGIMI MoGo 3 Pro or Samsung Freestyle 2, which handle extreme correction angles better than basic keystone systems.
The Samsung Freestyle 2’s 360° rotating head was designed specifically for these creative positioning scenarios — project onto walls, ceilings, the ground, or even the underside of a canopy without needing to physically reposition the projector body. For outdoor events where the projection surface isn’t a traditional flat screen, this flexibility has genuine practical value.
Surface Science
Outdoor Projection Screens vs Walls vs Sheets: Which Is Right?
| Surface Type | Brightness Return | Color Accuracy | Setup Effort | Cost | Best For |
|---|---|---|---|---|---|
| Dedicated projection screen | Excellent | Excellent | Moderate | $60–$300+ | Regular outdoor movie nights |
| White bedsheet (taut) | Good | Good | Moderate | $0–$20 | Occasional, budget-conscious use |
| White exterior wall | Moderate | Poor | Zero | $0 | One-off casual screenings only |
| Inflatable screen | Good–Excellent | Good | Moderate–High | $80–$250+ | Events, large gatherings, frequent use |
| Gain screen (1.1–1.5) | Excellent (+) | Excellent | Moderate | $100–$400+ | Compensating for lower-lumen projectors |
A dedicated outdoor projection screen is the single upgrade that delivers the most improvement to any outdoor setup, regardless of which projector you choose. The difference between projecting onto a proper screen versus a house wall is often more dramatic than the difference between a mid-range and premium projector on the same surface. If budget forces a choice between a better projector and a better screen surface, the screen surface delivers more visual improvement per dollar spent at most setup sizes below 120 inches.
For more specialized screen guidance, our ALR screen selection guide covers ambient-light-rejecting screens that can meaningfully recover image quality when you can’t fully control outdoor ambient light sources. And for those considering a more permanent outdoor setup, our broader home theater projector recommendations cover the projectors worth considering when you’re ready to invest in a more serious permanent installation.
Understanding Screen Gain
Screen gain measures how much light the screen surface reflects back toward the audience compared to a reference matte white surface (rated at 1.0 gain). A 1.2-gain screen reflects 20% more light back to the audience than a 1.0-gain screen — meaning your projector effectively becomes 20% brighter without any change in the projector itself. High-gain screens achieve this by focusing the reflected light into a narrower viewing cone, which means the brightness benefit is greatest for audience members seated directly in front of the screen and diminishes for those at wide angles. For outdoor setups where the audience is generally seated in a concentrated area facing the screen, high-gain screens are an excellent match.
Inflatable Screens: Pros and Cons
Inflatable outdoor movie screens have become popular for their dramatic visual presence and large available sizes (12–20+ feet diagonal). The screen surface is typically stretched across an inflatable frame that stands on its own without wall or fence mounting. Advantages: impressive size, freestanding placement, easy storage when deflated, and a genuine “event” feel that makes movie nights feel special. Disadvantages: wind sensitivity (even moderate wind causes visible screen vibration and image wobble), setup time of 10–20 minutes for inflation and staking, and the constant hum of the electric blower that keeps the frame inflated — which competes with your movie audio unless the blower is positioned at distance and the hose is long enough to reach.
Screen Cleaning and Maintenance
Outdoor screens accumulate dust, pollen, insect residue, and water spots that degrade image quality over time. Clean vinyl and PVC screen surfaces with a soft cloth dampened with mild soap and water — never use harsh chemicals, alcohol-based cleaners, or abrasive materials that can scratch or cloud the screen surface. Allow screens to dry completely before storage to prevent mold and mildew. For fixed outdoor screens that stay exposed year-round, a periodic wipe-down every 2–4 weeks during the outdoor viewing season maintains optimal reflectivity.
Protect Your Investment
Outdoor Projector Care, Maintenance, and Seasonal Storage
Projectors used outdoors face environmental stresses that indoor units never encounter: humidity, temperature swings, dust, insects, and physical impacts from being transported and set up repeatedly. Proper care extends the life of your outdoor projector significantly and maintains image quality over years of use rather than months.
Lens Care for Outdoor Use
The projector lens is the most sensitive optical component and the most vulnerable to outdoor contamination. Dust, pollen, water spots, and even fingerprints degrade image quality by scattering light before it reaches the screen. Clean the lens only with a proper lens cloth (microfiber) and lens cleaning solution — never use paper towels, shirt fabric, or household glass cleaner, which can scratch the lens coating or leave residue. For projectors used outdoors regularly, clean the lens before and after each outdoor session. Store the lens cap on whenever the projector is not in use, including during breaks in a screening. Our step-by-step guide on how to clean a projector lens properly covers the technique and materials for safe lens maintenance.
Filter and Vent Maintenance
Projector cooling systems draw air through intake vents and filters to cool the lamp or laser module. Outdoors, these intakes accumulate dust, pollen, grass clippings, and insect debris much faster than indoor use. Check intake vents after every outdoor session and clear any visible debris with compressed air or a soft brush. For projectors with removable filters (less common on portable models), clean or replace filters according to the manufacturer’s schedule, doubling the frequency for regular outdoor use. Blocked filters cause overheating, which triggers thermal protection shutdowns during use (covered in our troubleshooting section) and accelerates lamp degradation in lamp-based models.
Humidity and Condensation Management
When you bring a projector inside after outdoor use on a humid night, the temperature difference between the warm indoor air and the cooler projector body can cause condensation to form inside the unit — on the lens, on the optical elements, and on the electronics. The best practice: place the projector in a well-ventilated area at room temperature and allow it to acclimate gradually before powering it on. If condensation forms, wait 30–60 minutes for it to evaporate naturally before use. Never attempt to speed-dry a projector with a hair dryer or heat source — the concentrated heat can damage plastic lens elements and electronic components.
Transportation and Storage
Transport projectors in padded cases or bags to prevent impact damage during the trip from storage to setup location. Many portable projectors ship with carrying cases — use them. If yours didn’t include a case, a padded camera bag or laptop sleeve provides adequate protection. Store projectors indoors in a climate-controlled space — never in a garage, shed, or attic where temperature extremes and humidity can damage electronics and optics over time. If storing for an extended period (winter months), remove batteries from the remote control and store the projector with the lens cap on in a dry, room-temperature location.
Insect Prevention
A subtle but real outdoor projector maintenance concern: insects are attracted to projector light and warmth. Flying insects can enter through cooling vents and die on internal components, accumulating over time and potentially blocking airflow. Small spiders may build webs in the projector’s ventilation openings while it’s stored between uses. Before each outdoor session, give the projector a visual inspection and blow out any vent openings with compressed air. After each session, check vents for insect debris before bringing the projector inside. This 30-second routine prevents the gradual buildup that leads to overheating issues months later.
Entertaining
Hosting the Perfect Outdoor Movie Night: Beyond the Projector
The projector gets the spotlight, but the difference between a good outdoor movie night and an unforgettable one comes down to the details around the screen — the seating, the food, the timing, the ambiance, and the small preparations that prevent the evening from being derailed by problems you could have anticipated.
Seating Arrangements
Outdoor movie seating falls into three tiers: front-row blanket seating (closest to the screen, most immersive, best for kids), mid-range lawn chair seating (the comfort zone for adults, typically 10–18 feet from the screen), and back-row elevated seating (camp chairs, director’s chairs, or camping cots for those who want a more relaxed, distanced viewing experience). Provide more seating options than you think you’ll need — guests naturally spread out more outdoors than indoors, and the novelty of watching a movie outside means people arrive early and want to stake out their preferred position. Layer blankets and pillows for ground-level seating, and have a few extra camp chairs available for guests who prefer elevation.
Timing the Screening
Start time is the most common hosting mistake. Most people schedule outdoor movies for “sunset” — but depending on your latitude and season, sunset can mean the sky is still far too bright for projection for another 30–60 minutes. Schedule your screening start for 30 minutes after sunset (available from any weather app) and use the twilight gap for socializing, food service, and settling into seats. This avoids the frustration of projecting onto a still-visible sky and the awkward waiting period while the image slowly becomes watchable.
Food and Drink Logistics
Keep food simple and screen-safe: popcorn (the universal outdoor movie food), finger foods, and individually packaged snacks prevent the mess and disruption of plated meals during screening. Set up a food station behind the seating area so guests can get refreshments without walking between the projector and the screen (which blocks the image). For drinks, provide a cooler with a light that lets guests find what they want without shining a flashlight toward the screen — even brief light flashes near the projection path are distracting.
Insect and Pest Management
Bugs are the silent killer of outdoor movie nights. A citronella candle positioned near the seating area provides modest repellent benefit, but for areas with significant mosquito populations, a dedicated thermacell or mosquito-repellent device positioned upwind of the seating area is far more effective. Avoid bright bug zappers near the screen — they attract insects toward the projection area and the zapping sounds compete with movie audio. Position any insect management devices behind or to the side of the seating area, upwind of the screen and projector.
Neighborhood Courtesy
Projector speakers aimed toward neighboring houses are a fast way to generate complaints and sour relationships. Before your first screening, walk to the nearest neighbor’s property line during a test of your audio at viewing volume. If you can clearly hear the audio at their property, it’s too loud — reduce volume, redirect speakers toward your seating area (away from their house), or consider Bluetooth headphones for late-night screenings as a courtesy measure. Finishing screenings by 10–10:30 PM on weeknights and 11 PM on weekends is a reasonable courtesy guideline that preserves the neighborhood goodwill you need for ongoing outdoor movie nights.
All Year Round
Seasonal and Weather Considerations for Outdoor Projection
Outdoor movie projection is inherently seasonal in most climates, but the season is longer than most people assume — and the specific weather challenges of each season require different approaches to setup, protection, and projector care.
Spring: Pollen, Showers, and Variable Temps
Spring brings excellent outdoor viewing temperatures but introduces two challenges: pollen and unpredictable rain. Pollen coats everything outdoors from March through May in most of the Northern Hemisphere, and projector lenses, screen surfaces, and speaker grilles all accumulate pollen rapidly. Wipe down all equipment before and after each spring session. Spring rain is often unpredictable — a forecast of “10% chance of rain” still means occasional surprise showers. Keep a waterproof tarp or large beach towel nearby that can be thrown over the projector and screen within seconds if rain starts. The BenQ GS50’s IP55 rating provides genuine protection against light spring showers, but even IP55-rated projectors should not be left in sustained rain.
Summer: Peak Season with Heat and Bugs
Summer offers the longest viewing windows and the warmest evening temperatures, making it the peak outdoor movie season. The challenges: heat (projector operating temperatures can exceed safe thresholds on very hot evenings if ventilation is obstructed), insects (covered in the hosting section above), and the late sunset times that push screening start times past 9 PM in northern latitudes. For projector care in summer heat, ensure unobstructed airflow around the projector — never place it on a soft surface like a blanket that could block bottom vents, and avoid positioning it in enclosed spaces where heat accumulates.
Autumn: The Golden Season for Outdoor Movies
Many experienced outdoor movie enthusiasts consider autumn the best season for outdoor projection. Sunset comes earlier (moving screening start times to 7–7:30 PM), temperatures are comfortable for extended sitting, insect populations decline dramatically, and the dry air of early autumn produces the clearest, sharpest projected images of the year — less humidity means less atmospheric scattering of the projected light. The main autumn challenge is temperature drop during the screening — starting temperatures in the 60s°F can drop into the low 50s°F by the end of a two-hour movie, so have blankets available for the audience.
Winter: Cold-Weather Considerations
Winter outdoor projection is possible in milder climates (USDA zones 8–10, Mediterranean climates) but presents specific challenges: cold temperatures reduce battery performance (expect 20–30% shorter battery life in temperatures below 50°F), LCD panels respond more slowly in cold (which can cause temporary ghosting or slow pixel transitions until the projector warms up), and condensation risk increases dramatically when moving a cold projector into a warm indoor environment. If you project outdoors in cold weather, allow the projector to acclimate to indoor temperature gradually before powering it on, and keep spare batteries warm in a jacket pocket until needed.
Common Questions
Outdoor Projector FAQs — Answered
For a 100-inch screen in genuine full outdoor darkness with no ambient light sources, a minimum of 500–600 ISO Lumens (or approximately 1,000 ANSI Lumens) is practical. Below that, the image is watchable but noticeably dim at 100 inches. For screens larger than 100 inches, or if any ambient light is present (patio lights, pool lighting, street lights), target 1,500–2,500 ISO Lumens minimum. Importantly, always compare ISO or ANSI lumen figures rather than unspecified “lumen” marketing claims, which are often 2–3× the actual measured output.
Yes, with important caveats. Most indoor projectors will function outdoors in dry, calm conditions — but they’re vulnerable to humidity and condensation, which can damage optics and electronics over time. They also typically aren’t optimized for the brightness levels needed outdoors. For occasional outdoor use in dry weather, an indoor projector works. For regular outdoor use, a projector with an IP54 or IP55 rating (like the BenQ GS50) or at minimum a sealed optical system provides significantly better reliability and longevity in outdoor conditions.
You don’t strictly need one, but a proper outdoor projection screen produces noticeably better results than a house wall, white sheet, or fence. The difference in image brightness, color uniformity, and sharpness between a proper screen and an improvised surface is often more dramatic than the difference between projector models. A basic vinyl outdoor screen costs $60–$120 and significantly improves the experience. A high-gain screen (1.1–1.5 gain rating) specifically helps compensate for lower-brightness projectors outdoors by returning more light to the audience than a standard matte screen does.
Throw distance depends on both the projector’s throw ratio and your desired image size. A typical standard-throw projector with a 1.5:1 throw ratio needs approximately 11 feet of distance to project a 100-inch diagonal image (about 87 inches wide). For outdoor setups, this is generally comfortable — most backyards can accommodate 10–15 feet of throw distance. If your outdoor space is more limited, a short-throw projector (throw ratio under 0.8:1) can project a 100-inch image from under 6 feet. Our throw distance calculator makes it simple to plan for your specific setup dimensions.
For most outdoor setups up to 100 inches, 1080p is entirely sufficient and the difference between 1080p and 4K is subtle at typical outdoor viewing distances and on typical outdoor screen surfaces. At 120 inches and beyond, with a quality screen and a seated audience closer than 15 feet, 4K starts to show a perceptible advantage in fine detail resolution — particularly in landscape scenes and complex textures. For casual backyard movie nights at standard sizes, choosing a brighter 1080p projector is almost always the better trade-off than choosing a dimmer 4K unit at the same price.
Built-in projector speakers are usually inadequate outdoors except for very small, intimate gatherings — sound disperses quickly in open air without walls to contain it. The most practical outdoor audio solution is a quality Bluetooth speaker with a large driver (6 inches or larger) positioned centrally near the screen, or a stereo pair if your projector supports dual Bluetooth audio. Look for speakers with aptX LL or similar low-latency Bluetooth to keep audio synchronized with the video. For larger gatherings, a powered PA speaker delivers the volume and clarity that makes outdoor movies genuinely cinematic rather than just watchable.
Humidity and dew are genuine risks for non-weatherproof outdoor projectors. Condensation can form on lenses and internal optical elements, degrading image quality and potentially causing electrical issues over extended outdoor exposure. Practical mitigations: set up under a canopy or pergola to reduce direct humidity exposure, ensure your projector is elevated off the ground on a table or stand (where cooler, damper air pools), and bring your projector inside promptly after screening rather than leaving it outside overnight. Projectors with IP54 or higher ratings (like the BenQ GS50) have sealed optical systems that are significantly more resistant to humidity damage.
Yes — both the BenQ GS50 (3-hour battery) and the AKIYO O1 (2.5-hour battery) on this list have enough battery life to cover a standard feature film at their rated brightness. The BenQ GS50 can be recharged via USB-C during operation if needed for longer runtime. Battery life is measured at moderate brightness settings; running at maximum brightness reduces battery life by 30–40% typically. For the most reliable battery-powered outdoor movie experience, the BenQ GS50 is the strongest pick — its battery is rated to the same demanding IP55 outdoor standards as the rest of its design.
For large crowds requiring big screens (120+ inches) and good audio, the Anker Nebula Cosmos 4K is the strongest pick from this list. Its 2,200 ISO Lumens sustains a bright, watchable image at large sizes, and its 30W stereo speaker system is the only built-in audio on this list capable of filling a large outdoor space. For even larger events — 50+ people with a 150+ inch screen — you’d need to step beyond this list to dedicated high-lumen event projectors (typically 5,000+ ANSI lumens) paired with a proper PA system, which are covered in our guide to high-brightness projectors.
For most backyard setups with seating at 10–18 feet from the screen, a 100-inch screen is the sweet spot — large enough to feel cinematic, small enough that most projectors in this guide can fill it with adequate brightness in full darkness. A 120-inch screen is the next step up and delivers a genuinely immersive experience, but requires more brightness to maintain image quality — the Nebula Cosmos 4K Laser handles 120 inches well, while the portable picks (GS50, MoGo 3 Pro, AKIYO O1) look their best at 80–100 inches. Going larger than 120 inches with any projector on this list results in a dim image that, while impressive in scale, lacks the visual punch that makes outdoor movies special.
Only if it has an IP55 or higher weatherproof rating, and even then, it’s not recommended as a regular practice. The BenQ GS50 is the only projector on this list rated for sustained outdoor exposure, but even IP55-rated electronics are best brought inside between uses to maximize lifespan. For all other projectors on this list, overnight outdoor exposure risks condensation damage, insect intrusion, dew accumulation on optics, and potential damage from unexpected weather changes. The 2 minutes it takes to bring a projector inside after each screening provides significant protection for your investment.
When Things Go Wrong
Troubleshooting Common Outdoor Projector Problems
Outdoor projection introduces variables that don’t exist indoors, and when something goes wrong — a dark image, no signal, overheating, audio sync issues — the troubleshooting approach is different from indoor use. Here are the most common outdoor-specific problems and their solutions.
Problem: Image Looks Dim Even in Full Darkness
If your image looks dim despite being in full outdoor darkness, the most likely cause is an oversized screen for your projector’s brightness. A 350 ANSI lumen projector at 120 inches will look dim no matter how dark it is — the light is simply spread too thin over that large an area. Reduce screen size to 80–90 inches and the brightness per square inch doubles. Other causes: a dirty lens (clean with microfiber cloth), keystone correction set too aggressively (reposition the projector physically instead), or the projector running in an eco/low-power mode that reduces brightness — check settings and switch to “standard” or “bright” picture mode.
Problem: Projector Shuts Off Mid-Movie
Unexpected shutdowns during outdoor use are almost always thermal. Projectors have internal temperature sensors that shut the unit down if operating temperature exceeds safe limits. Outdoors, this happens when ventilation is blocked (projector sitting on a soft blanket, placed against a wall, or surrounded by objects that restrict airflow), ambient temperature is very high (summer evenings above 85°F), or filters and vents are clogged with dust and debris from outdoor use. Solution: ensure unobstructed airflow around the entire projector, clean all vents, and if the ambient temperature is extreme, consider positioning a small fan to provide additional airflow across the projector’s intake vents. For persistent overhecing issues, our guide on why projectors keep turning off covers the full range of causes and solutions.
Problem: No Signal or No Image
The “no signal” message when setting up outdoors usually traces to one of three causes: the HDMI cable isn’t fully seated (outdoor setup involves more cable movement and the connection can work loose), the input source isn’t correctly selected on the projector (cycle through inputs using the remote), or the streaming device connected to the projector isn’t powered on or has lost its WiFi connection. For WiFi-dependent setups, verify the projector or streaming device is connected to your network before your audience arrives. Our troubleshooting guide for projector no-signal HDMI errors covers the systematic diagnostic approach for wired connection issues.
Problem: Projector Turns On but Shows No Picture
If the projector powers up and you hear the fan running but see no image on screen, the issue may be a failed light source (lamp or laser), a lens cover left on (check — it happens more than you’d think during outdoor setups where you’re handling the projector in low light), or the projector is in standby mode and needs the power button pressed twice — once to wake, once to display. In rare cases, condensation on the internal optical elements can block light output entirely. If the projector was recently moved from a cold to warm environment, allow 30 minutes for internal condensation to evaporate before diagnosing further. For a complete diagnostic walkthrough, our guide on projector turns on but no picture covers every possibility systematically.
Problem: Audio and Video Are Out of Sync
Audio-video sync issues outdoors almost always involve Bluetooth audio. The delay between the video processing chain and the Bluetooth audio transmission creates a consistent offset that lip-reading makes obvious. Solutions: switch to a wired audio connection (3.5mm aux) if available, use a speaker with aptX Low Latency Bluetooth support, or adjust the audio delay setting on your streaming device (Roku, Fire TV, Apple TV, and Chromecast all offer audio sync adjustment in their settings menus). If using the projector’s built-in speakers, sync issues indicate a processing problem — try switching to a different picture mode (game mode typically has the lowest processing latency) or updating the projector’s firmware.
Problem: WiFi Keeps Buffering During Playback
Outdoor WiFi buffering is a signal-strength issue. The concrete, brick, and wood between your router and your backyard attenuate WiFi signals significantly. Solutions ranked by effectiveness: (1) move a mesh WiFi node to the room closest to your outdoor setup area, (2) use a WiFi range extender positioned near the back of your house, (3) reduce the streaming quality in your app settings (4K streaming requires 25+ Mbps, while 1080p requires only 5–8 Mbps — if your outdoor WiFi signal supports 1080p but not 4K, dropping to 1080p eliminates buffering with minimal visual impact on a portable projector), or (4) download content for offline playback before heading outside (Netflix, Disney+, and Amazon Prime all support downloads on mobile devices, which you can then cast or connect via HDMI to the projector).
The Verdict
Outdoor Movie Projector Recommendations: The Final Summary
The best outdoor movie projector for you comes down to a clear set of trade-offs, and understanding those trade-offs is what makes the choice obvious rather than confusing:
If true outdoor use matters — weatherproofing, no cables, setup anywhere — the BenQ GS50 is the only purpose-built choice on this list and remains the top recommendation. Its IP55 rating and 3-hour battery solve problems that every other pick on this list sidesteps. The 600 ISO Lumens limitation is real, but in practice, the GS50’s outdoor-optimized color calibration makes that figure feel more capable than its number suggests.
If portability but not weatherproofing is the priority, the XGIMI MoGo 3 Pro and Hisense C1 are the picks. The XGIMI wins on auto-alignment ease and audio quality; the Hisense wins on color quality and Google TV integration. Both need shelter from rain and dew.
If image quality at larger screen sizes is the primary goal, the Nebula Cosmos 4K Laser is the clear choice. At 2,200 ISO Lumens with a laser-driven 4K image, it’s the only projector here capable of a bright, detailed 120+ inch image that holds up in real-world outdoor conditions rather than just controlled demo rooms.
If budget is the primary constraint, the AKIYO O1 delivers a genuinely enjoyable outdoor movie experience for casual use at a fraction of the cost of premium alternatives. Set expectations at “fun and functional” rather than “cinematic perfection,” and it delivers on those terms consistently.
If the Samsung ecosystem and creative projection angles are appealing, the Samsung Freestyle 2 fills a unique niche — its 360° rotating head and Tizen smart TV platform make it the most creatively flexible projector on this list, though its brightness limits it to darkness-only use.
If color accuracy matters most and you’re willing to supplement with an external speaker, the Epson EF-12 delivers 3LCD laser color quality that no single-chip DLP projector in this price range can match — and for cinematic content where the filmmaker’s color intent matters, this distinction is visible.
Whichever pick suits your setup, pairing it with a proper outdoor projection screen — even a basic one — and a quality Bluetooth speaker will upgrade your experience more than any projector upgrade alone can. The hardware is only one part of a great outdoor movie night. The setup around it is what turns a good projector into an experience people talk about the next morning.
For continued exploration, our guides on best portable mini projectors, best smart projectors with Netflix built in, and projectors for every budget and room size cover the full landscape of projector options for whatever your next use case turns out to be.
Ready to Set Up Your Outdoor Cinema?
The BenQ GS50 is our #1 overall pick for outdoor movies — weatherproof, battery-powered, Android TV built in. Check current pricing and availability below.
Shop BenQ GS50 on Amazon Explore Home Theater Picks →
Pingback: BenQ Projector Review: Complete Guide to Their Best Models