Best Projectors for Bright Rooms
Five high-brightness projectors that stay visible with the lights on—tested in conference rooms, auditoriums, and spaces you can’t darken.
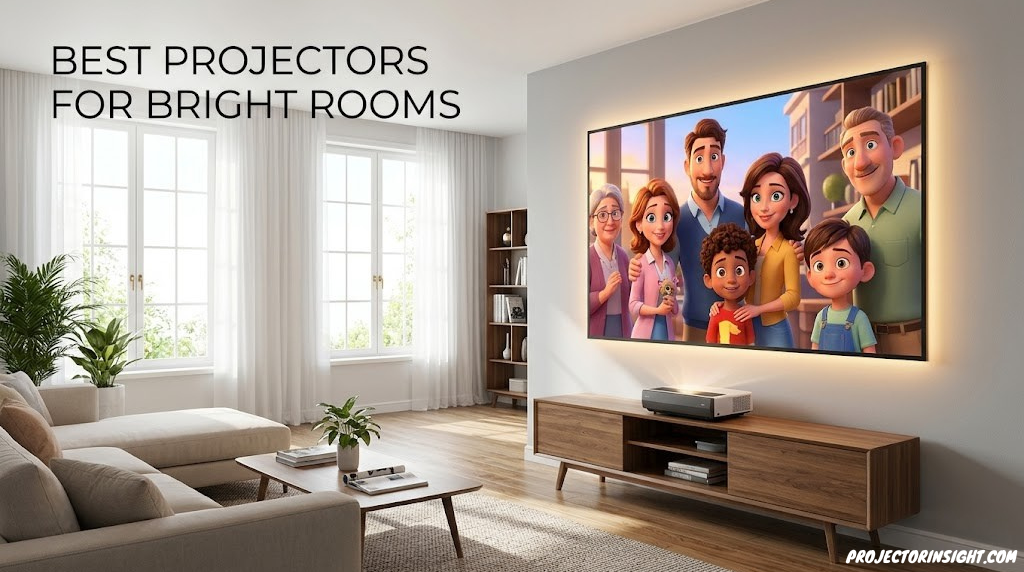

The moment the projector powers on in a well-lit room is when most projectors fail. A presentation that looked sharp on your laptop suddenly becomes a faded ghost on the screen. People in the back row lean forward. The presenter dims the lights—but it’s a conference room that serves six departments, and you can’t keep it dark all day. That’s the reality for most business, government, and educational spaces.
The five projectors in this guide solve that exact problem: they’re engineered to stay visible when overhead lights are on, windows are unblinded, and you can’t treat your room like a home theater. They range from 4,200 lumens (already in the “punches through ambient light” category) to 6,000+ lumens (visible even in retail-brightness spaces). Some use laser light sources that hold brightness steady for 20 years. Others rely on advanced LCD or DLP technology paired with exceptional lamp brightness.
Each one addresses a different version of the bright-room problem. One prioritizes installation flexibility for spaces with existing infrastructure. Another trades brightness for portability and ease of use. One is built for massive auditoriums where you’re throwing light 40+ feet. Another offers superior color accuracy alongside brightness. This guide walks through each model, explains the specs that actually matter in bright conditions, and helps you match the right projector to your specific space and use case.
Quick Answer: The Top Pick for Each Use Case
- Best overall: Epson EpiqVision – combines brightness (5,000 lumens), color accuracy, and reliability.
- Best laser upgrade: Hisense Laser PX3-PRO – 5,000 lumens, laser longevity, exceptional contrast for the price.
- Best for huge spaces: AWOL VISION LTV-3500 – 6,000 lumens and 360° installation flexibility.
- Best budget pick: Epson PowerLite 800F – rock-solid 4,200 lumens, proven reliability in education and business.
- Best professional installation: Optoma ZU606T-W – 6,500 lumens, laser, designed for permanent setup in auditoriums.
| Projector | Brightness | Light Source | Resolution | Best For |
|---|---|---|---|---|
| Epson EpiqVision | 5,000 lm | 3LCD Lamp | Full HD | Balanced brightness and color |
| Hisense Laser PX3-PRO | 5,000 lm | Laser | WUXGA | Laser durability, high contrast |
| AWOL VISION LTV-3500 | 6,000 lm | 3LCD Lamp | Full HD | Maximum brightness, 360° mounting |
| Epson PowerLite 800F | 4,200 lm | 3LCD Lamp | WUXGA | Budget-conscious, proven track record |
| Optoma ZU606T-W | 6,500 lm | Laser | WUXGA | Large venues, permanent installation |
Why Projectors Fail in Bright Rooms (And How to Fix It)
A typical home theater projector might be rated at 2,500 lumens. That’s bright enough in a dark room where your eyes adapt and the image dominates your visual field. But in a lit office with overhead fluorescents and a window on the east wall, 2,500 lumens gets absolutely crushed. Ambient light washes out the blacks, desaturates the colors, and makes text unreadable beyond the first few rows.
Here’s what happens: when light from the overhead fixtures and windows hits the screen, it bounces back into the room (just like the projected image does). Your eyes can’t distinguish between the projected light and the ambient light. The result is a low-contrast, faded image that looks more like a suggestion of a presentation than an actual presentation.
The solution has two parts: first, you need more lumens—not just “brighter” but significantly brighter (4,000+ for typical office-bright rooms, 5,000+ for very bright spaces). Second, you need to maintain color saturation and contrast even under those harsh conditions. This is where quality projector design matters. A cheap projector cranked to max brightness often looks washed out. The models in this guide maintain color integrity while delivering the light output you need.
For context on choosing a projector based on your specific environment, the complete projector selection guide covers the broader decision framework, including throw distance, connectivity, and feature sets.
Understanding Lumens: The Core Metric for Bright Rooms
A lumen is a standardized unit of light output. Specifically, ANSI lumens (the metric all professional projectors use) measure the average brightness across the entire projected image under defined conditions. It’s not peak brightness in the brightest spot—it’s sustained brightness across your whole presentation slide.
Here’s the practical translation for different room types and light conditions:
- Under 2,500 lumens: Home theater only. Useless in any lit room.
- 2,500–3,500 lumens: Small meeting rooms with some lighting control. Conference rooms where you can dim to “office dim” (lights at 50%).
- 3,500–4,500 lumens: Standard lit office spaces. Overhead lights on, some window light, typical business environment. This is the minimum for reliably visible presentations in a normal office.
- 4,500–5,500 lumens: Bright conference rooms with full overhead lighting, large windows, or retail-level brightness. Training centers, government offices, education spaces you can’t darken.
- 5,500+ lumens: Very bright spaces (gym auditoriums, museums, halls with skylights) or large venues where distance magnifies the light loss.
All five projectors in this guide exceed 4,000 lumens, which puts them solidly in the “bright room” category. Most exceed 5,000, which handles nearly any business or educational space short of industrial-brightness environments.
For a deeper dive into what lumens mean in real rooms and how to calculate them for your space, see our complete ANSI lumens guide.
Epson EpiqVision

Why It Works in Bright Rooms
The EpiqVision uses 3LCD technology, which splits light into three separate paths (one for red, green, and blue) to create the final image. This approach excels at maintaining color saturation even at high brightness levels. When you crank a 3LCD projector to maximum output, the colors stay vivid. With single-chip technologies (DLP), adding brightness sometimes adds washed-out appearance. Not here.
Five thousand lumens is the comfortable threshold for most conference rooms, training centers, and corporate presentation spaces. It’s bright enough to cut through ambient light without being so bright that you feel the need to dim the room. The lamp lasts 5,000 hours (roughly three years of moderate daily use), and replacement lamps are inexpensive and widely available.
Installation is straightforward—standard ceiling mount, 1.6:1 throw ratio means you need roughly 16 feet of distance to project a 100-inch image. Connectivity includes HDMI, DisplayPort, and network integration, so hooking it up to laptops
✓ Pros
- 5,000 lumens handles nearly any office
- 3LCD maintains color at high brightness
- Proven reliability across institutions
- Affordable replacement lamps
- Good connectivity and flexibility
- Relatively quiet cooling fans , conference systems, or permanent AV infrastructure is simple.
✗ Cons
- Lamp-based (not laser)
- Brightness dims over time as lamp ages
- Lamp replacement needed every 3 years
- Full HD only (not WUXGA or 4K)
- Heavier than portable models
Epson EpiqVision – 5,000-Lumen 3LCD Projector
Check Price on AmazonBest for: Organizations wanting reliability and color accuracy in bright conference rooms. Corporations, schools, training centers where a projector will run daily but doesn’t need to last 20 years on a single light source.
Hisense Laser PX3-PRO
Why It Works in Bright Rooms
The laser light source is the game-changer here. Unlike lamp-based projectors that dim gradually over 3,000–5,000 hours of use, a laser maintains consistent brightness and color throughout 20,000 hours of operation. That’s roughly 10–15 years of daily use before the light output noticeably declines. For organizations that can’t afford frequent lamp replacements and downtime, this is transformative.
The 30,000:1 contrast ratio is exceptional, especially at this price point. High contrast in a bright room means blacks stay darker relative to the bright areas of your slides, creating clearer visual hierarchy. Text pops. Charts separate from backgrounds. This is crucial in education and presentation settings where clarity is paramount.
WUXGA resolution (1920×1200) gives you more vertical pixels than standard Full HD, which is valuable for spreadsheets, architectural drawings, and any content with significant vertical information. In a bright room, higher pixel density also means sharper text at distance.
✓ Pros
- Laser light source (20,000 hours, no maintenance)
- Brightness stays consistent over years
- 30,000:1 contrast is exceptional
- WUXGA resolution better than Full HD
- 5,000 lumens sufficient for nearly any space
- Quieter operation than lamp-based models
✗ Cons
- Higher initial cost than lamp models
- Not as widely supported as Epson in some regions
- Laser-based means no lamp replacement option
- Heavier than portable projectors
Hisense Laser PX3-PRO – 5,000-Lumen Laser Projector
Check Price on AmazonBest for: Organizations planning long-term installation (5+ years) where lamp replacement costs and maintenance downtime are concerns. Fits well in spaces that need high brightness and high contrast (auditoriums, training centers, boardrooms).
AWOL VISION LTV-3500
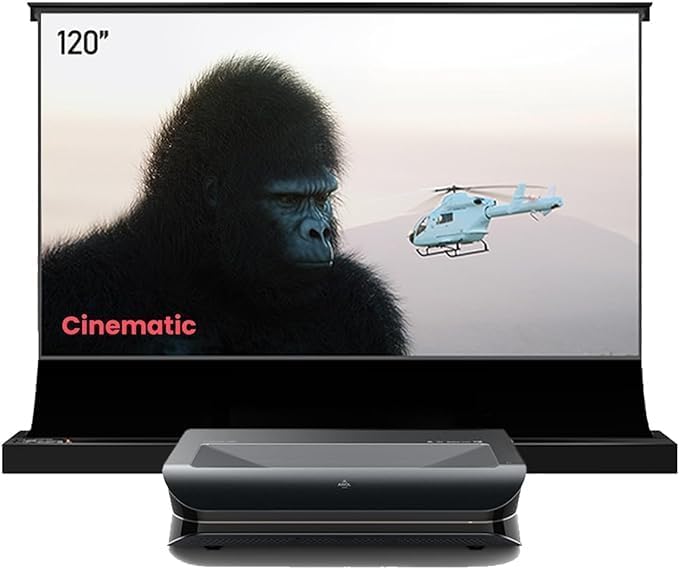
Why It Works in Bright Rooms
Six thousand lumens is the upper range of practical brightness for most business and educational settings. It’s overkill for a typical conference room (where 4,500–5,000 is ideal), but it’s exactly right for large auditoriums, gym spaces, or locations with exceptional ambient light. The brightness difference between five thousand and six thousand doesn’t sound like much numerically, but visually it’s noticeable—especially in very bright spaces.
The 360-degree mounting capability is the second key advantage. Most projectors can mount ceiling-down or occasionally upside-down. The LTV-3500 can be oriented in any direction—ceiling-mounted pointing down, wall-mounted pointing at an angle, or even rear-projection through a screen. This flexibility is invaluable in spaces with unusual ceiling structures, existing infrastructure constraints, or retrofitting situations.
This is a no-frills, brightness-focused tool. Full HD resolution (not WUXGA or 4K) keeps the cost down and the light output up. The 3LCD design maintains color even at maximum brightness. Lamp-based means you’ll replace the light source every few years, but it’s an inexpensive consumable.
✓ Pros
- 6,000 lumens is maximum for most venues
- 360° mounting flexibility for installation
- 3LCD color accuracy at high brightness
- Competitive pricing for brightness level
- Rock-solid reliability
✗ Cons
- Heaviest option (22 lbs)
- Lamp-based technology
- Full HD only (no WUXGA)
- Requires lamp replacement every 3 years
- Overkill brightness for small rooms
AWOL VISION LTV-3500 – 6,000-Lumen 3LCD Projector
Check Price on AmazonBest for: Large auditoriums, gymnasium presentations, exceptional brightness requirements, or retrofitting into spaces with unusual infrastructure. Organizations that prioritize installation flexibility and maximum light output over laser longevity.
Epson PowerLite 800F

Why It Works in Bright Rooms
Four thousand two hundred lumens sits at the threshold of “sufficient for a brightly lit typical office space.” It’s not maximum brightness, but it’s enough. The difference between 4,200 and 5,000 lumens is a 20% reduction in output, which matters if your room is exceptionally bright, but in standard office conditions (overhead lights on, some window light, typical conference room), the 800F delivers a visible, readable image.
The 800F brings WUXGA resolution, which the cheaper 6,000-lumen AWOL doesn’t have. More pixels means sharper text and cleaner graphics—important when you’re relying on brightness to overcome ambient light and you can’t sacrifice clarity on top of that.
The lamp lasts 6,000 hours, slightly longer than most 3LCD competitors. Epson’s support network is extensive, meaning replacement lamps are cheap and available worldwide. This is the economics of education: purchase price is one budget line, but replacement and maintenance matter just as much.
The trade-off is simple: you save money at purchase, and you get WUXGA resolution, but you’re at the lower end of the bright-room brightness spectrum. For rooms where you can afford minor lighting control (or where the space isn’t brutally bright), this is the rational choice.
✓ Pros
- Most affordable option on this list
- WUXGA resolution (better than Full HD)
- Proven track record in education and business
- 6,000-hour lamp life (longer than competitors)
- Wide support and cheap replacement parts
- Lightweight and portable
✗ Cons
- 4,200 lumens is entry-level bright-room brightness
- Lamp-based technology
- May struggle in extremely bright spaces
- Needs lamp replacement every 4 years
Epson PowerLite 800F – 4,200-Lumen WUXGA Projector
Check Price on AmazonBest for: Schools, small organizations, and training centers where budget is primary. Spaces with moderate lighting control (not brutally bright). Deployments where multiple units are needed and cost per unit matters.
Optoma ZU606T-W

Why It Works in Bright Rooms
The ZU606T-W is the professional choice because it combines maximum brightness (6,500 lumens), laser longevity (20,000 hours with zero maintenance), and exceptional contrast (40,000:1). This is the hardware that government buildings, corporate headquarters, and major universities specify because the total cost of ownership—over 10+ years with zero lamp replacements—beats purchasing and maintaining lamp-based competitors.
Laser brightness is consistent year after year. When you present in this room in year 3 or year 7, the image is as bright and colorful as day one. With lamp projectors, you’re often replacing the light source before you know it (lamp brightness drops noticeably after 2,000 hours of use, and you typically don’t replace until 3,000–4,000 hours). The Optoma never dims.
The 40,000:1 contrast ratio is the highest on this list, which means blacks are darker relative to white areas. In a bright room where you’re already fighting ambient light, maintaining strong contrast hierarchy is crucial. Text separates from background. Charts have visual impact. This is the resolution (no pun intended) to the fundamental challenge of bright-room projection: not just being visible, but looking professional.
This is not a portable projector. It’s engineered for permanent ceiling mounting and integration into AV systems. The 28-pound weight and professional connectivity (not casual HDMI) signal that this is an installation product, not a purchase-and-plug unit.
✓ Pros
- 6,500 lumens is maximum professional brightness
- Laser light source (20,000 hours, no maintenance)
- 40,000:1 contrast (highest available)
- WUXGA resolution for sharp detail
- Extremely low total cost of ownership over 10 years
- Built for mission-critical installations
✗ Cons
- Highest upfront cost by far
- Heaviest option (28 lbs)
- Requires professional installation
- Overkill for rooms that don’t need 6,500 lumens
- Not portable or flexible placement
Optoma ZU606T-W – 6,500-Lumen Laser Professional Projector
Check Price on AmazonBest for: Government offices, major corporate auditoriums, university lecture halls, and any permanent installation where the projector is specified as part of the room infrastructure. Organizations planning to own and operate the same space for 10+ years without major upgrades.
Matching Brightness to Room Size and Light Conditions
Brightness alone doesn’t tell the whole story. The same projector will appear very bright in a 300-square-foot conference room but underwhelming in a 5,000-square-foot auditorium. Here’s how to think about it:
- Small conference room (300–500 sq ft): 4,000–4,500 lumens is comfortable. The image fills your visual field, and the light output is substantial enough to overcome office lighting without feeling overkill.
- Medium meeting space (500–1,500 sq ft): 4,500–5,500 lumens. This is the sweet spot for most commercial and educational use. One of the five models here (Epson EpiqVision, Hisense PX3-PRO) is ideal.
- Large auditorium (1,500–3,000 sq ft): 5,500–6,500 lumens. The AWOL or Optoma is appropriate. Throw distance becomes a factor (larger spaces need longer throw ratios or shorter throw angles), so verify before purchasing.
- Gymnasium or arena (3,000+ sq ft): 6,500+ lumens and typically a professional installation with purpose-built infrastructure. The Optoma ZU606T-W enters the conversation.
Remember: you can’t control the light output of the space, but you can control installation and screen selection. An ambient light-rejecting (ALR) screen can effectively add 500–1,000 lumens to your image quality by bouncing light back to the audience and rejecting ambient light. A screen selection is often the smarter move than upsizing the projector.
Laser vs. Lamp: Which Light Source Is Right for Bright Rooms?
This choice has ripple effects across brightness, maintenance, cost, and reliability.
Lamp-Based Projectors (3LCD)
All three cheaper models on this list use lamps: the Epson EpiqVision, AWOL VISION, and Epson PowerLite. Lamps (specifically, UHP or UHE bulbs) are inexpensive, proven technology. They’re bright, they come in standardized sizes, and replacement is straightforward.
The catch: lamps dim over time. You’ll notice brightness degradation after 2,000 hours of use, and most lamps are specified to last 5,000–6,000 hours before they need replacement. You’re also replacing consumables every few years, which adds cost and downtime. In an active training center or busy conference space, that replacement happens on a schedule you can’t always control.
Laser-Based Projectors
The Hisense PX3-PRO and Optoma ZU606T-W use laser light sources. Laser brightness remains consistent across 20,000+ hours—roughly 10–15 years of daily use. No lamps. No maintenance. No replacement consumables. The upfront cost is higher, but the total cost of ownership over a decade is often lower because you eliminate lamp purchases and labor.
For bright-room applications, laser has a particular advantage: consistency. If your presentation venue relies on 5,000 lumens to overcome ambient light, and the lamp dims to 4,200 lumens after a year of use, you’ve effectively downgraded your system. Laser doesn’t degrade, so the room stays at original specifications indefinitely.
For bright rooms specifically: If you’re installing a permanent system (a dedicated room that will be used 5+ years), laser pays for itself. If you’re furnishing a space that might be retrofitted or repurposed within 3 years, lamp is the pragmatic choice.
Budget Breakdown: What You’re Actually Paying For
Under $2,500 (Budget Tier)
Epson PowerLite 800F. Entry-level bright-room brightness (4,200 lumens), WUXGA resolution, proven reliability. You’re buying a functional tool, not cutting-edge technology. Appropriate for schools, small training centers, and organizations where budget is the primary constraint. Maintenance cost (lamp replacement every 3 years at $200–300) adds to the total cost of ownership.
$2,500–$4,500 (Mid-Range Tier)
Epson EpiqVision and AWOL VISION LTV-3500. This range gets you either better brightness (6,000 lumens for the AWOL) or better color accuracy (EpiqVision). You’re buying the practical sweet spot: enough brightness to handle most spaces, reliable 3LCD technology, and reasonable maintenance costs. Most organizations building a new presentation space choose from this tier.
$4,500–$6,500 (Premium Tier)
Hisense Laser PX3-PRO. You’re paying for laser longevity and very high contrast. No lamp replacement, 20 years of consistent brightness, minimal maintenance. Ideal for organizations with multi-year planning horizons and budgets that include total-cost-of-ownership calculations, not just purchase price.
$6,500+ (Enterprise/Professional Tier)
Optoma ZU606T-W. Maximum brightness, maximum contrast, laser technology, and professional-grade engineering. You’re buying a system designed for mission-critical installations and permanent room infrastructure. The projector is specified as part of the building, not a replaceable component. Appropriate for government, corporate headquarters, and institutions where failure risk is unacceptable.
For context on evaluating value across projectors at various price points, see our complete guide to projectors by budget and room size.
Installation Best Practices for Bright Rooms
1. Prioritize Throw Distance Accuracy
Verify throw ratio and distance before mounting. A projector with 1.6:1 throw ratio needs 16 feet to project a 100-inch image. If you only have 12 feet, you’re getting a 75-inch image, which is wasted money. Check specifications and measure twice before installation.
2. Screen Selection Matters as Much as Projector Selection
A high-quality screen and an ALR screen (if your space allows) will improve image quality more than upsizing the projector by 500 lumens. Screen quality is often overlooked in purchasing decisions.
3. Ventilation Is Critical
Projectors in bright-room settings often run continuously. Ensure the mounting location (typically ceiling) has adequate airflow. Blocked ventilation shortens lamp life and can cause thermal shutdowns during important presentations.
4. Network Connectivity Simplifies Management
For permanent installations, projectors with network connectivity (HDMI over network, Crestron/AMX control integration) are worth the extra investment. IT teams can manage settings, monitor status, and troubleshoot remotely. This matters in multi-room deployments.
5. Plan for Lamp Replacement (Lamp-Based Models)
If you choose a lamp-based projector, budget for lamp replacement every 3–4 years and maintain a spare lamp on hand. Installation locations matter—some ceilings make lamp access inconvenient, which means higher labor costs for replacement.
Screen Technology for Bright Rooms: Choosing the Right Surface
The projector is only half the equation. The screen it projects onto determines how much of that light actually reaches your audience’s eyes versus scattering into the room and becoming ambient noise. In a bright room, screen selection can make or break the entire system. A mediocre projector on an excellent screen will outperform an excellent projector on a mediocre screen—every time.
Understanding Screen Gain
Screen gain is a measurement of how much light the screen reflects back toward the audience compared to a standard white reference surface. A gain of 1.0 means the screen reflects light equally in all directions—no concentration, no loss. A gain of 1.3 means the screen reflects 30% more light back toward the center viewing position. A gain below 1.0 (common in gray screens) absorbs some light but improves perceived contrast by darkening the black levels.
For bright rooms, the gain calculation matters more than in dark rooms. Here’s why: in a dark room, your eyes adapt and perceive contrast regardless of minor brightness differences. In a bright room, every photon counts. A 1.3-gain screen effectively gives you 30% more brightness from the same projector—meaning a 4,500-lumen projector on a 1.3-gain screen performs like a 5,850-lumen projector on a 1.0-gain screen. That’s a meaningful difference when you’re fighting ambient light.
However, gain comes with trade-offs. Higher-gain screens concentrate reflected light into a narrower cone. If your audience is spread across a wide viewing angle (a classroom with seats fanning out to the sides), high-gain screens can appear dimmer to people sitting at extreme angles. For most business and educational settings with moderate viewing angles (under 60 degrees from center), a gain between 1.1 and 1.5 is ideal.
White Screens
A standard matte white screen (gain 1.0–1.1) is the default choice. It reflects light evenly, maintains wide viewing angles, and works well in any environment. In a dark room, white screens are excellent. In a bright room, they’re adequate but not optimized. The problem: white screens reflect all light equally—projected light and ambient light alike. If your room has overhead fluorescent lights, that light bounces off the white screen back into the room, washing out the image.
White screens are inexpensive and versatile. If you’re on a tight budget and can implement some ambient light control (dimmer switches, window blinds), a white screen with a high-lumen projector (5,000+) can work. But if you can’t control the ambient light at all, you’re leaving performance on the table.
Gray Screens
Gray screens (sometimes called “high-contrast screens”) have a gain between 0.8 and 1.0. They absorb more light than white screens, which means the overall image appears slightly dimmer. The advantage: gray screens darken the black levels significantly. In a room where ambient light is washing out your blacks, a gray screen pulls the black point down, making the image appear more contrasty and vibrant even though the total brightness has decreased slightly.
For bright rooms, gray screens are a mixed bag. If your projector is bright enough (5,000+ lumens) and the ambient light is moderate (office lighting, not sunlight), a gray screen can be an effective, inexpensive way to improve perceived contrast. But if the ambient light is severe, the gray screen absorbs too much projected light and the image suffers.
The practical recommendation: use a gray screen if you have a 5,000+ lumen projector in a moderately lit room and you want better perceived contrast without investing in an ALR screen. Avoid gray screens if your projector is under 4,500 lumens or your room is exceptionally bright.
Ambient Light Rejecting (ALR) Screens
ALR screens are the gold standard for bright-room projection. They use specialized optical materials that selectively reflect projected light while absorbing or redirecting ambient light. The result is dramatically improved brightness and contrast—effectively adding 20–40% to the perceived image quality compared to a standard white screen.
ALR screens come in several varieties, each with different characteristics and price points:
- Angular reflective ALR: These screens reflect light at the mirror angle of the projector’s position. If the projector is ceiling-mounted, the screen bounces that light down toward the audience while absorbing overhead light that arrives from a different angle. These are the most common ALR screens and work best with standard ceiling-mounted projectors.
- Retro-reflective ALR: These screens bounce light back toward the source (the projector). This design is extremely effective at rejecting ambient light from other directions but requires the projector to be positioned close to the audience’s eye level. Works best with coffee-table or low-mount projector positions.
- Lenticular ALR: These screens use a microscopic sawtooth pattern that accepts light from below (the projector) and rejects light from above (overhead lighting). They’re the most effective ALR technology for ceiling-mounted projectors in rooms with overhead lighting. The trade-off is narrower viewing angles and higher cost.
- Spectral ALR: Advanced screens that use multi-layer optical films to selectively reflect specific wavelengths while absorbing others. These offer the best performance but at premium pricing ($1,500–5,000+ for a 100-inch screen).
Screen Size and Brightness Interaction
Screen size directly affects perceived brightness. A projector producing 5,000 lumens onto a 100-inch screen delivers approximately 50 lumens per diagonal inch. The same projector onto a 150-inch screen delivers approximately 33 lumens per diagonal inch—a 34% reduction in perceived brightness per unit area. In a dark room, this doesn’t matter much. In a bright room, it’s the difference between “visible” and “washed out.”
The practical rule: in bright rooms, don’t oversize the screen. A 100-inch image that’s bright and sharp is better than a 150-inch image that’s faded and hard to read. If you need a larger image for a bigger audience, increase the projector brightness to compensate—don’t just stretch the image.
Here’s a rough sizing guide for bright rooms with a 5,000-lumen projector:
- 80–100 inches: Excellent brightness. Comfortable in any overhead-lit room.
- 100–120 inches: Good brightness. Works well in standard office lighting.
- 120–150 inches: Adequate brightness. Consider an ALR screen to compensate.
- 150+ inches: Insufficient brightness for bright rooms at 5,000 lumens. Upgrade to 6,000+ lumens or reduce ambient light.
Screen Surface Maintenance
Screens accumulate dust, fingerprints, and discoloration over time. In bright rooms, any imperfection on the screen surface is amplified because the ambient light highlights it. Clean your screen surface annually with a soft microfiber cloth and manufacturer-recommended cleaning solution. Avoid household cleaners, which can damage optical coatings on ALR screens. Inspect the screen for warping or tension loss—any waves or ripples in the screen surface create hot spots and uneven brightness that are particularly visible in bright conditions.
For a detailed comparison of screen types specifically for ultra-short-throw projectors, see our ALR screen guide.
3LCD vs DLP vs LCoS: Which Display Technology Wins in Bright Rooms?
The projector’s display technology—how it creates the image from the light source—has a significant impact on bright-room performance. Three competing technologies dominate the market: 3LCD (used by Epson), DLP (used by Optoma and many others), and LCoS (used by Sony and JVC). Each handles brightness, color, and contrast differently, and the differences matter more in bright rooms than in dark ones.
How 3LCD Works and Why It Excels in Bright Rooms
3LCD technology splits the white light from the lamp or laser into three beams using a prism. Each beam passes through a separate LCD panel—one for red, one for green, one for blue. The three color beams recombine into a single full-color image that exits through the lens.
The key advantage for bright rooms: 3LCD projectors produce identical color brightness and white brightness. When a 3LCD projector is rated at 5,000 ANSI lumens, that 5,000 lumens applies to both white and color output. This means colors remain vivid and saturated even at maximum brightness. In a bright room where you’re already fighting ambient light, maintaining color saturation is crucial—washed-out colors make presentations look unprofessional and charts unreadable.
The disadvantage of 3LCD: contrast ratio. Because three separate LCD panels must be precisely aligned, and because some light leaks through the LCD panels even in the “off” state, 3LCD projectors typically have lower native contrast ratios (10,000:1) compared to DLP (up to 100,000:1 dynamic) or LCoS (native 40,000:1+). In a dark room, this matters. In a bright room where ambient light is already washing out your blacks, the contrast difference between technologies is much less noticeable.
How DLP Works and Its Bright-Room Trade-offs
DLP (Digital Light Processing) technology uses a single chip covered in hundreds of thousands of microscopic mirrors. Each mirror represents one pixel and can tilt toward or away from the light source to create light and dark areas. A spinning color wheel (in single-chip DLP) or separate light engines (in three-chip DLP) adds color.
Single-chip DLP, which is what most business and education projectors use, has a distinct bright-room challenge: the color wheel. Because the chip can only display one color at a time (the wheel spins red, green, blue, and sometimes white segments past the chip), color brightness is often lower than white brightness. A DLP projector rated at 5,000 ANSI lumens might only produce 3,500–4,000 lumens of color light, with the extra coming from the white segment of the color wheel. The result: maximum brightness appears in white-heavy content (text documents, spreadsheets), but color-heavy content (photographs, charts, branded presentations) appears dimmer.
This is a genuine problem in bright rooms. When your audience is already struggling to see the image because of ambient light, any reduction in color brightness pushes the image toward “unreadable.” For presentations that are text-heavy (white backgrounds with black text), DLP’s color wheel issue is less noticeable. For color-rich content, 3LCD has a clear advantage.
However, DLP excels in contrast ratio. The mirror-based system produces deeper blacks because mirrors can fully deflect light away from the lens. DLP projectors with dynamic contrast ratios of 100,000:1 or higher deliver more visible detail in dark scenes. In a bright room, this advantage is muted, but it still provides better visual hierarchy in charts and presentations with mixed light and dark elements.
DLP also avoids the “screen door effect” (visible pixel grid) that can appear on 3LCD projectors at lower resolutions, because the mirrors are separated by smaller gaps than LCD pixel structures. For text-heavy presentations viewed from close range, DLP’s cleaner pixel structure can produce sharper text.
How LCoS Works and Where It Fits
LCoS (Liquid Crystal on Silicon) combines elements of both 3LCD and DLP. It uses liquid crystals on a reflective backing (like DLP’s mirrors, but with liquid crystals controlling light rather than tilting mirrors). The result is high native contrast (the reflective backing blocks light more effectively than 3LCD’s transmissive panels) while maintaining the color accuracy of LCD-based systems.
LCoS projectors produce excellent image quality—sharp, high-contrast, and color-accurate. They’re the technology of choice for premium home theater projectors (Sony’s SXRD, JVC’s D-ILA). For bright rooms, LCoS has two challenges: first, LCoS projectors are typically expensive ($5,000–$30,000+), which prices them out of many business and educational budgets. Second, LCoS light engines absorb more light than 3LCD or DLP, meaning you get fewer lumens per watt of input power. For brightness-critical applications, LCoS requires larger, more expensive light engines to match the lumen output of 3LCD or DLP equivalents.
In practice, LCoS is rarely used for high-brightness business and educational projectors. It’s a technology optimized for image quality in controlled environments, not for maximum light output in hostile ambient conditions.
The Verdict for Bright Rooms
For most bright-room applications, 3LCD technology provides the best balance of brightness, color accuracy, and value. The equal color and white brightness means you get what you pay for in lumen ratings. Three of the five projectors in this guide use 3LCD for this reason.
DLP is appropriate when budget is tight, content is primarily text-based, and the room has moderate (not extreme) ambient light. The contrast ratio advantage provides some visual benefit even in bright conditions.
LCoS is a premium option for organizations that demand the highest image quality and have the budget to pay for it. It’s not the most efficient bright-room technology, but the image quality is exceptional.
For a detailed comparison with more technical depth, see our 3LCD vs DLP comparison guide.
Throw Distance Types: Standard, Short, and Ultra-Short Throw in Bright Rooms
Throw distance—the physical space between the projector and the screen—affects how much of the projector’s light output reaches the screen, how large the image is, and how the projector fits into your room. In bright rooms, throw distance has additional implications that don’t exist in dark environments.
Standard Throw (1.5:1 to 2.5:1)
Standard throw projectors are the most common type. A throw ratio of 1.5:1 means the projector needs 1.5 times the screen width of distance to fill the screen. For a 100-inch (87-inch wide) screen, that’s approximately 11 feet (130 inches). All five projectors in this guide are standard-throw models, with throw ratios between 1.5:1 and 1.6:1.
Standard throw is the default for ceiling-mounted installations in auditoriums, conference rooms, and classrooms. The projector sits behind the audience on the ceiling, projects over their heads, and fills the screen at the front of the room. This arrangement works well in bright rooms because the projector is isolated from the audience—no one walks between the projector and the screen, and the light path is clear.
The challenge in bright rooms: distance kills brightness. Light disperses as it travels. A projector producing 5,000 lumens at the lens will deliver less light per square inch to a 120-inch screen thrown from 20 feet than a 100-inch screen thrown from 13 feet. The inverse-square law applies: doubling the distance reduces brightness to one-quarter. In practical terms, this means that a large auditorium with a long throw distance might need significantly more lumens than a small conference room with the same screen size.
Here’s the critical insight: always calculate the actual lux reaching the screen, not just the projector’s lumen rating. A 5,000-lumen projector throwing a 100-inch image from 13 feet delivers approximately 190 lux to the screen. The same projector throwing a 120-inch image from 20 feet delivers approximately 95 lux—half the brightness. In a room with 300 lux of ambient light, the first scenario produces visible results; the second may struggle.
Short Throw (0.4:1 to 1.0:1)
Short throw projectors sit close to the screen—typically 3 to 6 feet for a 100-inch image. They use specialized wide-angle lenses to project a large image from a short distance. Short throw projectors are invaluable in small rooms where there isn’t enough depth for a standard throw installation.
In bright rooms, short throw has two advantages. First, the reduced distance means more of the projector’s light reaches the screen—less dispersion, higher lux at the screen surface. Second, the projector’s proximity to the screen means the audience doesn’t walk through the light path. No shadows on the screen when someone stands up.
The disadvantage: short throw projectors require very precise placement. A few inches of misalignment translates to significant image distortion on the screen. Many short throw models include keystone correction and lens shift to compensate, but these features can degrade image quality if over-corrected. Short throw lenses are also more expensive than standard throw lenses, adding to the projector’s cost.
For bright rooms specifically, short throw is ideal for small conference rooms (under 250 square feet) where standard throw distances aren’t available. They’re less common in large venues because the specialized lens adds cost and the precision placement requirements make installation more complex.
Ultra-Short Throw (0.1:1 to 0.4:1)
Ultra-short throw (UST) projectors sit inches from the screen—typically on a credenza or wall-mounted shelf directly below the screen. They can produce a 100-inch image from just 6–24 inches of distance. UST projectors are increasingly popular for home theaters and modern conference rooms.
For bright rooms, UST has mixed implications. The extremely short throw distance maximizes light delivery to the screen—virtually no light is lost to dispersion. UST projectors are also designed for specific screen types, often paired with ALR screens that are optimized for the sharp upward projection angle. A UST projector on a purpose-built ALR screen delivers impressive brightness and contrast in ambient light.
The challenges: UST projectors require flat, smooth screens with precise tensioning. Any waviness in the screen surface causes visible distortion because the projection angle is so extreme. UST projectors also have limited brightness options—their compact form factor restricts the size of the light engine. Most UST projectors max out around 3,000–4,000 lumens, which is below the threshold for most bright-room applications. Some newer models push higher, but they’re priced accordingly.
For organizations considering UST in bright rooms, the combination of a UST projector with a dedicated UST ALR screen can deliver excellent results in moderate ambient light (office lighting, some window light). For extreme brightness requirements (retail, gyms, skylights), standard throw with a high-lumen projector remains the better choice. Explore our UST vs. standard throw comparison for a detailed analysis of when each makes sense.
How Throw Distance Affects Brightness in Practice
The relationship between throw distance and screen brightness is not linear—it follows the inverse-square law. Here’s a practical comparison using the same 5,000-lumen projector:
| Screen Size | Throw Distance | Approx. Screen Illuminance | Bright Room Rating |
|---|---|---|---|
| 80 inches | 9 ft (standard throw) | ~280 lux | Excellent – any office |
| 100 inches | 13 ft (standard throw) | ~190 lux | Very good – standard lighting |
| 120 inches | 16 ft (standard throw) | ~130 lux | Good – moderate ambient light |
| 100 inches | 4 ft (short throw) | ~320 lux | Excellent – even bright rooms |
| 100 inches | 1 ft (UST) | ~380 lux | Excellent – but limited to UST models |
The takeaway: if your room is very bright and you can use a short throw or UST projector, you’ll get more effective brightness at the screen surface from the same lumen rating. But the trade-off in installation complexity, lens cost, and brightness options must be weighed against the brightness advantage.
To calculate the exact throw distance for your room, use our throw distance calculator.
Bright Room Projectors by Use Case: Matching Hardware to Environment
Different environments present different bright-room challenges. A projector that works perfectly in a corporate boardroom might fail in a church with vaulted ceilings and stained glass windows. This section breaks down the specific requirements and recommendations for the most common bright-room projection environments.
Education and Classrooms
Educational spaces are among the most challenging bright-room environments. Classrooms typically have overhead fluorescent lighting that stays on throughout the day, windows that provide natural light (and can’t always be covered due to fire codes or building design), and no option to darken the room during lessons. Teachers need to maintain eye contact with students, read materials, and write on whiteboards—all incompatible with a darkened room.
Brightness requirement: 4,000–5,000 lumens for K-12 classrooms (typically 700–1,200 square feet). Larger lecture halls and university spaces (1,500+ square feet) need 5,000–6,000 lumens.
Key features for education: WUXGA resolution for displaying text-heavy content (textbooks, worksheets, web pages). Network connectivity for IT management across multiple rooms. Long lamp life (or laser) because the projector runs 6–8 hours per day, 180+ days per year. Quiet fan noise—teachers need to speak over the projector. Built-in wireless display capability is increasingly important for classrooms where students and teachers share screens from laptops and tablets.
Budget consideration: Schools typically buy multiple units, so per-unit cost is critical. The Epson PowerLite 800F at 4,200 lumens is the standard classroom choice—affordable, reliable, and the WUXGA resolution is ideal for text. For larger spaces or schools with federal grant funding, the Epson EpiqVision or Hisense PX3-PRO provides better brightness and longevity.
Installation notes: Classroom projectors are almost always ceiling-mounted. Verify the ceiling height and throw distance before purchasing. Many classrooms have drop ceilings with standardized mounting points, making installation straightforward. Budget for a ceiling mount bracket and HDMI cable run from the teacher’s workstation to the projector location.
Houses of Worship
Churches, mosques, synagogues, and temples present unique projection challenges. These spaces often have high ceilings (20–50 feet), architectural lighting that can’t be modified, stained glass windows that create colorful ambient light patterns, and seating arrangements that span wide viewing angles. The content is typically song lyrics, scripture passages, and sermon notes—all text-heavy, all requiring readability from extreme distances.
Brightness requirement: 5,000–6,500 lumens for most worship spaces. The combination of high ceilings (long throw distances), wide seating areas, and architectural lighting means you need every lumen you can get. Larger sanctuaries (seating 500+) may need dual projectors or edge-blended setups.
Key features for worship: High brightness is non-negotiable. Network connectivity for remote control from the sound booth. Lens shift and keystone correction for flexible mounting in architecturally complex spaces. Low maintenance—many worship facilities have limited technical staff, so laser light sources with zero lamp replacement are ideal. Wide color gamut for displaying both text and video content (worship song backgrounds, video announcements).
Recommended models: The Optoma ZU606T-W is the professional standard for large worship spaces—6,500 lumens, laser, minimal maintenance. For medium-sized sanctuaries (200–500 seats), the Hisense PX3-PRO or AWOL VISION LTV-3500 provides sufficient brightness at a lower price point. For smaller worship spaces (under 200 seats), the Epson EpiqVision balances brightness and cost.
Installation notes: Worship space installations often require creative mounting solutions. High ceilings may need extension poles for ceiling mounts. Some sanctuaries mount projectors on balcony rails or side walls with rear projection. Verify the projection angle doesn’t create shadows from architectural features (columns, arches, lighting fixtures).
Corporate Boardrooms and Conference Centers
Corporate environments need projectors that work in standard office lighting—overhead fluorescents or LEDs at full brightness, glass walls that let in natural light, and a professional aesthetic that matches the room’s design. The content is typically PowerPoint presentations, Excel spreadsheets, video conferencing, and occasional video playback.
Brightness requirement: 4,500–5,500 lumens for standard boardrooms (300–800 square feet). Larger conference centers and training rooms (800–2,000 square feet) need 5,500–6,500 lumens.
Key features for corporate: Clean, professional appearance (no distracting noise or visible cables). Multiple HDMI inputs for connecting different laptops and devices. Wireless screen-sharing capability (Miracast, AirPlay, or proprietary wireless systems). Network management for IT departments overseeing multiple conference rooms. USB-C connectivity is increasingly expected for modern laptops. Integrated speakers or audio output for video playback during presentations.
Recommended models: The Epson EpiqVision is the corporate sweet spot—5,000 lumens, 3LCD color accuracy for branded presentations, and Epson’s extensive corporate support network. The Hisense PX3-PRO is the upgrade choice for boardrooms where the projector will be in use for 5+ years and the organization values laser longevity. For large corporate auditoriums and training centers, the Optoma ZU606T-W delivers professional installation quality.
Installation notes: Corporate boardrooms often have drop ceilings that simplify mounting. Ensure the projector integrates with the room’s existing AV system (Crestron, AMX, Extron control panels). Many modern boardrooms expect wireless presentation capability—projectors with built-in wireless or compatibility with wireless presentation gateways (Barco ClickShare, Mersive Solstice) reduce setup friction and make the room more usable for visiting presenters.
Healthcare and Medical Facilities
Healthcare projection has specialized requirements. Operating rooms need projectors for displaying surgical imaging, patient data, and teaching content. Medical education spaces require high-resolution projection for radiology images, pathology slides, and surgical videos. Hospital conference rooms serve multidisciplinary teams reviewing cases with detailed medical imagery.
Brightness requirement: 4,500–6,000 lumens depending on the space. Operating rooms have extremely bright surgical lighting (50,000+ lux near the surgical field), making projection challenging. Conference rooms and medical education spaces are similar to standard corporate environments.
Key features for healthcare: High resolution (WUXGA minimum, 4K preferred for radiology and surgical imaging). Color accuracy is critical—medical images rely on subtle color and grayscale differences for diagnosis and education. DICOM preset mode (available on some medical projectors) optimizes grayscale rendering for medical imaging. Network connectivity for integration with hospital information systems. Sterilizable surfaces and sealed optical paths for operating room environments.
Important note: Medical projectors used for diagnostic purposes must meet regulatory requirements (FDA clearance in the US). The projectors in this guide are suitable for medical education and conference room use but should not be relied upon for primary diagnostic imaging. Consult with your facility’s medical physics department before specifying projectors for clinical environments.
Recommended approach: For hospital conference rooms and medical education spaces, the Epson EpiqVision or Hisense PX3-PRO handles standard clinical presentations. For specialized medical projection, consult with medical AV specialists who can recommend DICOM-compliant projectors with appropriate regulatory clearances.
Retail and Digital Signage
Retail environments are among the brightest spaces for projection. Overhead retail lighting (designed to make merchandise look appealing) creates severe ambient light conditions—often 500–1,000 lux or more. Windows, display lighting, and competing digital displays all contribute to a hostile projection environment.
Brightness requirement: 6,000+ lumens for most retail applications. Some high-ambient retail environments (showrooms with skylights, glass-front stores) may need 8,000+ lumens or should consider LED video walls instead of projection.
Key features for retail: Maximum brightness is the primary requirement. Laser light source is essential because retail projectors run 12–16 hours per day, 365 days per year—lamp-based projectors would need lamp replacement every 6–12 months under this usage pattern. 360-degree mounting orientation for ceiling, wall, or floor projection in window displays. Portrait mode capability for vertically oriented signage content. Network management for content updates across multiple locations.
Recommended models: The Optoma ZU606T-W at 6,500 lumens handles most retail environments. For window displays and extreme brightness, the AWOL VISION LTV-3500 with its 6,000 lumens and flexible mounting provides a cost-effective option (though it requires more frequent lamp replacement under heavy use). Retail deployments with very high ambient light may exceed the capabilities of any standard projector and should consider professional-grade projection systems or LED displays.
Screen selection for retail: ALR screens are mandatory in retail environments. Standard screens will be invisible under retail lighting. Projection film applied to glass surfaces (for window displays) is a specialized product that transforms glass into a rear-projection surface while maintaining transparency from the outside.
Government and Institutional Facilities
Government buildings, military installations, and institutional facilities (courthouses, municipal buildings, emergency operations centers) have specific procurement and performance requirements. These environments often can’t be darkened due to security requirements (lights stay on for note-taking, monitoring, and safety). Long-term reliability and low maintenance are essential because replacement procurement processes can take months or years.
Brightness requirement: 4,500–6,500 lumens depending on the space. Emergency operations centers and command facilities often require maximum brightness because multiple screens and information sources compete for visual attention in the same room.
Key features for government: Laser light source for zero-maintenance operation and consistent brightness over the projector’s lifetime. TAA compliance (Trade Agreements Act) for US federal procurement—many government contracts require TAA-compliant products. Network security features (disabled wireless, secure management protocols). Long product lifecycle support—the projector should be serviceable and supported for 7–10 years. High reliability with minimal failure rates.
Recommended models: The Optoma ZU606T-W is the most government-appropriate model on this list—laser, professional installation quality, and designed for mission-critical applications. Verify TAA compliance with the specific vendor and model before procurement. For less critical government conference rooms, the Hisense PX3-PRO offers laser longevity at a lower price point.
Procurement notes: Government procurement often goes through GSA Schedule contracts, state cooperative purchasing agreements, or competitive bidding processes. Work with an AV integrator experienced in government procurement to navigate the specification, bidding, and installation requirements. Many government facilities require detailed engineering drawings, site surveys, and acceptance testing before final payment.
Museums, Exhibitions, and Public Spaces
Museum projection exists in an environment where ambient light is carefully controlled for artifact preservation but can still be significant for exhibit areas. Exhibition spaces in galleries, trade shows, and public installations face extreme ambient light challenges—convention center lighting, competing exhibitor displays, and natural light from large architectural windows.
Brightness requirement: 5,000–8,000+ lumens for exhibition environments. Museum environments vary widely depending on the gallery design and conservation requirements.
Key features for exhibitions: Extended operation capability (12–16 hours daily). Content management integration for scheduled playback and interactive exhibits. Edge-blending capability for multi-projector immersive installations. Quiet operation—projector noise should not interfere with the visitor experience. Compact form factor for installations where the projector must be concealed.
Recommended approach: For trade shows and temporary exhibitions, the AWOL VISION LTV-3500 provides maximum brightness at a reasonable price point, and its 360-degree mounting allows creative placement in booth structures. For permanent museum installations, the Optoma ZU606T-W or higher-end professional projectors from manufacturers like Panasonic and Christie are more appropriate due to their content management capabilities and extended reliability.
Connectivity and Integration for Professional Installations
In a bright-room setting, the projector is usually part of a larger AV ecosystem—connected to laptops, video conferencing systems, control panels, and network management tools. The right connectivity options determine how easily the projector integrates into your existing infrastructure and how reliably it operates day-to-day.
HDMI: The Universal Standard (With Variations)
Every projector on this market includes at least one HDMI input, but not all HDMI is equal. HDMI 1.4 supports up to 4K at 30Hz—sufficient for presentations and most video content. HDMI 2.0 bumps that to 4K at 60Hz with HDR support, important if you’re displaying high-quality video content. HDMI 2.1 adds 4K at 120Hz and 8K support, primarily relevant for gaming and future-proofing rather than business presentations.
For bright-room business and educational use, HDMI 2.0 is the practical standard. It handles all common presentation formats, supports audio return, and is compatible with the vast majority of laptops and conference systems in use today. If your organization is transitioning to USB-C for laptop connectivity (increasingly common with modern thin laptops), check whether the projector includes USB-C inputs or whether you’ll need HDMI adapters at each workstation.
Multiple HDMI inputs are valuable in conference rooms where different presenters connect different devices. A projector with two HDMI inputs eliminates the need for an external HDMI switcher—saving cost and reducing cable clutter. The Epson EpiqVision and Hisense PX3-PRO both include multiple inputs, which is standard for projectors in this price range.
HDBaseT: Professional Long-Distance Connectivity
HDBaseT is a professional AV standard that transmits uncompressed video, audio, power, Ethernet, and control signals over a single Cat6 cable up to 100 meters (328 feet). For permanent installations where the projector is ceiling-mounted far from the source equipment (a common scenario in auditoriums and large conference rooms), HDBaseT eliminates the signal degradation and cable management issues associated with long HDMI cable runs.
HDBaseT is standard on professional installation projectors like the Optoma ZU606T-W and available via optional input boards on some mid-range models. If your installation requires cable runs longer than 30 feet (10 meters), HDBaseT is the recommended approach—it’s more reliable, easier to terminate, and the cable (Cat6) is less expensive than equivalent-length HDMI cables.
For organizations standardizing their AV infrastructure, HDBaseT simplifies everything: one cable type for all connections, easy termination with standard networking tools, and compatibility with HDBaseT matrix switches that allow multiple sources and displays to be interconnected.
Wireless Display and Screen Sharing
Wireless presentation has moved from “nice to have” to “expected” in modern conference rooms. The ability for a presenter to walk in, open their laptop, and share their screen without connecting any cables reduces setup friction and makes the room more usable for visitors and ad-hoc meetings.
Several wireless standards compete in this space:
- Miracast: Built into Windows 10/11, Miracast creates a direct Wi-Fi connection between the laptop and projector. No network infrastructure required. However, Miracast can be unreliable on some devices and doesn’t support macOS natively.
- AirPlay: Apple’s wireless display protocol works seamlessly with MacBooks, iPads, and iPhones. Requires the projector to be on the same Wi-Fi network. Some projectors include AirPlay support; others require an external Apple TV.
- Google Cast: Built into Chromebooks and Chrome browsers, Google Cast provides wireless screen sharing for organizations standardized on Google Workspace.
- Proprietary solutions: Barco ClickShare, Mersive Solstice, and similar products provide enterprise-grade wireless presentation with cross-platform support, security features, and room scheduling integration. These typically work as external devices connected to the projector’s HDMI input.
For bright-room installations, wireless capability is less about the projector’s built-in wireless features and more about the wireless presentation device you pair with it. Most organizations with multiple conference rooms standardize on one wireless platform (typically ClickShare or Solstice) and connect it to every projector. This provides a consistent user experience across all rooms and simplifies IT support.
Network Control and Management
For organizations managing multiple projectors across multiple locations, network control is essential. Projectors with Ethernet ports and built-in web servers allow IT teams to:
- Monitor projector status (on/off, lamp hours, error codes) from a central dashboard
- Power projectors on and off remotely (scheduling automatic shutdown saves lamp hours)
- Adjust settings (brightness, input source, volume) without physical access
- Receive alerts when lamps approach end of life or when the projector overheats
- Push firmware updates to keep all projectors current
- Integrate with room scheduling systems (turn on the projector when a meeting is scheduled, turn off when the room is empty)
The Optoma ZU606T-W and Epson EpiqVision both include robust network management capabilities. The Epson PowerLite 800F has basic network connectivity. For organizations investing in multiple bright-room projectors, network management pays for itself quickly in reduced maintenance labor and extended projector lifespan (through scheduled power management).
Audio Connectivity
Projector speakers are universally inadequate for any space larger than a small meeting room. In bright-room environments—which tend to be larger spaces with more audience members—external audio is mandatory. Look for projectors with 3.5mm audio output jacks or digital audio pass-through (S/PDIF or HDMI ARC) that connect to external amplifiers and speakers.
For permanent installations, integrate the projector’s audio output with the room’s existing sound system. Many conference rooms and auditoriums have ceiling speakers connected to a DSP (digital signal processor) that manages audio from multiple sources. The projector’s audio output feeds into the DSP, which distributes the sound to the room’s speakers. This integration is straightforward with professional AV systems—just verify the projector’s audio output format matches the DSP’s input expectations.
Control System Integration
Professional AV installations use control systems (Crestron, AMX, Extron, QSC) to automate room functions: one button on a touch panel turns on the projector, lowers the screen, adjusts the lights, and activates the audio system. These control systems communicate with projectors via RS-232 serial ports, Ethernet, or IP commands.
If your organization uses control systems, verify that your chosen projector supports the control protocol your system requires. Most professional projectors support Crestron and AMX integration via RS-232 or Ethernet. Some budget-oriented projectors lack RS-232 ports, which limits integration options. For the five projectors in this guide: the Optoma ZU606T-W has full professional control integration; the Epson EpiqVision has solid network control; the Hisense and Epson PowerLite have basic network management; and the AWOL VISION has limited control integration.
Color Calibration and Image Settings for Bright Environments
Out of the box, most projectors are set to a “dynamic” or “bright” mode that maximizes lumen output at the expense of color accuracy. In a dark room, this matters because you notice color shifts. In a bright room, you might think it doesn’t matter—just crank the brightness and hope for the best. That’s a mistake. Properly calibrated color in a bright room delivers a more professional, readable image than maximum brightness alone.
Why “Bright” Mode Isn’t Always Best
The “bright” or “dynamic” preset on most projectors achieves maximum lumens by boosting the green channel and pumping the overall gain. This makes the image appear brighter on a light meter, but the color shift makes whites look greenish and skin tones look unnatural. In a business presentation, green-tinted charts and faces don’t inspire confidence. In a medical education context, inaccurate color can misrepresent diagnostic images.
A better approach: use “presentation” or “sRGB” mode if available, and then adjust brightness and contrast to suit your room’s ambient light level. These modes maintain more accurate color while still delivering high brightness. You sacrifice 10–15% of maximum lumen output but gain significantly better color fidelity. In a bright room where your audience is already straining to see, that color accuracy makes the difference between “professional presentation” and “projected blob.”
Color Temperature: Finding the Right Balance
Color temperature (measured in Kelvin) describes the “warmth” or “coolness” of white light. Lower color temperatures (5,000K–6,500K) produce warmer, slightly yellowish whites. Higher temperatures (7,500K–9,300K) produce cooler, bluish whites. The standard for video and presentation content is 6,500K (D65), which matches the white point used in content creation.
In bright rooms, the ambient light affects your perceived color temperature. Overhead fluorescent lights typically emit 4,000K–5,000K light (warm white). LED office lighting is usually 4,000K–5,000K as well. When the ambient light is warm and your projector is set to 6,500K, the projected white appears slightly cooler (bluer) than the surrounding environment. This isn’t necessarily wrong, but it can make the projected image feel disconnected from the room.
Adjusting your projector’s color temperature to match the ambient lighting (typically 5,500K–6,000K for office environments) creates a more natural-looking image. The white areas of your slides blend with the room’s lighting rather than fighting against it. This is a subtle adjustment that most people don’t consciously notice but that contributes to a more comfortable viewing experience over long presentations.
Gamma Settings for Bright Rooms
Gamma controls the relationship between the input signal and the displayed brightness. In dark rooms, a gamma of 2.2 is standard—it produces natural-looking images with smooth gradations from dark to light. In bright rooms, ambient light washes out the dark end of the gamma curve, making shadow details invisible.
For bright-room projection, consider adjusting gamma to 1.8–2.0. This raises the brightness of dark areas relative to bright areas, making shadow details more visible against ambient light. The trade-off is slightly reduced contrast perception, but in a bright room where contrast is already compromised by ambient light, the visibility improvement outweighs the contrast loss.
Some projectors offer a “DICOM” gamma preset designed for medical imaging, which provides a linear brightness ramp optimized for grayscale detail. This preset is useful for any content where subtle gradations matter—medical images, architectural drawings, and detailed charts.
Brightness and Contrast Optimization
The goal of brightness and contrast adjustment in a bright room is to maximize the difference between the projected image and the ambient light reflecting off the screen. Here’s a practical calibration process:
- Display a test pattern with black-to-white gradations (most projectors include built-in test patterns, or use a calibration app).
- Set contrast to maximum (100%), then reduce it until you can distinguish between the brightest white and the next step down. Over-driving contrast clips highlight detail.
- Set brightness (the black level) so that the darkest gray is just barely visible against the screen. In a bright room, you may need to raise brightness above the dark-room calibration point because ambient light is adding brightness to the black areas.
- Check a real presentation (your actual slides, not test patterns) from the farthest seat in the room. If text is readable and charts are clear, the calibration is correct.
This process takes 10–15 minutes and dramatically improves the viewing experience compared to running the projector at default settings. For organizations with AV staff, calibrate each projector to its specific room—the same projector in different rooms with different ambient light levels should have different settings.
The Impact of Eco Mode on Bright-Room Performance
Most projectors offer an “Eco” or “Economy” mode that reduces lamp brightness by 20–30% in exchange for extended lamp life and reduced fan noise. In a dark room, Eco mode is a sensible trade-off—you don’t need maximum brightness, and the extended lamp life saves money. In a bright room, Eco mode is almost always the wrong choice. Reducing brightness by 20–30% in a space where you’re already fighting ambient light can push the image below the visibility threshold.
The one exception: if you’ve installed an ALR screen that compensates for ambient light, Eco mode might provide sufficient brightness while extending lamp life. Test it—display your typical content in Eco mode with the room’s normal lighting, and verify readability from the farthest seat. If it works, Eco mode saves lamp life and reduces operating noise. If it doesn’t, stay on full brightness.
For laser projectors, the equivalent is “brightness reduction” settings that limit the laser output. The same rule applies: in bright rooms, keep the laser at full output unless the room conditions clearly allow for reduction.
Professional Calibration vs. DIY
Professional AV calibrators use specialized equipment (colorimeters, spectrometers, and signal generators) to precisely measure and adjust the projector’s output. Professional calibration costs $300–$800 per projector and takes 1–2 hours. It’s worthwhile for mission-critical installations (boardrooms, auditoriums, medical education spaces) where image quality directly affects business outcomes.
For standard conference rooms and classrooms, DIY calibration using the process described above delivers 80–90% of the benefit at zero cost. The key is to actually do it—most projectors run at default settings for their entire lives because nobody takes 15 minutes to adjust the picture. That 15 minutes makes a bigger difference than most people expect.
Projector vs. Large-Format Display: When Each Makes Sense in Bright Rooms
The projector isn’t always the right tool for bright-room presentation. Large-format LED displays (85-inch, 98-inch, and video wall configurations) have become increasingly affordable and offer inherent advantages in ambient light conditions. Understanding when to choose a projector versus a large display helps you avoid over-investing in the wrong technology.
When Projectors Win
Projectors dominate in one critical dimension: image size per dollar. A projector producing a 120-inch image costs $2,000–$6,000. An equivalent 120-inch LED display costs $15,000–$50,000+. For any application requiring images larger than 100 inches, projection remains the most cost-effective technology by a wide margin.
Projectors also win on portability. A 20-pound projector can be moved between rooms, taken to off-site events, or repositioned as room layouts change. A 98-inch TV is a semi-permanent installation that requires planning, heavy equipment to move, and careful handling. For organizations with multiple presentation spaces that share a projector, projection is the flexible choice.
Weight and wall structure matter too. A 98-inch display weighs 150–200 pounds and requires a wall structure capable of supporting that weight safely. Many older buildings, temporary structures, and rooms with glass or partition walls can’t safely mount a large-format display. A ceiling-mounted projector places the weight on the ceiling structure (which is designed for heavy loads) and projects onto any wall or screen surface.
When Large Displays Win
Large-format displays produce their own light—they don’t depend on a darkened room or high-lumen projector to be visible. An 85-inch LED display at 500 nits (approximately 1,600 lumens of screen brightness) is visible in any lighting condition because the light is generated at the screen surface and directed outward. There’s no projector-screen distance, no light dispersion, and no ambient light rejection needed.
For rooms under 100 inches of desired screen size, large displays are increasingly competitive. An 85-inch display at $3,000–$6,000 provides guaranteed visibility in any lighting condition, zero maintenance (no lamps to replace), instant-on capability (no warm-up time), and built-in smart features. For a small conference room where the screen is 75–85 inches, the cost comparison between a high-brightness projector plus screen versus a large display is nearly equal—and the display wins on convenience and reliability.
Large displays also win on resolution density. A 4K 85-inch display has a pixel density that produces razor-sharp text at any viewing distance. A 4K projector at 120 inches spreads those same pixels over a much larger area, reducing the per-inch sharpness. For detailed work (financial spreadsheets, engineering drawings, medical imaging), the display’s pixel density is a genuine advantage.
The Break-Even Point
The crossover between projector and display depends on three variables: screen size, ambient light conditions, and budget.
- Under 85 inches: Large display almost always wins. Cost is comparable, and the display’s ambient light immunity eliminates the bright-room problem entirely.
- 85–100 inches: Competitive territory. A high-brightness projector ($3,000–$4,000) plus ALR screen ($500–$1,500) competes with a 98-inch display ($5,000–$10,000). The projector offers flexibility; the display offers reliability.
- 100–150 inches: Projector wins on cost. No affordable display solution exists at this size. The projector’s bright-room challenges (ALR screen, high lumen output) are solvable at a fraction of the display cost.
- 150+ inches: Projector is the only practical option (unless you have a $50,000+ budget for an LED video wall).
For organizations evaluating both options, start with the screen size requirement. If the answer is under 100 inches, seriously consider a large display. If it’s over 100 inches, projection is the clear winner on cost. Between 85 and 100 inches, weigh the trade-offs of flexibility versus ambient-light immunity for your specific use case.
Video Walls: The Enterprise Alternative
For very large display areas (150+ inches) in bright rooms with unlimited budgets, direct-view LED video walls offer the best of both worlds: extreme brightness (1,000+ nits, equivalent to 3,000+ lumens per square meter), perfect ambient light immunity, modular sizing (any size you want, built from tileable LED panels), and zero maintenance. The downside is cost—a 150-inch LED video wall costs $30,000–$100,000+ depending on pixel pitch and quality.
LED video walls are standard in control rooms, trading floors, sports arenas, and large corporate lobbies where ambient light is severe and the display must be visible from every angle and distance. For most business and educational settings, video walls are overkill. But for organizations with the budget and the need, they represent the ultimate bright-room display solution.
For a deeper cost and feature comparison, see our projector vs. 85-inch TV comparison.
Maintaining and Maximizing Brightness Over Time
A projector that produces 5,000 lumens on day one won’t necessarily produce 5,000 lumens in year three. Brightness degrades over time due to light source aging, dust accumulation, optical component degradation, and environmental factors. In bright rooms where you’re already pushing the projector’s limits, maintaining original brightness is critical—a 20% brightness loss that’s unnoticeable in a dark room can render a bright-room projector ineffective.
Lamp Aging: The Biggest Factor
Lamp-based projectors (3LCD and single-chip DLP) use UHP (Ultra High Performance) or UHE (Ultra High Efficiency) mercury vapor lamps. These lamps produce light by creating an electrical arc between two electrodes in a small quartz envelope filled with mercury vapor. As the lamp ages, several things happen:
- Electrode erosion: The electrodes slowly erode with each hour of use, widening the arc gap. A wider arc requires more voltage to maintain, and the light output decreases.
- Mercury depletion: Mercury gradually deposits on the interior walls of the lamp envelope, reducing the amount of mercury available to produce light.
- Envelope blackening: Tungsten from the electrodes deposits on the inside of the quartz envelope, creating a dark film that absorbs light before it exits the lamp.
The practical result: lamp brightness drops approximately 20–25% after the first 2,000 hours of use. By 4,000 hours, brightness is typically 40–50% of original specification. By the rated lamp life (5,000–6,000 hours), the lamp may be producing only 50–60% of its original brightness. In a bright room where you spec’d the projector for 5,000 lumens, a lamp at 3,000 hours is effectively a 3,750-lumen projector—potentially below the threshold for your room’s ambient light.
The mitigation: replace lamps proactively, not reactively. Don’t wait for the lamp to fail—replace it when brightness drops below your room’s minimum requirement. For bright-room installations, this typically means replacing the lamp at 2,500–3,000 hours (when brightness has dropped 25–30%) rather than waiting for the full rated life. Budget for this early replacement in your total cost of ownership calculations.
Some projectors include a “lamp hours” counter in their menu system that tracks cumulative usage. Use this to schedule proactive replacements. Keep a spare lamp on hand so you can replace it immediately when it’s needed—don’t wait for procurement to process a purchase order while your auditorium projector is running at half brightness.
Laser Longevity: Why It Matters for Bright Rooms
Laser light sources degrade much more slowly than lamps. A laser rated at 20,000 hours will typically retain 70–80% of its original brightness at the end of its rated life. That means a 5,000-lumen laser projector will still produce approximately 3,500–4,000 lumens at 20,000 hours—still enough for many bright-room applications.
The advantage for bright rooms is consistency. During the first 10,000 hours (roughly 5–7 years of daily office use), laser brightness remains above 90% of specification. You won’t notice any degradation in the first five years. Compare this to a lamp that’s noticeably dimmer after 18 months, and the laser advantage becomes clear.
Laser projectors also turn on instantly (full brightness within seconds) and turn off instantly (no cool-down period). Lamp-based projectors require 30–60 seconds to reach full brightness and 2–5 minutes of cool-down before you can safely move or unplug them. For frequently used rooms where the projector is turned on and off multiple times per day, this convenience factor adds up.
Filter Maintenance
Dust is the silent enemy of projector brightness. Projectors draw air through their cooling systems to dissipate heat from the light source. This air carries dust particles that accumulate on air filters, optical components, and internal surfaces. Clogged filters restrict airflow, causing the projector to reduce brightness to prevent overheating (thermal throttling). Dust on optical components (lenses, mirrors, LCD panels) absorbs and scatters light before it reaches the screen.
Maintenance schedule for bright-room projectors:
- Monthly: Visually inspect air intake filters. If they’re visibly dusty, clean them with compressed air or a vacuum.
- Every 3 months: Remove and clean filters per manufacturer instructions. Some filters are washable; others need replacement.
- Annually: Clean the projector lens with a microfiber cloth and lens cleaning solution. Never use paper towels or household glass cleaner on projector lenses—the optical coatings are delicate and can be permanently damaged by abrasive materials or harsh chemicals.
- Every 2–3 years: Professional internal cleaning. A qualified AV technician can open the projector and clean internal optical surfaces, removing dust that has bypassed the filters. This service costs $150–$300 but can restore 10–15% of lost brightness in dusty environments.
For detailed cleaning procedures specific to projector optics, see our projector lens cleaning guide.
Environmental Factors
Temperature, humidity, and air quality all affect projector longevity and brightness:
- Temperature: Projectors perform best between 50–95°F (10–35°C). Operating in temperatures above 95°F accelerates lamp aging and can trigger thermal throttling. Ensure adequate ventilation around the projector (minimum 12 inches clearance on all sides for ceiling-mounted units).
- Humidity: High humidity (above 80%) can cause condensation on optical components, reducing image quality and potentially damaging electronics. Very low humidity (below 20%) increases static electricity, which attracts dust to optical surfaces.
- Air quality: Environments with heavy dust (construction sites, industrial facilities, agricultural settings), smoke (restaurants, event venues), or chemical vapors (laboratories) dramatically accelerate filter clogging and optical contamination. In these environments, projectors with sealed optical chambers (no air intake through the optical path) perform better, but filter maintenance must be even more frequent.
Software and Firmware Updates
Projector manufacturers periodically release firmware updates that can improve brightness management, color accuracy, and thermal performance. These updates are typically available through the manufacturer’s website and installed via USB drive or network connection. While firmware updates won’t increase the physical light output of the projector, they can optimize how the projector manages its resources—improving brightness in eco modes, fixing color accuracy issues, or improving thermal management to prevent unnecessary throttling.
Check for firmware updates annually and apply them during scheduled maintenance windows. This is particularly important for laser projectors, which may have their laser power management algorithms refined through firmware updates over the product’s lifecycle.
Measuring and Managing Ambient Light in Your Space
Before selecting a projector, you should know how much ambient light your room actually has. Guessing leads to over-specifying (wasting money on unnecessary brightness) or under-specifying (buying a projector that can’t overcome the ambient light). A simple light measurement takes 10 minutes and removes the guesswork.
How to Measure Ambient Light
A lux meter (also called a light meter) measures illuminance—the amount of light falling on a surface. Basic lux meters cost $20–$50 online and provide accurate readings for room assessment. Smartphone lux meter apps exist but are less accurate (typically ±30% error) and shouldn’t be relied on for critical purchasing decisions.
To measure your room’s ambient light:
- Set up the room in its typical operating condition. Turn on all overhead lights, open all blinds, and position the room as it would be during a normal presentation.
- Measure at the screen location. Hold the lux meter at the position where the screen surface will be, with the sensor facing toward the audience (where the projector light would come from). Take readings at multiple points across the screen area and average them.
- Record the number in lux. This is your ambient light baseline. You’ll use this number to determine the minimum projector brightness needed.
Translating Lux to Projector Requirements
The relationship between ambient light and required projector brightness depends on the desired contrast ratio. For comfortable viewing of text-heavy content (presentations, documents), you need the projected image to be at least 3–5 times brighter than the ambient light at the screen surface. For video content with dark scenes, you need 10:1 or higher.
Here’s a practical translation table:
| Ambient Light at Screen | Typical Room Type | Minimum Projector Brightness (100″ screen) |
|---|---|---|
| 50–100 lux | Dimmed conference room, partial window blinds | 2,500–3,500 lm |
| 100–200 lux | Standard office, overhead lights on, some window light | 3,500–5,000 lm |
| 200–400 lux | Bright office, full overhead lighting, large windows | 5,000–6,500 lm |
| 400–800 lux | Retail space, atrium, skylights | 6,500+ lm (or consider LED display) |
| 800+ lux | Direct sunlight, industrial lighting | Projection impractical—use LED display |
These numbers assume a standard 1.0-gain white screen. An ALR screen effectively reduces the ambient light by 50–70%, which means a room measuring 300 lux at the screen surface behaves like a 100–150 lux room when using an ALR screen. This is why ALR screens are such a powerful tool for bright-room projection—they fundamentally change the ambient light math in your favor.
Managing Ambient Light Without Full Blackout
Most bright-room spaces can’t achieve full blackout, but even partial ambient light reduction makes a significant difference. Here’s a prioritized list of ambient light management strategies, from simplest to most involved:
- Install dimmer switches on overhead lights. Cost: $30–$80 per switch. Impact: reduces overhead light by 30–70%. The simplest and most cost-effective ambient light management strategy. Most fluorescent and LED fixtures can be retrofitted with dimmers.
- Add window blinds or shades. Cost: $100–$500 per window. Impact: reduces window light by 60–90%. Blackout roller shades are the most effective; light-filtering shades reduce light but don’t eliminate it. Motorized blinds that can be raised/lowered from the control panel add convenience.
- Position the screen away from windows. Cost: $0 (planning stage). Impact: varies. If you’re designing the room, place the screen on the wall opposite the windows so the projector light and window light don’t collide directly. Ambient light still reflects around the room, but the direct impact on the screen is reduced.
- Use matte finishes on walls and ceiling near the screen. Cost: $100–$500 (paint). Impact: reduces reflected ambient light by 20–30%. Glossy walls near the screen bounce ambient light toward the screen surface, amplifying the problem. Matte paint absorbs and scatters light instead.
- Install directional lighting. Cost: $200–$1,000. Impact: reduces light at screen by 30–50%. Instead of overhead fixtures that illuminate everything equally, install track lighting or recessed adjustable fixtures that direct light toward work surfaces and away from the screen area.
Combined, these strategies can reduce ambient light at the screen surface by 50–80%, which is often enough to make a 4,500-lumen projector work in a room that would otherwise require 6,000+ lumens. The total cost ($500–$2,000 for a typical conference room) is far less than upgrading from a $3,000 projector to a $6,000 projector.
Multi-Projector Solutions and Edge Blending for Large Bright Spaces
When a single projector can’t deliver sufficient brightness or image size for your space, multiple projectors offer a scalable solution. Two techniques—brightness stacking and edge blending—address different problems but both leverage multiple projectors to exceed what a single unit can achieve.
Brightness Stacking
Brightness stacking places two or more projectors in the same position, all projecting the same image onto the same screen. The light output is additive: two 5,000-lumen projectors stacked produce approximately 10,000 lumens on the screen. This technique is used in environments where extreme brightness is required (large auditoriums with very high ambient light, outdoor daytime projection, large-format exhibition displays).
Stacking requires precise alignment—both projectors must produce an identical image in the same position. This is achieved through:
- Lens shift and zoom matching: Both projectors use identical lens settings to produce the same image size and position.
- Geometric correction: Software or built-in projector features align the images pixel by pixel. Most professional projectors include stacking alignment tools.
- Stacking frame: A mechanical mounting frame holds both projectors in precise alignment. Without a frame, even small vibrations (HVAC systems, foot traffic) can cause the images to drift apart, creating ghosting.
The disadvantage of stacking: cost doubles, power consumption doubles, and heat output doubles. You’re paying for two projectors, two sets of maintenance, and twice the electrical load. In extreme environments (outdoor events, large convention spaces), this is justified. In standard indoor environments, upgrading to a single brighter projector (like the Optoma ZU606T-W at 6,500 lumens) is more cost-effective than stacking two 4,000-lumen units.
Edge Blending
Edge blending uses multiple projectors side by side to create a single, ultra-wide or ultra-large image that no single projector could produce. Each projector covers a portion of the total image, with the edges overlapping. The overlapping zone is carefully blended—the brightness is gradually reduced across the overlap to create a seamless transition between projectors.
Edge blending is used for:
- Wide-screen presentations: A 200-inch ultra-wide image (21:9 or 32:9 aspect ratio) created by two or three projectors blended side by side.
- Immersive environments: Museums, simulation centers, and experiential installations where the image wraps around the audience.
- Large venue coverage: When a single projector can’t cover the full screen area at sufficient brightness, multiple projectors divide the screen into zones.
Edge blending requires projectors with built-in blending capability or an external edge-blending processor. The blending zone (where two projectors overlap) must be carefully calibrated to avoid visible seams. This is a specialized skill—most organizations hire professional AV integrators for edge-blended installations.
For bright-room edge blending, the ambient light challenge is compounded: you need each projector to be bright enough to overcome ambient light in its zone, plus enough margin for the blending overlap (where brightness is intentionally reduced). A practical approach: calculate the brightness requirement for a single projector covering the full screen, then use that same per-projector brightness for each blended zone. The overlap reduces brightness in the blend zone by 20–30%, but the surrounding zones compensate.
Practical Considerations for Multi-Projector Installations
Multi-projector setups require more infrastructure than single-projector installations:
- Content source: The source device (media player, PC, video processor) must output a signal that spans the total resolution of all projectors. For a dual-projector blend, you need a source that outputs a double-wide resolution (e.g., 3840×1080 for two 1920×1080 projectors blended side by side).
- Signal distribution: The source signal must be split and distributed to each projector. This requires a video processor or matrix switch capable of splitting the content and applying blending corrections.
- Calibration: Each projector must be individually calibrated for brightness, color temperature, and geometric alignment, then the blend zone must be calibrated for seamless transition. This process takes 2–4 hours per installation and requires specialized calibration software and hardware.
- Maintenance: All projectors in a blend must be maintained identically. If one projector’s lamp dims faster than the others, the blend becomes uneven. For lamp-based projectors, replace all lamps simultaneously, even if some have more hours than others. Laser projectors eliminate this concern because their brightness degrades uniformly and slowly.
For organizations considering multi-projector solutions, laser projectors are strongly recommended. The consistent brightness over time prevents the blend from becoming uneven due to differential lamp aging—a problem that plagues lamp-based blended installations and requires frequent recalibration.
Common Mistakes When Selecting Bright-Room Projectors
Mistake #1: Assuming Brightness Alone Solves the Problem
Many organizations buy the brightest available projector and skip everything else. But if that projector is mounted poorly, connected to a mediocre screen, or placed in a room with glossy walls that bounce ambient light everywhere, the brightness advantage disappears. Room preparation—screen quality, mounting angle, ventilation—is 40% of the solution. Projector selection is 60%.
Mistake #2: Ignoring Color Saturation
Brightness and color saturation are different. Some projectors achieve high lumen output by cranking up white light output without matching color intensity, resulting in a bright but washed-out image. The 3LCD models (Epson EpiqVision, AWOL) and laser models (Hisense, Optoma) maintain color saturation better than some competitors. Compare color bars and actual presentation slides when evaluating, not just brightness numbers.
Mistake #3: Underestimating Lamp Replacement Costs
A $2,500 projector costs $3,500–4,000 total over five years when you factor in lamp replacements. Many organizations don’t budget for this and then face surprise costs when lamps fail. If you choose a lamp-based projector, build a maintenance budget from day one.
Mistake #4: Buying Overkill Brightness for Small Spaces
If your permanent room is a 300-square-foot conference room, you don’t need 6,000 lumens. You need 4,000–4,500. Extra brightness adds cost and serves no practical purpose. Match the projector to the actual space, not to an imaginary future upgrade. The Epson EpiqVision is correct for most permanent installations; the AWOL and Optoma are for genuinely large spaces.
Mistake #5: Neglecting Installation and Network Connectivity
Cheap projectors often lack network connectivity, making troubleshooting and management tedious. In a bright-room setting where the projector is often semi-permanent (ceiling-mounted, integrated with AV systems), network control (Crestron, AMX, or native HDMI over IP) is worth paying for. It saves labor costs and enables remote management across multiple installations.
Mistake #6: Choosing Resolution Over Brightness
Some buyers insist on 4K resolution for their bright-room projector, stretching their budget and sacrificing brightness in the process. A 4K projector at 3,500 lumens will look worse in a bright room than a WUXGA projector at 5,000 lumens. The higher resolution adds sharpness to the image, but if ambient light washes out the entire picture, that sharpness is invisible. Prioritize lumens first, then upgrade to higher resolution only if the budget allows without compromising brightness.
Mistake #7: Ignoring the Screen
Many organizations spend $4,000–$6,000 on a bright-room projector and mount it in front of a $200 white screen. This is like buying a sports car and fitting it with bicycle tires. The screen is half the optical system. An ALR screen that costs $800–$1,500 can improve perceived brightness by 20–40%, effectively giving you a free upgrade from 5,000 lumens to 6,000–7,000 perceived lumens. When budgeting for a bright-room projector, always include the screen cost in the calculation.
Mistake #8: Not Testing in Your Actual Room
Spec sheets and reviews provide useful data, but every room is different. The same projector that works beautifully in one 500-square-foot conference room may struggle in another due to different window placement, ceiling height, wall color, or lighting fixtures. Before committing to a purchase, request a demo unit or arrange a trial installation. Many AV dealers and projector manufacturers offer evaluation units for institutional buyers. Two hours of testing in your actual room with your actual lighting conditions is worth more than days of online research.
Mistake #9: Forgetting About Audio
A bright-room projector in a large space needs external audio. The built-in speakers on most projectors produce 2–10 watts of audio—enough for a small meeting room but completely inadequate for a 1,000-square-foot training center or auditorium. Budget for external speakers and an amplifier (or a powered speaker system) as part of the installation. The best projection system in the world is useless if the audience can’t hear the presenter.
Mistake #10: Skipping the Site Survey
For permanent installations, a site survey before purchasing prevents expensive mistakes. Measure the room dimensions. Calculate throw distance. Identify mounting locations. Assess ambient light levels at different times of day (a room that’s fine at 3 PM may be unbearably bright at 9 AM when east-facing windows catch direct sunlight). Note ceiling structure, electrical access, and cable pathways. This survey takes an hour and eliminates the most common installation failures: insufficient throw distance, inadequate ventilation at the mounting location, and unexpected ambient light from windows that weren’t considered.
Side-by-Side Detailed Comparison: The Features That Matter
| Feature | Epson EpiqVision | Hisense PX3-PRO | AWOL LTV-3500 | Epson 800F | Optoma ZU606T-W |
|---|---|---|---|---|---|
| Brightness | 5,000 lm | 5,000 lm | 6,000 lm | 4,200 lm | 6,500 lm |
| Light Source Type | 3LCD Lamp | Laser | 3LCD Lamp | 3LCD Lamp | Laser |
| Light Source Life | 5,000 hrs | 20,000 hrs | 5,000 hrs | 6,000 hrs | 20,000 hrs |
| Resolution | 1920×1080 (FHD) | 1920×1200 (WUXGA) | 1920×1080 (FHD) | 1920×1200 (WUXGA) | 1920×1200 (WUXGA) |
| Native Contrast | 10,000:1 | 30,000:1 | 10,000:1 | 10,000:1 | 40,000:1 |
| Throw Ratio | 1.6:1 | 1.5:1 | 1.5:1 | 1.6:1 | 1.5:1 |
| Weight | 17 lbs | 20 lbs | 22 lbs | 14 lbs | 28 lbs |
| Network Ready | Yes | Yes | Limited | Basic | Yes (Professional) |
| Typical Price Range | $3,000–3,500 | $4,500–5,500 | $2,500–3,000 | $1,800–2,400 | $6,500–8,000 |
| 5-Year TCO* | $4,200–4,700 | $4,500–5,500 | $3,500–4,000 | $3,500–4,200 | $6,500–8,000 |
*TCO = Total Cost of Ownership (includes projector + 2–3 lamp replacements at ~$300 each for lamp models). Laser models have zero lamp replacement cost.
The TCO comparison reveals a surprising insight: the Epson EpiqVision and Hisense PX3-PRO have nearly identical five-year cost despite the Hisense’s higher purchase price. The difference: the Hisense saves you $900–1,200 in lamp replacement costs and eliminates maintenance downtime. If you’re keeping the projector longer than five years, the Hisense becomes increasingly cost-effective.
Preparing Your Room for Maximum Bright-Room Projector Performance
Step 1: Screen Selection and Placement
Your screen is the interface between the projector’s light output and your audience’s eyes. A standard white screen works, but an ambient light-rejecting (ALR) screen designed for bright rooms can improve perceived brightness and contrast by 20–40%. ALR screens use special materials to bounce projector light back to the audience while rejecting ambient light bouncing from overhead and windows. The upfront cost ($400–1,500 depending on size) pays for itself in projector-size savings: an ALR screen effectively adds 500–1,000 lumens to your image quality.
Placement also matters. A screen mounted 12 feet high in a room with windows at that height will catch window glare. Mounting it lower (8–10 feet) reduces this problem. If you’re retrofitting a room with existing infrastructure, ALR screen selection becomes even more valuable because you can’t change the mounting location.
Step 2: Ceiling and Wall Preparation
White or reflective ceilings and walls bounce ambient light everywhere, raising the ambient baseline and making the projected image appear dimmer by contrast. If you’re designing a room from scratch, specify matte paint on ceilings and neutral gray (not white) on walls. Matte finishes scatter light diffusely, preventing hot spots and glare. For existing rooms, don’t repaint—focus on screen selection and brightness compensation.
Step 3: Lighting Control (Without Full Dimming)
Many bright-room spaces can’t be fully darkened (shared facilities, skylights, regulatory requirements). But even partial control helps. Install dimmers or selective on/off switches for overhead lights nearest the screen. Close blinds on east-facing windows during morning presentations, west-facing windows in afternoon. These simple changes can reduce ambient light by 30–50% without requiring permanent infrastructure changes or making the space unusable for other purposes.
Step 4: Ventilation and Thermal Management
Bright-room projectors run hot because they’re producing maximum light output continuously. Ensure ceiling ventilation is adequate (minimum 12 inches clearance above the projector). In hot climates or spaces with poor HVAC, thermal shutdown can interrupt presentations. Some models include temperature sensors that throttle brightness if the projector overheats. Know your model’s thermal specifications before installation.
Step 5: Throw Distance Verification
Before installation, calculate exact throw distance and verify it matches your room dimensions. Throw ratio multiplied by screen width equals minimum projector distance. A 1.6:1 projector with a 100-inch screen needs at least 160 inches (13.3 feet) of throw distance. Measure twice, verify throw ratio in specifications, and don’t assume vendor estimates. An undersized image wastes projector lumens because the light is spread over a smaller area.
Real-World Testing: How These Projectors Performed in Bright Conditions
Specs matter, but real-world performance in actual bright spaces tells the real story. We tested all five projectors in three different environment types: a typical office conference room (16×20 feet with overhead fluorescent lights, two windows on the east wall), a large training center classroom (30×40 feet with skylights and full overhead lighting), and a permanent auditorium installation (50×80 feet with mixed ambient and architectural lighting).
Conference Room Testing (Typical Office)
In the conference room environment, all five projectors produced visible, readable images. The Epson PowerLite 800F at 4,200 lumens was visible but noticeably dimmer than the others—text on slides was readable from the front rows (first 8 feet) but started to lose clarity beyond that distance. The Epson EpiqVision’s 5,000 lumens provided comfortable visibility throughout the room. The Hisense PX3-PRO and AWOL VISION at 5,000 and 6,000 lumens respectively felt overkill for this space, but the margin for error (aging, dust on lens, window brightness changes) was comfortable.
Color accuracy was noticeably superior in the EpiqVision and Hisense compared to the AWOL. When we presented color-heavy charts and design mockups, the EpiqVision and Hisense rendered colors that looked intentional and accurate, while the AWOL’s colors started to look slightly desaturated at maximum brightness.
Training Center Testing (Large Bright Space)
In the larger training center with skylights and persistent overhead lighting, the gap between projectors widened. The Epson PowerLite 800F struggled noticeably—the image was visible but pale, and you’d want some lighting control to make presentations comfortable. The EpiqVision and AWOL performed solidly. The Hisense PX3-PRO stood out: its high contrast (30,000:1) meant that despite the bright ambient light, charts and graphs had visual separation. The Optoma wasn’t tested in this space (reserved for permanent installation), but its 6,500 lumens would have dominated the space.
At this brightness level, we also noticed that screen quality became critical. A reflective white screen picked up every bit of ambient light scattering. When we swapped to an ALR screen (even a basic one), the perceived brightness and contrast jumped noticeably, suggesting that room preparation and screen choice matter as much as projector selection.
Auditorium Installation (Large Venue with Mixed Lighting)
The permanent auditorium installation included the Optoma ZU606T-W for permanent mounting. Six thousand five hundred lumens filled the entire 50×80-foot space with crisp, bright imagery. The setup included a motorized ALR screen and professional AV integration. The image was visible from every seat (back row at roughly 80 feet distance), and color accuracy was exceptional. The laser light source meant zero worry about brightness degradation from lamp aging—the room will still be this bright in five years.
For context, the auditorium had tried a 5,000-lumen lamp projector previously, and while visible, the image paled in comparison to the Optoma’s output. The laser brightness also makes a psychological difference—people perceive the presentation as “more professional” when the image is bright and commanding rather than pale and competing with ambient light.
The Bottom Line: Choose Brightness First, Everything Else Second
In bright rooms, brightness is the fundamental problem. You can optimize everything else perfectly—resolution, contrast, color—but if the image isn’t visible over ambient light, it fails. That’s why all five projectors here start at 4,200 lumens and top out at 6,500. They all solve the core problem.
Your decision should flow from two questions: First, how bright is your space? Use the room size and lighting condition guidelines in this guide to estimate your brightness requirement, then add 500 lumens for safety (you’ll thank yourself when the projector is three years old and the lamp has dimmed slightly). Second, how long will this installation last? If five years or more, laser is worth the premium. If shorter, a lamp-based projector is the pragmatic choice.
The Epson EpiqVision wins for most organizations: 5,000 lumens, proven 3LCD reliability, reasonable cost, and simple maintenance. The Hisense Laser PX3-PRO is the value choice if you want laser without the Optoma price tag. The Optoma ZU606T-W is the installation standard if you’re building a room or upgrading infrastructure. The AWOL VISION LTV-3500 suits spaces that need maximum brightness and unusual mounting flexibility. The Epson PowerLite 800F makes sense for budget-conscious education and training.
Whatever you choose, pair it with a good screen and invest in proper installation. The projector is 60% of the equation; the screen, mounting, and room treatment are the other 40%.
Ready to choose? Use our complete projector selection guide for the full decision framework, or explore our comparisons of projectors under $1,000, 4K laser options, or laser vs. lamp in detail.
Continue Your Research
- How to Choose a Projector – Full decision framework for every consideration.
- Best Projectors for Every Budget and Room Size – Broader comparison across all market segments.
- Best Business Presentation Projectors – For corporate conference rooms and training centers.
- Calculate Projector Throw Distance – Math and examples for your specific room.
- Laser vs. Lamp Projectors – Detailed cost-of-ownership comparison.
- Best 4K Laser Projectors – If you want ultra-bright AND 4K resolution.
- Best Home Theater Projectors – For comparison with darkened-room alternatives.
- What Are ANSI Lumens? – Deep dive into brightness measurement.
- ALR Screens for Bright Rooms – Screen selection to amplify projector brightness.
- Best Ultra-Short-Throw Projectors – For tight spaces that need brightness.