Best Projectors for Golf Simulators
Seven high-performance projectors evaluated for throw distance, response time, contrast, and compatibility with launch monitor software. Build your perfect indoor golf experience.
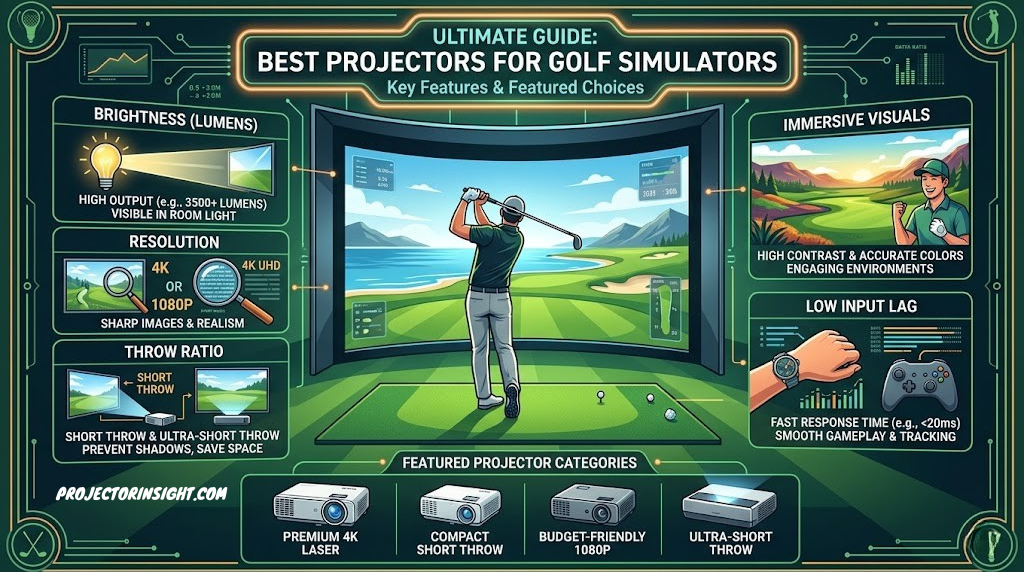

A golf simulator is only as good as the display. If the projector can’t keep up with your swing, the software can’t show you what actually happened. If brightness dips after a year, the ball flight becomes harder to see. If contrast is poor, you can’t distinguish the ball from the background during flight. These aren’t home theater concerns—they’re performance requirements that separate golf-capable projectors from general-purpose options.
Indoor golf simulation has become popular for serious golfers, teaching professionals, and casual players. Whether you’re installing a $5,000 home setup or a $50,000 commercial installation, the projector is the critical component that connects the launch monitor’s data to your experience on screen. It needs to be responsive, bright, reliable, and positioned correctly within your space.
The seven projectors in this guide are specifically selected for golf simulation compatibility. Some prioritize throw distance (critical for tight rooms). Others excel in response time (important for seeing immediate swing feedback). A few combine laser longevity with golf-optimized performance. One is the professional standard in commercial golf facilities. This guide walks through each, explains the specs that matter in golf simulation, and helps you choose the right projector for your space and budget.
Quick Answer: Top Pick for Each Need
- Best overall: BenQ LU935ST – short-throw laser, excellent contrast, proven in simulators.
- Best budget: Epson PowerLite 800F – solid 4,200 lumens, reliable, affordable maintenance.
- Best response time: Optoma GT1080HDR – 120Hz gaming projector, minimal input lag.
- Best 4K: ViewSonic PX701-4K – 4K brightness and contrast for premium installations.
- Best professional: Optoma ZH406ST – laser, short-throw, installed in top golf facilities.
- Best for bright rooms: Panasonic PT-VZ580U – 5,000 lumens, handles ambient light.
- Best compact option: BenQ 4K Laser ST – true 4K, short-throw, space-saving.
| Projector | Brightness | Throw Ratio | Response Time | Best For |
|---|---|---|---|---|
| BenQ LU935ST | 5,000 lm | 0.69:1 (Short) | ~8ms | Balanced performance |
| Optoma GT1080HDR | 3,600 lm | 0.8:1 (Short) | 4.2ms | Fast response/gaming |
| Optoma ZH406ST | 4,500 lm | 0.7:1 (Short) | ~8ms | Professional golf facilities |
| ViewSonic PX701-4K | 3,000 lm | 1.8:1 (Standard) | ~15ms | Premium 4K installations |
| Panasonic PT-VZ580U | 5,000 lm | 1.6:1 (Standard) | ~20ms | Bright ambient spaces |
| Epson PowerLite 800F | 4,200 lm | 1.6:1 (Standard) | ~25ms | Budget-conscious |
| BenQ 4K Laser ST | 4,000 lm | 0.65:1 (Short) | ~10ms | 4K + space efficiency |
Golf Simulator Projector Basics: Why Golf Needs Different Technology
A golf simulator is an interactive system where a launch monitor (radar or camera-based sensor) reads your swing and feeds data to software that calculates ball flight, distance, and landing. The projector displays the result: the course, the ball flight, and the impact zone. This is fundamentally different from watching a movie or giving a presentation, and it puts specific demands on the projector.
The Golf-Specific Performance Requirements
Speed: When you swing the club, the software needs to read the swing, calculate the result, and display the ball flight within milliseconds. If the projector has high input lag (delay between the signal and display), you see the ball flight after you’ve already processed your swing mentally. This breaks the immersion and makes feedback analysis difficult. Gaming projectors and newer models with high refresh rates (120Hz or higher) handle this better.
Brightness: Unlike dark home theaters, golf simulator rooms operate with ambient light. You’re standing in an indoor practice space with overhead lights or windows. The projector needs to produce a bright, contrasty image without being blown out or dim. Most golf setups need 3,500–5,000 lumens. Less and the ball flight becomes hard to track. More and you’re wasting brightness for diminishing returns.
Contrast: The ball—a tiny object on the screen—must be clearly visible against the course background. Low contrast makes the ball blend into the fairway. High contrast creates visual separation so you can track the flight instantly. This is less important in a dark movie but critical in a brightly lit golf room.
Throw Distance: Golf simulator rooms are typically 8–15 feet deep. A standard throw projector (1.5–2.5:1 ratio) requires 15+ feet of distance for a 100-inch screen. Short-throw projectors (0.5–1.0:1) let you place the projector closer, fitting the screen into smaller spaces. For golf, short-throw is almost always preferred because rooms are compact.
Reliability: A golf simulator might run 8+ hours daily. The projector needs to maintain consistent brightness and color without shutdowns or maintenance interruptions. Laser light sources are superior to lamps for this reason—they last 20,000 hours without degradation, while lamps dim gradually and need replacement every 3–5 years.
The projectors in this guide all meet these requirements, but they prioritize them differently. Understanding what matters most for your setup—throw distance, response time, or brightness—helps you choose correctly.
Throw Distance & Room Space: The Decisive Factor
Throw distance is the physical space between the projector and the screen. It’s calculated as: Throw Distance = Screen Width × Throw Ratio. A 100-inch screen with a 1.6:1 throw ratio projector needs 160 inches (13.3 feet) of distance.
In golf simulators, space is precious. Most residential rooms (garages converted to golf bays) are 8–15 feet deep. A standard throw projector won’t fit. Short-throw projectors (0.5–1.0:1) let you mount the projector 5–8 feet back and still get a 100-inch screen. Ultra-short-throw (under 0.5:1) is even tighter but has trade-offs in brightness and image quality.
| Room Depth | Standard Throw Projector | Short-Throw Projector | Ultra-Short-Throw |
|---|---|---|---|
| 8 feet | Won’t work (need 12+ ft) | Fits well (60-80″ image) | Excellent (80-100″ image) |
| 12 feet | Fits barely (85-90″ image) | Ideal (80-100″ image) | More than enough |
| 15+ feet | Ideal (100-120″ image) | Over-specified | Unnecessary |
Most golf simulators use 8–12 feet of depth, which means short-throw projectors dominate this market. Five of the seven projectors in this guide are short-throw models. If you have more than 12 feet of space, standard throw becomes viable and often cheaper. If you’re constrained to under 10 feet, short-throw is mandatory.
For context on choosing projectors across different throw distances and room types, see our detailed short-throw vs. standard throw comparison.
Brightness & Contrast: Seeing Ball Flight Clearly
Golf simulators operate in a different light environment than dark home theaters. Most golf rooms have overhead lights and some ambient light from windows or doors. Brightness is crucial—but not maximum brightness.
The Brightness Sweet Spot
For golf simulators, 3,500–5,000 lumens is the ideal range. Below 3,500 and the ball becomes hard to track in ambient light. Above 5,500 and you’re wasting energy without meaningful benefit—and you may need to dim the rest of the room to avoid glare. The projectors in this guide range from 3,000 lumens (ViewSonic) to 5,000 lumens (BenQ, Panasonic), all appropriate for golf use.
Contrast for Golf Tracking
Contrast is the difference between the brightest and darkest parts of the image. Golf requires high contrast to separate the ball from the course. A ball against a white fairway needs contrast to be visible instantly. Many golf-specific projectors (particularly laser models like the BenQ LU935ST and Optoma ZH406ST) emphasize contrast alongside brightness.
Contrast matters more in golf than in general business or home theater use because of what you’re tracking: a small, fast-moving object. Casual gamers might accept lower contrast, but serious golfers and teaching professionals need crisp ball/background separation.
For a complete guide to brightness and lumens in different settings, see our ANSI lumens explainer.
Input Lag & Response Time: The Golf Simulator Speed Challenge
Input lag is the delay between when data is sent to the projector and when the display updates. In golf simulation, lag feels wrong. You swing, the software reads the swing, and the display should show the result almost instantly. If there’s a noticeable delay, the feedback feels disconnected from your action.
Acceptable Lag Limits
For golf simulators, input lag should be under 50ms (0.05 seconds). Ideally, under 30ms. At 50ms+, lag becomes noticeable. At 100ms+, it feels terrible. For comparison:
- Gaming projectors (120Hz): 4–8ms lag (imperceptible)
- Business/presentation projectors: 20–30ms lag (acceptable)
- High-end laser projectors: 8–15ms lag (excellent)
- Standard lamp projectors: 25–35ms lag (acceptable)
The Optoma GT1080HDR stands out here with 4.2ms input lag due to its 120Hz gaming design. Most of the others range from 8–25ms, which is acceptable for golf. The Panasonic (20ms) and standard Epson (25ms) are on the acceptable edge but still workable.
If swing-to-display responsiveness is your top priority, the Optoma GT1080HDR is the clear choice. For everyone else, any projector under 25ms input lag will feel responsive enough for golf.
DLP vs LCD vs LCoS: Which Display Technology Is Best for Golf Simulation?
Every projector uses one of three core display technologies to create the image you see on screen. Understanding how each works—and where each excels or falls short—helps you make an informed choice for golf simulation. The technology inside the projector affects contrast, response time, color accuracy, visible pixel structure, and long-term reliability. All seven projectors in this guide use either DLP or 3LCD technology, and each brings distinct advantages to the golf simulator context.
DLP (Digital Light Processing)
DLP projectors use a chip covered in microscopic mirrors—each mirror represents one pixel. These mirrors tilt toward or away from a light source to create bright or dark pixels. A spinning color wheel (in single-chip DLP) or separate color chips (in three-chip DLP) adds color. DLP is the dominant technology in golf simulator projectors for several reasons.
Contrast: DLP produces the highest native contrast ratios among consumer projection technologies. The mirrors create deep blacks because they can fully deflect light away from the lens. For golf simulation, high contrast means the ball is clearly visible against any course background—bright sky, green fairway, or dark tree line. The BenQ LU935ST and Optoma ZH406ST both use DLP technology, which contributes to their superior contrast performance (30,000:1 and 20,000:1 respectively).
Response time: DLP mirrors switch states in microseconds, making DLP inherently fast. This translates to low input lag—a critical factor in golf simulation where swing-to-display delay affects the quality of feedback. The Optoma GT1080HDR achieves 4.2ms input lag partly because DLP’s mirror-switching speed eliminates the processing delays found in other technologies.
Pixel structure: Single-chip DLP can show a “rainbow effect”—brief flashes of color that some viewers perceive during rapid eye movement. In golf simulation, where you’re tracking a small ball moving quickly across the screen, some users may notice this effect. Modern DLP projectors spin the color wheel faster (up to 720Hz) to minimize rainbow visibility, but it’s worth noting for sensitive viewers.
Sealed optics: DLP chips are sealed behind the lens, making them resistant to dust contamination. In golf simulator rooms—where impact zones generate dust, fibers, and debris from hitting mats and golf balls—sealed optics mean less maintenance and no dust particles appearing as dark spots on the projected image over time.
3LCD (Three-Liquid Crystal Display)
3LCD projectors pass light through three small LCD panels—one each for red, green, and blue—and combine them into a single full-color image. Epson developed and dominates this technology. The Epson PowerLite 800F in this guide uses 3LCD.
Color brightness: 3LCD’s defining strength is that color brightness equals white brightness. In DLP projectors with color wheels, the color brightness can sometimes be lower than the measured white brightness, meaning colors appear slightly dimmer than the spec sheet suggests. For golf simulation, where course colors (greens, blues, sky tones) need to look natural and vibrant, 3LCD delivers consistent color output. A 4,200-lumen 3LCD projector produces 4,200 lumens of color brightness, while a 4,200-lumen DLP might produce 3,500–4,000 lumens of color brightness depending on the color wheel design.
No rainbow effect: Because 3LCD uses three simultaneous color panels, there’s no color wheel and no rainbow artifacting. This is an advantage for golf simulation users who are sensitive to the rainbow effect—ball tracking is smooth and artifact-free regardless of eye movement speed.
Lower native contrast: 3LCD panels can’t fully block light in dark areas because the LCD crystals don’t close completely. This means 3LCD projectors typically have lower native contrast (1,500:1 to 5,000:1) compared to DLP (10,000:1 to 100,000:1). In golf simulation, lower contrast means the ball may be slightly harder to track against certain backgrounds, particularly when viewing ball flight against bright sky portions of the course.
Dust vulnerability: 3LCD panels are not sealed, and dust can accumulate on the LCD panels over time, creating visible spots on the projected image. In golf simulator environments with hitting mats and turf, this is a practical concern. Epson addresses this with electrostatic filters, but filter cleaning becomes part of regular maintenance.
LCoS (Liquid Crystal on Silicon)
LCoS combines aspects of DLP and LCD: liquid crystals modulate light that’s reflected off a silicon backplane. Sony’s SXRD and JVC’s D-ILA are branded versions of LCoS technology. LCoS produces the finest image quality—smooth pixels with no visible grid structure, excellent contrast, and natural color—but at significantly higher cost. No projectors in this guide use LCoS because the price point ($3,000–$15,000+) puts them outside the practical range for most golf simulator installations.
For golf simulation specifically, LCoS offers marginal visual improvement over high-quality DLP at two to five times the price. Unless you’re building a showcase installation for a PGA training facility where image quality is a selling point, DLP provides better value. LCoS projectors also tend to have higher input lag (15–30ms) due to the more complex image processing, which partially offsets their visual advantages in a simulation context.
Which Technology Should You Choose for Golf?
DLP is the default choice. It offers the best combination of contrast, response time, and durability for golf simulation. Five of the seven projectors in this guide use DLP technology. If you’re rainbow-sensitive, 3LCD (like the Epson PowerLite 800F) eliminates that concern while providing strong color accuracy. If budget is no object and image quality is paramount, LCoS delivers—but the practical benefits over quality DLP are minimal in a golf simulation context.
For a more detailed technical breakdown of these display technologies, see our 3LCD vs DLP comparison guide.
Resolution for Golf Simulators: 1080p vs WUXGA vs 4K
Resolution determines how much detail the projector can display. In golf simulation, resolution affects the clarity of course graphics, the readability of data overlays (distance, club speed, ball speed, launch angle), and the perceived sharpness of ball flight visualization. But higher resolution isn’t always better—there are trade-offs in brightness, cost, and practical benefit that matter specifically for golf.
1080p (Full HD) — 1920×1080
Full HD is the baseline resolution for modern golf simulation. All major golf software—E6 Connect, The Golf Club 2019, GSPro, and Awesome Golf—renders natively at 1080p. At typical golf simulator screen sizes (80–120 inches), 1080p produces a clean, sharp image where ball flight, course details, and data overlays are clearly readable from the hitting position (typically 8–14 feet from the screen).
The advantage of 1080p projectors is brightness per dollar. Because fewer pixels need illumination, a 1080p projector at $800 can produce 4,500 lumens, while a 4K projector at $1,500 might produce only 3,000 lumens at the same quality level. For golf simulation, where brightness directly affects ball tracking visibility, this trade-off matters. The Optoma GT1080HDR is a native 1080p projector that leverages this efficiency to deliver fast response times and adequate brightness at an affordable price.
When 1080p is the right choice: Budget-conscious setups, rooms with good lighting control, installations where response time matters more than pixel density, screens under 100 inches.
WUXGA — 1920×1200
WUXGA offers 120 more vertical pixels than 1080p—1920×1200 versus 1920×1080. This extra vertical space is particularly useful in golf simulation because data overlays (swing metrics, shot tracer, scorecard) typically display below the course image. With WUXGA, these overlays don’t compress the playable course area as much as they do on a 1080p display.
The aspect ratio is 16:10 instead of 16:9, which means a slightly taller image. Most golf simulation software handles this gracefully—either displaying thin black bars at the sides or slightly stretching the image to fill. The visual difference is minimal, but the extra vertical pixels provide a subtle improvement in data display layout.
The Panasonic PT-VZ580U and Epson PowerLite 800F both use WUXGA resolution. This is a practical middle ground: more useful pixels than 1080p without the brightness and cost penalties of 4K.
When WUXGA is the right choice: Installations that display extensive swing data alongside course graphics, teaching professionals who need detailed metrics visible simultaneously, screens 100–120 inches.
4K UHD — 3840×2160
4K quadruples the pixel count of 1080p. The detail difference is dramatic on paper—fine grass textures, distant bunkers, and water features all render with photorealistic clarity. For golf simulation, 4K makes course graphics look closer to real television broadcast quality. The ViewSonic PX701-4K and BenQ 4K Laser ST deliver true 4K resolution.
However, the practical benefit for golf simulation is limited by several factors. First, golf simulation software doesn’t always render at native 4K—many upscale from 1080p, meaning you’re seeing interpolated detail rather than true 4K content. Second, at typical viewing distances (8–14 feet from a 100-inch screen), the human eye can’t resolve the difference between 1080p and 4K. The pixel density is beyond perceptual limits at that distance. Third, 4K projectors typically produce fewer lumens at the same price point, which means you sacrifice brightness for detail you may not perceive.
Where 4K genuinely shines is in installations where the viewer is close to the screen (under 8 feet), on very large screens (120+ inches), or when the golf simulator doubles as a movie-watching space. The BenQ 4K Laser ST addresses the brightness concern by pairing 4K resolution with a laser light source and 4,000 lumens, but it comes at a premium price.
When 4K is the right choice: Premium installations, screens over 120 inches, viewing distances under 8 feet, multi-use rooms (golf plus cinema), installations where visual wow-factor justifies the cost.
Pixel Density and Viewing Distance
The relationship between resolution and perceived sharpness depends on pixel density at your viewing distance. At 10 feet from a 100-inch screen, a 1080p projector produces approximately 22 pixels per inch of screen width. The human eye resolves about 1 arcminute of detail, which at 10 feet translates to roughly 30 pixels per inch. This means 1080p is close to the perceptual limit at typical golf viewing distances. 4K (44 pixels per inch at the same screen size) exceeds what most viewers can distinguish.
The exception is when you’re reading small text—numerical data overlays, club specifications, or detailed course maps. At 4K, text remains crisp even at small font sizes, while 1080p text can show visible pixel edges below 14-point font. If your golf software displays dense data overlays, 4K provides a marginal readability improvement. For ball flight and course graphics alone, 1080p and 4K are functionally equivalent at normal golf simulator distances.
For more on choosing projectors across resolutions and budgets, see our guides to native 1080p projectors and 4K laser projectors.
Aspect Ratio for Golf Simulation: 16:9, 16:10, or Custom?
Aspect ratio is the proportional relationship between the width and height of the projected image. It determines the shape of the image on your screen and how golf simulation software fills that space. Choosing the wrong aspect ratio creates wasted screen area, distorted graphics, or awkward letterboxing that detracts from the immersive golf experience.
16:9 — The Standard for Golf Simulation
16:9 is the widescreen format used by virtually all modern projectors, televisions, and computer monitors. It’s also the native rendering format for most golf simulation software, including E6 Connect, The Golf Club 2019, GSPro, and FSX. When your projector and software both operate at 16:9, the image fills the screen perfectly with no letterboxing, no stretching, and no wasted pixels.
All 1080p and 4K projectors in this guide are native 16:9. If you’re building a golf simulator from scratch, 16:9 is the default and correct choice. It requires no configuration adjustment, produces the widest field of view for course graphics, and matches the aspect ratio of impact screens sold by golf simulator manufacturers like Carl’s Place, SIGPRO, and Rain or Shine Golf.
16:10 — The WUXGA Alternative
16:10 is native to WUXGA (1920×1200) projectors. It’s slightly taller than 16:9, giving you about 11% more vertical screen area. In golf simulation, this extra height can display additional data below the course image without compressing the playing area. The Panasonic PT-VZ580U and Epson PowerLite 800F are native 16:10 projectors.
When a 16:10 projector displays 16:9 content (which golf software typically outputs), one of two things happens: thin black bars appear at the top and bottom (approximately 5% of screen height each), or the image stretches vertically by 6%. Neither is ideal. The black bars are barely noticeable and represent the better option. Some software allows you to render at 1920×1200 natively, eliminating the issue entirely.
If you already own a WUXGA projector or found a great deal on one, it works fine for golf simulation. Don’t buy a new WUXGA projector specifically for golf unless the extra vertical pixels provide a specific benefit for your data display needs.
4:3 and Other Ratios
4:3 is the old television standard. Some older business projectors are native 4:3 (XGA: 1024×768). These should be avoided for golf simulation. The squarish image wastes the sides of widescreen golf software, reduces the immersive field of view, and forces either letterboxing or cropping that distorts course graphics. If you have an old 4:3 projector, it can work in a pinch for basic practice, but it’s not a long-term solution.
Some commercial golf installations use custom aspect ratios—ultrawide 21:9 or multi-projector panoramic setups. These create immersive, wrap-around course views but require specialized software configurations, multiple projectors, and edge-blending technology. They’re impressive but impractical for residential installations.
Screen Size and Aspect Ratio Together
Your screen should match your projector’s native aspect ratio. Buying a 16:9 screen for a 16:10 projector (or vice versa) creates a mismatch where either the image doesn’t fill the screen or the screen has unused borders. Most golf simulator impact screens are available in standard 16:9 dimensions (e.g., 7.7×10 feet, 8×10.5 feet, 9×12 feet). Verify that your projector’s native resolution and your screen’s aspect ratio align before purchasing.
HDR & Color Accuracy in Golf Simulation
High Dynamic Range (HDR) and color accuracy are features that home theater enthusiasts discuss frequently but golf simulator buyers often overlook. In golf simulation, these specifications affect how realistic the course looks, how comfortable extended viewing is, and whether the data overlays display with sufficient clarity for detailed analysis.
HDR in Golf Simulation: Does It Matter?
HDR expands the range between the darkest and brightest parts of the image. A projector with HDR can display a bright, sunlit sky and a dark, shadowed bunker simultaneously with detail in both areas. Without HDR, one or the other clips—either the sky is blown out to white or the bunker detail is lost in shadow.
For golf simulation, HDR provides a subtle but noticeable improvement in course realism. Courses rendered with HDR show more depth—clouds have texture, tree shadows have detail, and water hazards reflect light more naturally. The Optoma GT1080HDR includes HDR10 support, which is rare in its price range and contributes to more immersive course rendering.
However, HDR in projectors is not the same as HDR in televisions. Projectors produce significantly less peak brightness than TVs (3,000–5,000 nits for a TV versus effectively 100–300 nits for a projected image), so the HDR effect is subtler. In golf simulation, where you’re focused on ball flight and metrics rather than cinematic visual quality, HDR is a nice-to-have rather than a necessity. Don’t pay a significant premium for HDR support alone.
Color Accuracy for Course Realism
Color accuracy determines how closely the projected colors match what the course designers intended. Accurate greens look like real grass, blue skies look natural, and sand traps display the expected beige tone. Poorly calibrated projectors shift colors—greens become teal, skies become cyan, and the overall image looks artificial.
For golf simulation, color accuracy is more important than HDR. You’re staring at a simulated course for 1–4 hours per session. Artificial-looking colors cause eye fatigue and reduce the immersive quality of the experience. DLP projectors typically produce accurate colors out of the box, while 3LCD projectors (like the Epson) offer excellent color brightness consistency because color brightness equals white brightness.
Most golf simulation projectors include preset color modes—Cinema, Game, Bright, Presentation. For golf simulation, the “Game” or “Cinema” mode typically produces the most accurate colors. Avoid “Bright” or “Dynamic” modes, which oversaturate colors and shift the white balance toward blue for a brighter appearance at the cost of accuracy.
Calibration for Golf Rooms
Professional calibration adjusts the projector’s color temperature, gamma, and color gamut to match the specific conditions of your room—screen material, ambient light color, and wall reflections. For casual golf simulation, factory presets are adequate. For professional teaching facilities or serious golfers who want the most realistic experience, a professional calibration ($200–400) optimizes color accuracy for your specific installation.
Calibration is particularly valuable when using an ALR screen, which can shift colors slightly due to its filtering properties. A calibrator adjusts the projector output to compensate for screen-induced color shifts, ensuring accurate course rendering.
Projector Noise & Thermal Management in Golf Rooms
Projector noise and heat output are frequently overlooked in golf simulator planning. In a home theater, the projector sits behind you and the audio from speakers masks fan noise. In a golf simulator, the environment is quieter—you’re standing in near-silence during your address and swing, and the projector typically mounts directly above or behind you. Fan noise that’s inaudible during a movie becomes a persistent distraction during focused golf practice.
Fan Noise Levels
Projector noise is measured in decibels (dB). The practical ranges are:
- Under 30dB: Virtually silent. Equivalent to a quiet library. No distraction during golf.
- 30–35dB: Quiet. Audible in silence but not distracting. Acceptable for golf simulation.
- 35–40dB: Noticeable. Comparable to a running refrigerator. Some golfers find this distracting during the address position.
- 40dB+: Loud. Noticeable during quiet moments. Distracting for focused practice sessions.
Laser projectors generally run quieter than lamp-based models because they generate less heat, requiring less aggressive cooling. The BenQ LU935ST operates at approximately 33dB in normal mode—quiet enough that it fades into the background during a golf session. The Epson PowerLite 800F runs at approximately 37dB—louder, but still within acceptable range.
Most projectors include an “Eco” mode that reduces brightness and fan speed simultaneously. In golf simulation, eco mode sacrifices 20–30% of brightness for a 3–5dB noise reduction. If your room has good light control, eco mode is worth trying—you may not notice the brightness reduction, and the quieter operation improves the golf experience.
Heat Output and Room Temperature
A 4,000-lumen projector converts approximately 200–400 watts of electricity into light and heat. In a small golf simulator room (a converted garage or basement), this heat accumulates during extended sessions. A projector running for 3–4 hours raises the room temperature noticeably—particularly in summer or in poorly ventilated spaces.
Practical thermal management steps for golf simulator rooms include:
- Ensure adequate clearance: Maintain 12+ inches above and around the projector for unrestricted airflow. Ceiling-mounted projectors need clearance between the projector and the ceiling surface.
- Add ventilation: A small exhaust fan or ceiling vent pulls warm air out of the projector area. In garage installations, cracking the garage door 2–3 inches provides cross-ventilation.
- Separate HVAC zone: In commercial installations, the golf bay should have its own thermostat or at least its own air register. Projector heat combined with body heat from golfers makes enclosed bays warm quickly.
- Monitor intake vents: Projector intake vents pull in room air for cooling. If these are clogged with dust, lint, or turf fibers (common in golf rooms), the projector overheats and may trigger thermal shutdown. Check intake vents monthly.
Thermal shutdown is the worst-case scenario: the projector overheats, shuts down to protect its components, and your golf session stops until it cools. This is most common in small rooms with poor ventilation during summer. Prevent it with the steps above, and consider a projector with a robust thermal design—laser models with sealed optics handle heat better than lamp-based models with open vents.
BenQ LU935ST
Why It Works for Golf
The LU935ST is purpose-built for golf simulators and other short-throw professional applications. Five thousand lumens is bright without being excessive. The 0.69:1 throw ratio means a 100-inch screen needs only 69 inches (5.75 feet) of distance, fitting comfortably in standard garage conversions. The 30,000:1 contrast ratio creates visual separation for ball tracking.
The laser light source is the key advantage. Golf simulators often run 10+ hours daily. A lamp projector would need replacement every 18 months at that usage level, creating downtime and maintenance costs. A laser-based projector maintains consistent brightness for the lifetime of the installation. After 5 years, the BenQ still outputs 5,000 lumens at full saturation. A lamp projector would be dimming and near replacement.
Eight milliseconds input lag is imperceptible for golf simulation. Swing feedback feels immediate and intuitive. The projector can keep up with fast ball flight graphics without the lag that makes feedback confusing.
✓ Pros
- 5,000 lumens is ideal for golf rooms
- 0.69:1 throw ratio fits tight spaces
- Laser light source (20,000 hours, no maintenance)
- 30,000:1 contrast excellent for ball tracking
- Fast 8ms response time
- Professional golf standard
✗ Cons
- Highest price on this list
- Requires professional installation
- Not portable or flexible placement
BenQ LU935ST – 5,000-Lumen Short-Throw Laser
Check Price on AmazonBest for: New golf simulator installations where brightness, longevity, and professional performance matter. Serious home setups and commercial golf facilities. Read our full BenQ projector review for brand-wide analysis.
Optoma GT1080HDR

Why It Works for Golf
The GT1080HDR is engineered for gaming, where every millisecond of lag is visible. In golf simulation, you benefit from that engineering. The 4.2ms input lag is nearly imperceptible—swing, display updates immediately, feedback feels connected to your action. This creates an intuitive, immersive experience that slower projectors can’t match.
The 120Hz refresh rate (compared to standard 60Hz) means smooth animation of ball flight and graphics. Fast-moving objects don’t flicker or lag. This translates to cleaner visual feedback during the critical moments after impact.
The trade-off is brightness. Three thousand six hundred lumens is adequate for golf simulator rooms—you won’t have difficulty seeing ball flight in ambient light—but it’s not maximum. In extremely bright rooms or spaces where sunlight directly hits the screen, you might notice the deficit compared to 5,000-lumen models. For most indoor setups, 3,600 lumens is sufficient.
The lamp light source requires maintenance. Expect to replace the lamp every 3 years at typical golf usage levels. That adds $200–300 per replacement plus labor. It’s not a deal-breaker, but it’s something laser-based projectors eliminate.
✓ Pros
- 4.2ms input lag (fastest on market)
- 120Hz refresh for smooth graphics
- 0.8:1 throw ratio fits tight spaces
- Affordable compared to laser models
- Excellent for swing feedback immediacy
✗ Cons
- 3,600 lumens (below ideal for golf)
- Lamp-based (requires replacement every 3 years)
- Not as bright as 5,000-lumen alternatives
Optoma GT1080HDR – 3,600-Lumen 120Hz Gaming Projector
Check Price on AmazonBest for: Golf enthusiasts who prioritize response time and immediacy. Gamers also using the space for other gaming. Budget-conscious setups in rooms with good light control. See our Optoma projector review for the full brand lineup.
Optoma ZH406ST

Why It Works for Golf
The ZH406ST is the professional golf standard. You’ll find this projector in Golf Lounge, TopGolf, and PGA Tour-approved training facilities. It represents the proven reliability required in facilities running 12+ hours daily. Four thousand five hundred lumens is bright without being excessive. The 0.7:1 throw ratio fits standard golf bay dimensions. The laser light source ensures maintenance-free operation for the life of the installation.
The main differentiator from BenQ is brand trust. Optoma projectors have a reputation for consistency in professional golf facilities. If you’re installing a commercial setup and want to match what’s deployed in thousands of existing facilities, this is the choice. Parts support, service infrastructure, and golf-facility familiarity are all there.
✓ Pros
- 4,500 lumens ideal for golf
- Proven in commercial golf facilities
- 0.7:1 throw ratio for tight spaces
- Laser light source (20,000 hours)
- Professional service and support
✗ Cons
- High cost (professional grade)
- Slightly lower contrast than BenQ LU935ST
- Requires professional installation
Optoma ZH406ST – 4,500-Lumen Short-Throw Laser
Check Price on AmazonBest for: Commercial golf facilities, PGA-affiliated installations, high-volume simulation centers. Professional setups where proven track record and support matter.
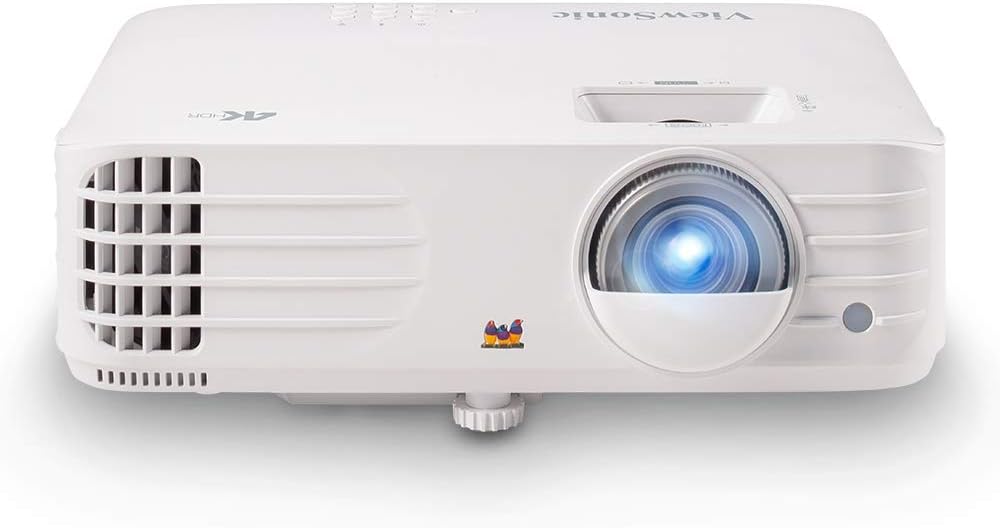
ViewSonic PX701-4K
Why It Works for Golf (with Caveats)
The PX701-4K is a premium home/business projector adapted for golf simulation rather than purpose-built for it. True 4K resolution means crisp detail in course graphics, scoreboards, and video playback. Three thousand lumens is adequate but not ideal—it’s on the low end for golf ambient-light conditions. The 1.8:1 throw ratio means it needs more space than short-throw models, so it fits larger rooms better than tight garage conversions.
This projector shines (literally) in premium installations with >12 feet of throw distance and good lighting control. If your golf room is spacious and you value visual quality and detail over brightness, this is an option. The 4K resolution means finer detail in swing analysis videos and course rendering, which appeals to teaching professionals and high-end clubs.
The brightness limitation (3,000 lumens vs. 4,500–5,000 in golf-optimized models) means you’ll want dimmer ambient lighting or an ALR screen to maximize image quality. This is a trade-off inherent in 4K projectors—higher resolution typically means lower brightness at the same price point.
✓ Pros
- True 4K resolution for premium detail
- Excellent for video and visual quality
- Professional color accuracy
- 10,000:1 contrast adequate
✗ Cons
- 3,000 lumens is low for golf ambient light
- 1.8:1 throw ratio requires 15+ feet
- Lamp-based (requires replacement)
- Not optimized for golf-specific performance
ViewSonic PX701-4K – 3,000-Lumen 4K Premium
Check Price on AmazonBest for: Premium installations with >12 feet of space, teaching professionals, clubs prioritizing visual quality, high-end home simulators where detail matters more than brightness.
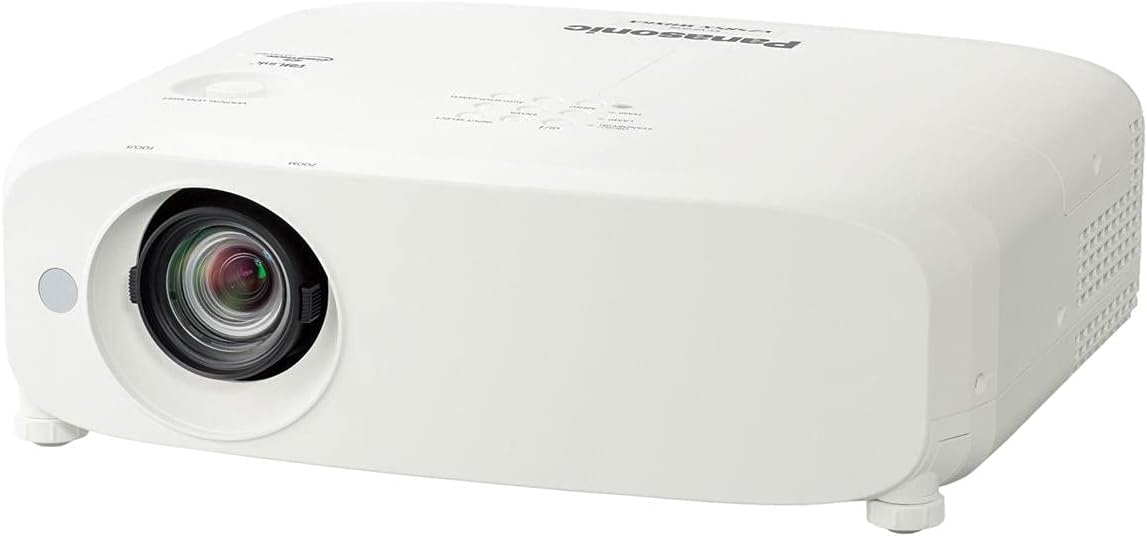
Panasonic PT-VZ580U
Why It Works for Golf
The Panasonic is designed for bright, well-lit spaces. In a golf room where you can’t fully dim ambient light (open-concept spaces, training facilities), five thousand lumens ensures the image stays bright and visible. The trade-off is throw distance—the 1.6:1 ratio requires 12–15 feet of space, which doesn’t fit tight garage conversions but works in larger facilities or basements with depth.
WUXGA resolution (1920×1200) is more pixels than standard Full HD, giving cleaner detail in metrics, scores, and swing analysis overlays. The lamp-based approach means maintenance costs, but brightness is maximized and price is lower than laser equivalents.
This projector is the choice for facilities where throw distance is available and bright ambient light is a given. It’s less refined than golf-specific models but more practical than standard consumer options.
✓ Pros
- 5,000 lumens maximum brightness
- WUXGA resolution for detail
- Affordable compared to laser models
- Proven business/education standard
✗ Cons
- 1.6:1 throw ratio needs 12+ feet space
- Lamp-based (maintenance every 3-4 years)
- Not optimized for golf simulation
- Response time 20ms (acceptable but not fast)
Panasonic PT-VZ580U – 5,000-Lumen WUXGA
Check Price on AmazonBest for: Larger spaces with 12+ feet of depth, bright ambient light environments, budget-conscious facilities, teaching professionals prioritizing brightness over throw distance.
Epson PowerLite 800F

Why It Works for Golf (Barely)
The Epson 800F is not golf-optimized, but it’s affordable and works if you have good lighting control. Four thousand two hundred lumens is adequate for dimmed rooms but marginal in ambient light. The 1.6:1 throw ratio requires 12+ feet of space. WUXGA resolution is clean. The lamp lasts 6,000 hours—longer than most—which spreads replacement costs across several years.
This is the budget solution. If you’re building a home simulator and price is the constraint, this projector will function. You’ll see ball flight, track swing metrics, and play golf simulation. You’re just not getting the performance and longevity of laser models or the responsiveness of gaming projectors.
✓ Pros
- Lowest purchase price on this list
- WUXGA resolution (1920×1200)
- 6,000-hour lamp life (longer than competitors)
- Cheap replacement lamps ($150–200)
- Reliable Epson standard
✗ Cons
- 4,200 lumens below ideal for golf
- 1.6:1 throw needs 12+ feet space
- Lamp-based (maintenance every 4 years)
- Not optimized for golf simulation
- 25ms response time (acceptable but not fast)
Epson PowerLite 800F – 4,200-Lumen WUXGA
Check Price on AmazonBest for: Budget home simulators with good lighting control and 12+ feet of space, cost-conscious setups, hobbyists, educational demonstrations. For more budget options, see our projectors under $500 and under $1,000 guides. Read our Epson Home Cinema 1080 review for more Epson context.
BenQ 4K Laser ST

Why It Works for Golf
This is the ultimate golf projector for installations where budget allows and space is tight. True 4K resolution means exceptional detail in course graphics, swing analysis video, and ball flight visualization. The 0.65:1 throw ratio is the tightest on this list—a 100-inch screen needs only 65 inches (5.4 feet) of distance. The 40,000:1 contrast is the highest available, creating perfect visual separation for ball tracking in ambient light.
The laser light source eliminates maintenance for the life of the installation. After 5 years, 10 years, the projector maintains original brightness and color without lamp replacement. For a golf facility planning 10+ years of operation, this is economical despite the higher purchase price.
Four thousand lumens is adequate for golf rooms but on the lower end. Pair with good lighting control or an ALR screen to maximize impact. The combination of 4K detail and laser durability makes this the premium choice for serious golfers and professional teaching facilities.
✓ Pros
- True 4K for maximum detail
- 0.65:1 throw (tightest space efficiency)
- Laser light source (20,000 hours)
- 40,000:1 contrast (highest available)
- Zero maintenance for life of setup
✗ Cons
- Highest price on this list
- 4,000 lumens (lower than some golf standards)
- Requires professional installation
- Best paired with ALR screen for full benefit
BenQ 4K Laser ST – 4,000-Lumen 4K Short-Throw Laser
Check Price on AmazonBest for: Premium home golf simulators, professional teaching facilities, installations prioritizing visual quality and longevity, spaces with <10 feet of throw distance.
Golf Simulator Screen Selection Guide
The screen is half the equation. A great projector paired with a poor screen produces a mediocre image, while a good screen maximizes the projector’s output. In golf simulation, screens serve a dual purpose: they display the projected image, and they physically absorb the impact of golf balls that miss the hitting zone or ricochet off mishits. This dual role means golf simulator screens are fundamentally different from home theater screens.
Impact Screens vs. Standard Projection Screens
Standard projection screens (white fabric or matte white paint) are designed to reflect light, not absorb impact. A golf ball hitting a standard screen at 100+ mph will damage it—tearing fabric, denting the frame, or destroying the screen surface. Golf simulator impact screens are engineered with multiple layers: a tightly woven front surface that displays the projected image, a mesh backing that absorbs ball energy, and sometimes a foam or padding layer behind that.
Impact screens come in several materials:
- Woven polyester: The most common material. Tight weave provides good image quality, and the polyester fibers stretch to absorb ball impact without tearing. Most mid-range golf simulator screens use this material. Image quality is good but not exceptional—slight texture is visible at close distances.
- Knitted polyester: Stretchier than woven polyester, providing better ball absorption. The trade-off is slightly softer image quality because the knitted surface scatters more light. Good for recreational setups where ball safety matters more than pixel-sharp rendering.
- Multi-layer composite: Premium screens combine a smooth front surface with impact-absorbing layers behind. These produce the best image quality—smooth enough for crisp 4K rendering—while still absorbing ball impacts safely. Carl’s Place, SIGPRO, and Rain or Shine Golf all offer composite-layer impact screens.
Screen Gain and Golf Simulation
Screen gain measures how much light the screen reflects compared to a reference white surface (gain of 1.0). Higher gain means a brighter image but narrower viewing angle. Lower gain means a dimmer image but wider, more uniform brightness across the screen.
For golf simulation:
- Gain 1.0–1.3: Ideal range. Produces a bright image without hotspotting (a bright center with dimmer edges). Most golf impact screens fall in this range.
- Gain 0.8–1.0: Slightly dimmer but more uniform. Works well with bright projectors (4,500+ lumens) in controlled-light rooms. ALR screens often fall in this range because their filtering reduces overall gain while improving contrast.
- Gain 1.3+: Brighter but creates visible hotspotting at the screen center. Not recommended for golf—ball tracking requires uniform brightness across the entire screen, not a bright center with dim edges.
ALR Screens for Golf Simulation
Ambient Light Rejecting (ALR) screens filter out ambient light from the sides and above while reflecting the projector’s light (coming from a specific angle) back to the viewer. In golf simulation, ALR screens improve perceived contrast by 20–40% in rooms with ambient light. Ball flight appears sharper, course colors look more saturated, and data overlays display with better contrast against the background.
The trade-off with ALR screens is cost (typically 2–3× the price of standard screens) and compatibility. ALR screens are angle-sensitive—the projector must be positioned precisely relative to the screen for the filtering to work correctly. With short-throw golf projectors mounted directly above the hitting bay, ALR screens work well because the projector angle is consistent.
If your golf room has ambient light you can’t fully control (windows, open doorways, overhead lighting that stays on during play), an ALR screen is worth the investment. If you have complete light control, a standard high-contrast gray impact screen is sufficient and more affordable.
Screen Color: White vs. Gray
White screens reflect all light equally, producing the brightest possible image. Gray screens absorb some light, which reduces overall brightness but improves perceived contrast. In golf simulation, gray screens are preferred because they darken the black portions of the image (sky, shadows, tree lines) while maintaining adequate brightness in lit areas (fairway, green, ball).
A light gray screen (0.8–0.9 gain) with a 4,000+ lumen projector produces excellent results for golf simulation—bright enough to see clearly in ambient light, with improved contrast for ball tracking. Pure white screens work in fully darkened rooms but wash out quickly when ambient light is present.
For a detailed guide to ALR screen technology and its benefits, see our ALR screen guide.
Launch Monitor & Golf Software Compatibility
The projector doesn’t work in isolation—it’s part of a system that includes a launch monitor (the sensor that reads your swing), golf simulation software (that calculates ball flight and renders the course), and often a gaming PC or console (that runs the software). Understanding how these components interact with the projector ensures your entire system works together without compatibility issues, lag, or display problems.
How the Data Flows
When you hit a golf ball in a simulator, the sequence is: (1) the launch monitor detects the ball and club at impact, (2) the launch monitor sends raw data (ball speed, launch angle, spin rate, club path, face angle) to the software, (3) the software calculates the full ball flight trajectory, (4) the software renders the ball flight and course graphics, (5) the rendered image is sent via HDMI to the projector, (6) the projector displays the result. Steps 2 through 6 happen in 0.5–2 seconds with modern systems.
The projector’s role in this chain is minimal—it simply displays what the computer sends. However, the projector’s specifications (resolution, refresh rate, input lag) affect how quickly and clearly the result appears. A slow projector adds delay to an already multi-step process.
Popular Launch Monitors and Projector Requirements
| Launch Monitor | Connection | Resolution Output | Projector Notes |
|---|---|---|---|
| Trackman (4/iO) | HDMI from PC | Up to 4K | Any resolution works; software handles scaling |
| SkyTrak / SkyTrak+ | HDMI from PC/iPad | 1080p typical | 1080p projector is ideal match |
| GCQuad / GCHawk | HDMI from PC | Up to 4K | 4K projector maximizes detail |
| Mevo+ | HDMI from iPad/PC | 1080p | 1080p projector sufficient |
| Bushnell Launch Pro | HDMI from PC | Up to 4K | Resolution depends on software choice |
| Rapsodo MLM2PRO | HDMI from phone/tablet | 1080p | Phone casting may add latency |
The key point: most launch monitors don’t connect directly to the projector. They connect to a PC or mobile device running the golf software, which then outputs to the projector via HDMI. The projector sees a standard HDMI video signal—the same as any computer output. This means any projector with an HDMI input works with any launch monitor system.
Golf Simulation Software and Display Settings
Major golf simulation software packages and their display characteristics:
E6 Connect: The most widely used commercial golf simulation software. E6 renders at 1080p or 4K depending on your PC hardware. It supports 16:9 aspect ratio natively and outputs clean, well-optimized graphics that look good on both 1080p and 4K projectors. E6 includes detailed course graphics, practice ranges, and skill challenges. It runs on moderate PC hardware (GTX 1060 or better for 1080p, RTX 3060 or better for 4K).
The Golf Club 2019 (TGC): Offers photorealistic course rendering and thousands of user-created courses. TGC is graphically demanding—it requires a gaming PC with a dedicated GPU (GTX 1070 or better). TGC renders at your PC’s output resolution, which means 1080p and 4K are both supported. The photorealistic graphics benefit from higher resolution, making 4K projectors more justified here than with simpler software.
GSPro: Growing in popularity for its accuracy and community-driven content. GSPro supports 1080p and 4K rendering. It includes a driving range, course play, and online tournaments. Graphics quality is between E6 and TGC—realistic but less graphically demanding than TGC. GSPro runs well on mid-range PCs and looks excellent at 1080p.
Awesome Golf: A lighter, more casual golf simulation. Runs on tablets and lower-end PCs. Outputs at 1080p maximum. Any projector in this guide handles Awesome Golf without issues. Good for family use or casual practice where detailed simulation isn’t required.
HDMI Version and Cable Quality
The HDMI connection between your PC and projector determines maximum resolution and refresh rate. HDMI 1.4 supports 4K at 30Hz (adequate for golf simulation, which doesn’t need high frame rates for course rendering). HDMI 2.0 supports 4K at 60Hz (smooth and responsive). HDMI 2.1 supports 4K at 120Hz (overkill for golf but future-proof).
Cable quality matters over long distances. If your PC is more than 15 feet from the projector, use a high-speed HDMI cable (rated for 18Gbps) or an active HDMI cable to prevent signal degradation. Cheap or damaged cables cause signal dropouts, flickering, or resolution limitations that are difficult to diagnose.
For guidance on resolving connection issues, see our HDMI no signal troubleshooting guide.
Wireless Projection: Not Recommended for Golf
Some projectors support wireless screen mirroring (Miracast, AirPlay, Chromecast). While convenient for presentations, wireless projection adds 50–200ms of latency—unacceptable for golf simulation where responsiveness matters. Always use a direct HDMI cable connection between your PC and projector for golf simulation. The reliability and speed of a wired connection far outweigh the convenience of wireless.
Ambient Light Management for Golf Simulator Rooms
Ambient light is the enemy of projected image quality. Unlike televisions, which produce their own light and compete well with room lighting, projectors depend on a dark(ish) environment to produce vivid, high-contrast images. In golf simulation, you can’t create a pitch-black room—you need to see the ball at your feet, read the launch monitor display, and navigate the space safely. The goal isn’t total darkness but strategic light management that maximizes image quality without sacrificing functionality.
Understanding How Ambient Light Affects Your Image
Ambient light hits the screen from all directions—overhead lights, windows, open doorways, and light-colored walls that reflect projector light back onto the screen. This ambient light washes out the projected image, reducing contrast and making dark portions of the course (shadows, night scenes, dark tree lines) appear gray instead of black. The ball, which is a small bright object against the course background, becomes harder to distinguish when ambient light reduces the contrast ratio.
A 5,000-lumen projector in a room with moderate ambient light produces an effective contrast ratio of approximately 150:1–300:1. The same projector in a controlled-light room produces 1,000:1–3,000:1. That difference is the gap between “you can see the ball” and “the ball tracking is crisp and instant.” Light management, more than projector brightness, determines your effective image quality.
Lighting Design for Golf Simulator Rooms
Overhead lights: Install dimmable LED fixtures positioned so they illuminate the hitting area and walkways without shining directly on the screen. Track lighting or recessed cans with adjustable trim rings let you aim light downward and away from the screen wall. Dimmer switches are essential—full brightness during setup and teardown, 30–50% during play.
Indirect lighting: Wall sconces or LED strip lights along side walls provide ambient visibility without direct screen illumination. These create enough light to see the ball, read the launch monitor, and navigate the room without washing out the projected image. Indirect lighting is the preferred approach for professional golf simulator installations.
Accent lighting behind the screen: LED strip lights behind the screen frame create a subtle halo effect that reduces the perceived contrast between the bright screen and dark surrounding wall. This doesn’t improve screen image quality but reduces eye strain during long sessions by preventing the harsh transition from bright screen to dark wall.
Window and Doorway Management
Windows are the primary ambient light source in residential golf simulator rooms. Solutions range from simple to permanent:
- Blackout curtains: Affordable ($30–80 per window) and effective. Heavy blackout fabric blocks 95–99% of window light. Install curtain rods that extend 4–6 inches beyond the window frame on each side to prevent light leakage around edges.
- Cellular blackout shades: More attractive than curtains and equally effective. Honeycomb-shaped cellular shades trap air for insulation while blocking light. They sit inside the window frame for a clean look. Budget: $50–150 per window.
- Blackout film: Adhesive film applied directly to window glass. Blocks 100% of light. Permanent solution that requires no hardware. Budget: $15–30 per window. The downside: it’s permanent and prevents using the window for ventilation or natural light when the simulator isn’t in use.
Doorways are harder to manage, especially in open-concept spaces. Portable room dividers or curtains on ceiling-mounted tracks can create a temporary enclosure around the golf bay. In garage installations, closing the garage door is the obvious solution—but this eliminates ventilation, which brings us back to the thermal management discussion.
Wall and Ceiling Color
Light-colored walls (white, cream, light gray) reflect projector light back onto the screen, reducing effective contrast. Dark-colored walls (dark gray, black, navy) absorb stray light, preserving image quality. This is the same principle used in movie theaters, where dark walls and ceilings prevent light from bouncing around the room.
For golf simulator rooms, painting the screen wall and adjacent side walls a dark color (charcoal gray or black) is one of the most cost-effective improvements you can make. A $50 can of dark paint on the wall behind and beside the screen can improve perceived contrast by 15–25%—equivalent to adding 1,000+ lumens of projector brightness.
The ceiling above the screen should also be dark or covered with dark fabric. Projector light that hits the ceiling bounces back down onto the screen, creating a subtle washout effect. A dark ceiling panel or dark paint above the screen area eliminates this.
Room Setup & Installation: Making Golf Simulation Work
1. Measure Your Throw Distance First
Before buying, measure the distance from where the projector will mount to where the screen will hang. This determines whether you need short-throw or standard throw. A 10-foot space mandates short-throw. A 15-foot space can accommodate standard throw. This single measurement gates your choices.
2. Choose Your Screen Carefully
Golf simulation screens are specialized. They need high brightness (to show ball flight clearly), high contrast (to separate ball from background), and appropriate aspect ratio (usually 16:9 for modern golf software). Gray screens are better than white for golf—they reject ambient light while maintaining color accuracy. An ambient light-rejecting screen improves perceived image quality by 20–40% without needing a brighter projector.
3. Plan Lighting Strategy
Even with a 5,000-lumen projector, you need some lighting control. Install dimmers or selective switches for overhead lights. If windows exist, add blackout curtains or shades. Complete darkness isn’t necessary for golf (unlike home theater), but you want to eliminate direct glare on the screen.
4. Ensure Proper Ventilation
Projectors in golf rooms run continuously during play. Heat buildup can trigger thermal shutdowns. Ensure 12+ inches of clearance above the projector and unrestricted airflow. In hot climates, add a small exhaust fan to pull heat away from the installation.
5. Integrate with Launch Monitor Software
Your launch monitor (Trackman, SkyTrak, etc.) connects to golf simulation software (E6, The Golf Club, PGA Tour Simulator) which sends graphics to the projector. The setup software needs to recognize your projector’s resolution and refresh rate. Most modern golf software handles this automatically, but verify compatibility with your specific launch monitor and software before installation.
6. Ceiling Mount vs. Floor Placement
Ceiling mounting is the standard for golf simulator projectors. It keeps the projector out of the swing path, prevents accidental contact with clubs or balls, and positions the projector at the correct angle for the screen. Ceiling mounts range from $20–80 for basic fixed mounts to $100–200 for adjustable mounts with tilt, swivel, and extension capabilities.
Floor placement (on a shelf or cart) is possible but creates problems: the projector is in the path of errant balls, the projection angle may cause keystoning, and floor vibrations from the golfer’s stance can cause image instability. If ceiling mounting isn’t possible (rental space, concrete ceiling), a high shelf or rear-wall mount behind the golfer is the next best option.
For detailed mounting instructions, see our ceiling mounting guide.
7. Cable Management
HDMI cables from the PC to the ceiling-mounted projector should run through the ceiling or along walls in cable channels. Exposed cables in a golf room create tripping hazards and risk damage from golf clubs. Use a high-speed HDMI cable rated for the distance between your PC and projector. For runs over 25 feet, consider an HDMI over Cat6 extender, which sends the HDMI signal over Ethernet cable for longer distances without signal degradation.
8. Offset Mounting and Image Correction
In many golf simulator setups, the projector can’t be centered perfectly on the screen. It may be offset to one side to avoid ceiling lights, or mounted at an angle due to room geometry. Most projectors include keystone correction (digital adjustment that trapezoidally distorts the image to appear rectangular) and lens shift (optical adjustment that moves the image without distortion).
For golf simulation, always prefer lens shift over keystone correction. Keystone correction reduces effective resolution and can introduce input lag. Lens shift moves the image optically without these penalties. If your projector lacks lens shift, position it as precisely as possible and use minimal keystone correction—just enough to square the image.
Common Mistakes When Choosing a Golf Simulator Projector
Golf simulator forums and installation services report the same mistakes repeatedly. Understanding these pitfalls before you buy saves money, frustration, and the cost of replacing a projector that doesn’t work for your setup.
Mistake 1: Buying a Home Theater Projector for Golf
Home theater projectors are optimized for dark rooms, movie content, and cinematic color. They typically produce 2,000–3,000 lumens—which is perfect for a pitch-black theater but insufficient for a golf simulator room with ambient lighting. They also prioritize color accuracy and film-like motion over the fast response times golf requires. A home theater projector in a golf room produces a dim, washed-out image with noticeable lag between swing and display.
The exception is if your golf room has complete light control (no windows, dimmable lights, dark walls). In that case, a home theater projector with 3,000+ lumens and decent response time (under 30ms) can work. But for most installations, a business or golf-specific projector is the correct choice.
Mistake 2: Ignoring Throw Distance
The number one installation failure is buying a projector that doesn’t fit the room. A projector with a 1.6:1 throw ratio needs 13.3 feet to produce a 100-inch image. If your room is 10 feet deep, that projector physically cannot produce the image size you want. Measure your throw distance before comparing projectors. If you have under 10 feet, only short-throw models (0.5–1.0:1) will work.
Use the formula: Required Distance = Screen Width × Throw Ratio. For a 100-inch (87-inch wide) screen with a 0.7:1 throw ratio: 87 × 0.7 = 60.9 inches (approximately 5 feet). That fits comfortably in a 10-foot room with space to spare.
Mistake 3: Over-Valuing Resolution
Many buyers assume 4K is always better and pay a premium for 4K projectors that deliver fewer lumens than their 1080p counterparts. In golf simulation, brightness and contrast affect your experience more than resolution. A 1080p projector at 5,000 lumens produces a better golf simulation experience than a 4K projector at 3,000 lumens—at a lower price. The extra pixels of 4K are imperceptible at typical golf viewing distances (10+ feet from a 100-inch screen).
Choose 4K only if: your budget allows it without sacrificing brightness, your screen is over 120 inches, your viewing distance is under 8 feet, or you’re also using the space for home theater viewing where 4K matters more.
Mistake 4: Under-Budgeting for the Screen
Some golfers spend $2,000 on a projector and $200 on a screen. This is backwards. The screen is the surface you stare at for every shot—it determines image quality as much as the projector does. A quality golf impact screen with proper gain, color, and impact resistance costs $400–1,000. Pair it with a projector that matches its characteristics. An ALR screen adds another $200–500 but dramatically improves ambient light performance.
Mistake 5: Forgetting About Noise
The projector mounts directly above the golfer’s head. If it produces 40dB+ of fan noise, the constant whirring becomes distracting during the quiet focus of address and swing. Check the noise specification before buying. Under 35dB is ideal. If your preferred projector is louder, consider eco mode (reduces brightness and noise) or acoustic treatment around the mount.
Mistake 6: Skipping Lamp vs. Laser Analysis
A $600 lamp-based projector seems cheaper than a $1,500 laser projector—until you factor in replacement lamps ($200–300 every 2–3 years), downtime during replacement, and gradual brightness degradation over the lamp’s life. Over 5 years of heavy golf simulator use (8+ hours daily), the total cost of ownership often favors the laser projector. Calculate the 5-year cost including lamp replacements before deciding.
Mistake 7: Not Testing Before Committing
If possible, visit a golf simulator facility and observe the projected image quality in person. Notice the brightness, contrast, screen quality, and room lighting. Ask what projector they use. This real-world reference point is more valuable than spec sheet comparisons. Many golf facilities use the Optoma ZH406ST or BenQ LU935ST—seeing these in action helps you understand what to expect from your own installation.
Mistake 8: Mounting the Projector Incorrectly
Incorrect mounting—too close, too far, off-center, wrong angle—creates image distortion, uneven brightness, and wasted screen area. Before mounting, use the projector manufacturer’s online throw distance calculator to determine the exact mounting position for your screen size. Mark the position on the ceiling, verify the image fills the screen correctly (use a test pattern or white image), then mount permanently.
For a broader perspective on projector mistakes across all use cases, see our complete projector selection guide.
Commercial vs. Home Golf Simulator Installations
The projector requirements for a commercial golf facility differ significantly from a home simulator. Understanding these differences helps you choose the right projector for your specific context—and avoid over-buying for a home setup or under-buying for a commercial one.
Usage Hours and Durability
A home golf simulator might run 2–4 hours per day, 3–5 days per week—approximately 500–1,000 hours annually. A commercial facility operates 8–14 hours per day, 6–7 days per week—3,000–5,000 hours annually. This 3–5× difference in usage drives projector selection in ways that matter:
- Light source: At 4,000 hours annually, a lamp projector needs a new lamp every 12–18 months. Over 5 years, that’s 3–5 lamp replacements at $200–300 each ($600–1,500 total). A laser projector costs more upfront but needs zero replacements in the same period. For commercial use, laser is almost always the right choice. For home use, lamp-based projectors are viable if you accept the maintenance cycle.
- Build quality: Commercial projectors use heavier-duty components designed for continuous operation. The Optoma ZH406ST and BenQ LU935ST are commercial-grade projectors with thermal designs, filter systems, and component ratings for all-day operation. Consumer projectors may overheat or degrade faster under commercial workloads.
- Service and support: Commercial projector manufacturers offer dedicated service programs, loaner units during repairs, and extended warranties. Optoma and BenQ both have professional support channels for commercial accounts. If your golf facility generates revenue from simulator sessions, projector downtime directly costs money—a service contract that provides a loaner projector during repairs pays for itself.
Multiple Bays and Centralized Control
Commercial facilities typically operate multiple golf bays (4–20 bays per location). Each bay has its own projector, screen, and launch monitor. Managing 10+ projectors requires centralized power control (turn all projectors on/off simultaneously), consistent settings across all units, and easy access for maintenance. Professional projectors support network control (PJLink, Crestron, AMX) that allows centralized management from a single interface.
For home installations with a single bay, network control is irrelevant. You turn the projector on manually, adjust settings once, and rarely touch it again. Don’t pay a premium for features designed for multi-bay commercial facilities if you’re building a single-bay home simulator.
Screen and Enclosure Differences
Commercial golf bays use engineered enclosures with padded walls, turf flooring, protective side netting, and professional-grade impact screens. These enclosures cost $2,000–10,000 per bay and are designed for high-volume use with hundreds of different golfers. The projector is a component of this system, not a standalone device.
Home installations are more flexible. Many home golfers use a simple impact screen hung from the ceiling or attached to a frame, with the projector mounted above. The setup is less polished but functional. The projector choice is the same—short-throw, laser or lamp, adequate brightness—but the surrounding infrastructure is simpler and less expensive.
Budget Allocation
In a commercial facility, the projector represents 15–25% of total bay cost (enclosure, turf, launch monitor, software, projector, PC, furniture). Spending more on a premium projector makes sense because it’s a fraction of the total investment and directly affects customer experience.
In a home installation, the projector represents 30–40% of total cost. Budget constraints are tighter, and the difference between a $800 projector and a $2,000 projector is more significant relative to total budget. The Epson PowerLite 800F at the budget end and the BenQ LU935ST at the midrange end represent the practical range for most home installations.
For perspective on projector budgets across all price ranges, see our projector guide for every budget and room size and our high-end projector guide.
Multi-Sport Simulator Use: Beyond Golf
A golf simulator room is an expensive, dedicated space. Making it serve multiple sports increases the return on that investment. Several golf simulation platforms support multi-sport modes, and the projector choice for golf generally works well for other sports—but there are considerations worth understanding.
Supported Sports
The major golf simulation software packages that include multi-sport capabilities:
- E6 Connect: Includes golf, soccer, baseball, football, and several carnival-style games. Multi-sport mode uses the same launch monitor to detect ball impact and direction, adapting the physics model to each sport. The projector requirements are identical to golf—brightness, contrast, and response time matter equally for displaying a soccer goal or a football field.
- TGC 2019: Primarily golf-focused but includes driving range, closest-to-the-pin challenges, and mini-games that test different aspects of the golf simulator’s capabilities.
- Awesome Golf: Includes several non-golf games (zombie dodgeball, island adventure) designed for family entertainment. These games are less graphically demanding than detailed golf courses, so any projector that handles golf handles these easily.
Projector Considerations for Multi-Sport
If you plan to use the simulator room for sports other than golf, consider these additional factors:
Screen durability: Multi-sport use often involves different ball types (soccer balls, baseballs, softballs) that impact with different force and surface area than golf balls. Verify that your impact screen can handle non-golf impacts. Most commercial-grade golf impact screens handle soft soccer balls and tennis balls, but baseballs and hockey pucks require reinforced screens.
Brightness for varied content: Non-golf sports display larger, brighter images (full-field soccer, wide baseball diamonds) that fill more of the screen. This means the projector works harder—more of the screen is illuminated, and the effective brightness per square inch decreases. If multi-sport use is planned, favor brighter projectors (4,500+ lumens) to handle the increased screen fill.
Aspect ratio: Some sports render better at different aspect ratios. Baseball and football benefit from the full 16:9 width, while golf uses the height more for ball flight trajectory. Standard 16:9 handles all sports well, but if you’re considering a 16:10 screen for golf, verify that non-golf content looks acceptable at that aspect ratio.
Home Entertainment Beyond Sports
Many golf simulator owners also use their space for movie watching, gaming (console or PC), and sports viewing (watching real golf tournaments on the big screen). The projector choice for golf generally serves these purposes well—brightness, resolution, and response time are all relevant for gaming and movie viewing.
If you plan significant non-golf use, consider a projector that balances golf performance with home entertainment features. The Optoma GT1080HDR, with its gaming-optimized 120Hz and low input lag, serves double duty as a gaming projector. The BenQ 4K Laser ST, with its 4K resolution and laser longevity, excels as both a golf simulator and home cinema projector. The trade-off is that these dual-purpose projectors may not be the absolute best at either use case, but they’re excellent at both.
For dedicated home cinema recommendations, see our best home theater projectors guide. For gaming-focused options, see our 4K 120Hz gaming projector roundup.
Projector Maintenance & Long-Term Care for Golf Simulators
A golf simulator projector is a long-term investment. Proper maintenance preserves image quality, extends the projector’s lifespan, and prevents unexpected failures during play. The maintenance requirements differ between laser and lamp-based projectors, but both need regular attention in the dusty, high-use environment of a golf simulator room.
Lamp-Based Projector Maintenance
Lamp-based projectors require the most maintenance because the lamp is a consumable component with a finite lifespan. Here’s the maintenance schedule:
Lamp replacement (every 2,000–5,000 hours): The lamp dims gradually over its lifespan. You may not notice the dimming day-to-day, but after 2,000 hours, the lamp is typically at 70% of original brightness. By 4,000 hours, it may be at 50%. Replace the lamp before it fails catastrophically (popping or blackening), which can damage the projector’s optical system. Replacement lamps cost $150–300 depending on the projector model. Budget for one replacement every 2–3 years at typical home golf simulator usage.
Filter cleaning (every 200–500 hours): Lamp-based projectors have air filters that prevent dust from reaching the lamp and optical components. In golf simulator rooms, these filters clog faster because of turf fibers, mat dust, and general particulate from the hitting area. Check the filter monthly. Most filters are removable and washable—rinse under running water, air dry completely, and reinstall. Clogged filters cause overheating, which triggers thermal shutdown and shortens lamp life.
Vent cleaning (annually): Even with regular filter cleaning, dust accumulates on intake and exhaust vents. Use compressed air (canned air or a low-pressure compressor) to blow dust out of the vents annually. Don’t use a vacuum cleaner directly on the projector—the static charge can damage electronic components.
Laser Projector Maintenance
Laser projectors require less maintenance because the light source has no consumable components. The laser module lasts 20,000+ hours without degradation. However, other components still need attention:
Filter cleaning (every 500–1,000 hours): Laser projectors still have air filters (though some models use sealed optics that eliminate this need). The BenQ LU935ST has a sealed optical engine that requires no filter cleaning—a significant advantage in dusty golf simulator environments. The Optoma ZH406ST has a filter that requires periodic cleaning. Check your specific model’s maintenance requirements.
Lens cleaning (every 3–6 months): The projector lens accumulates dust, fingerprints, and airborne particles that degrade image quality. Clean the lens with a microfiber cloth and lens cleaning solution (or distilled water). Never use paper towels, tissues, or household glass cleaner—these scratch the lens coating. For stubborn spots, use a lens pen designed for camera lenses.
Vent inspection (annually): Check intake and exhaust vents for dust buildup. Even sealed-optics laser projectors have ventilation for heat management. Clear any visible dust with compressed air.
Environmental Maintenance
The projector’s environment affects its longevity more than the projector itself:
- Keep the hitting area clean: Turf fibers, rubber particles from hitting mats, and dust from golf balls become airborne during practice and settle on the projector. Regularly vacuum or sweep the hitting area. Consider a hitting mat with low-shed fibers.
- Control humidity: Excessive humidity (above 60%) promotes mold growth inside the projector and on the lens. In humid climates, use a dehumidifier in the golf simulator room. In dry climates, static electricity can attract dust to the projector’s optics—aim for 40–50% relative humidity.
- Prevent impact damage: Errant golf balls that hit the projector can destroy it instantly. Position the projector where direct ball contact is physically impossible—above and behind the hitting position, protected by a ceiling or enclosure structure. Some installations add a protective cage or polycarbonate shield below the projector.
Firmware Updates
Projector manufacturers occasionally release firmware updates that fix bugs, improve image processing, or add features. Check the manufacturer’s website annually for firmware updates for your model. Updates typically install via USB drive and take 5–10 minutes. This is especially important for laser projectors, which may receive optimization updates that improve color accuracy or reduce fan noise over time.
Troubleshooting Common Issues
Image flickering: Usually caused by a failing lamp (in lamp-based models), a loose HDMI cable, or a damaged HDMI cable over long distances. Check cable connections first, then test with a different cable. If the lamp is near end-of-life (check hours in the projector menu), replace it.
Color shift: Gradual color change over time is normal for lamp-based projectors as the lamp ages (typically shifting toward yellow or green). Replace the lamp. For laser projectors, color shift is rare—check color mode settings and verify the HDMI cable is functioning properly.
Image appears dimmer than when new: For lamp-based projectors, this is normal lamp degradation. Replace the lamp. For laser projectors, check eco mode settings (eco mode reduces brightness), clean the lens, and verify the room hasn’t gotten brighter (new windows, lighter wall paint).
Projector won’t turn on: Check the power cable, try a different outlet, and verify the power indicator light. If the projector turns on briefly and shuts off, it’s likely overheating—check for blocked vents or failed cooling fans. For persistent issues, see our projector troubleshooting guide and projector shutdown troubleshooting.
Visible dust spots on the projected image: Dust on the internal LCD panel (3LCD) or DLP chip. For DLP projectors with sealed optics, this is rare. For 3LCD projectors, professional cleaning may be required ($100–200). Prevent this with regular filter maintenance.
For general projector cleaning guidance, see our projector lens cleaning guide.
Frequently Asked Questions
What throw distance do I need for a golf simulator?
Most golf simulators need 8-12 feet of throw distance. Short-throw projectors (0.5-1.0 throw ratio) let you place the projector 5-8 feet away. Standard throw projectors (1.5-2.5 throw ratio) require 12-15 feet. Measure your available space first—this determines whether you need short-throw or standard throw, which gates your entire projector selection.
Does input lag matter in golf simulators?
Yes, significantly. Input lag (delay between swing and display) should be under 50ms, ideally under 30ms. Gaming projectors (120Hz) excel here with 4–8ms lag. Professional golf projectors typically range 8–15ms. Standard business projectors are 20–30ms, which is acceptable but noticeable. If you’re looking for the most immediate swing feedback, gaming projectors like the Optoma GT1080HDR have clear advantages.
What brightness is ideal for golf simulators?
Golf simulators typically need 3,500–5,000 lumens. Below 3,500 and ball flight becomes hard to track. Above 5,500 adds expense without practical benefit. The sweet spot for most setups is 4,000–5,000 lumens. This provides visibility in ambient light without requiring complete darkness like home theater projectors.
Should I use laser or lamp for a golf simulator?
Laser is preferred if you’re planning a long-term installation (5+ years). Golf simulators often run 8+ hours daily. Laser maintains consistent brightness for 20,000 hours. Lamps dim gradually and need replacement every 3–4 years, creating downtime and recurring costs. Lamp-based projectors are cheaper upfront but more expensive over time for heavy usage.
Can I use a home theater projector for golf simulation?
Not ideally. Home theater projectors (2,000–3,000 lumens) wash out in ambient light, and they’re not optimized for the responsiveness golf requires. Golf-specific projectors have better contrast, faster response times, and appropriate brightness for indoor practice spaces. A home theater projector would require near-total darkness to be functional.
What resolution is needed for golf simulation?
1080p (Full HD) is sufficient and standard. 4K offers sharper detail but at higher cost and often lower brightness. WUXGA (1920×1200) offers a middle ground with more vertical pixels for metrics and scoreboards. For most golf applications, 1080p or WUXGA is more practical than 4K. The ball flight and course rendering look good at 1080p; golfers focus on metrics and feedback, not pixel perfection.
What’s the best screen material for golf simulators?
Light gray screens are ideal—they reject ambient light while maintaining color accuracy. Avoid pure white screens (wash out in ambient light) and very dark screens (reduce brightness). High-contrast, ambient light-rejecting (ALR) screens improve perceived brightness by 20–40% without needing a brighter projector. For golf, screen quality is as important as projector quality.
How long do golf simulator projectors last?
Laser projectors last 20,000 hours (roughly 10 years at typical golf usage). Lamp projectors last 3,000–6,000 hours before lamp replacement is needed (roughly 1.5–3 years at heavy usage). After lamp replacement costs and downtime, laser-based projectors often cost less over 10 years despite higher purchase price.
Can I mount the projector behind the golfer or to the side?
Most golf simulator projectors mount above and in front of the hitting bay, projecting forward onto the screen. Some facilities use behind-screen (rear-projection) installations for space efficiency. Most modern short-throw projectors support various mounting angles and positions. Check specifications for flexibility—some models support 360-degree mounting (any angle), while others have limited placement options.
What’s the total cost for a complete golf simulator setup?
A basic setup (projector, screen, launch monitor, software) costs $3,500–7,000. Mid-range installations $7,000–15,000. Professional facilities $15,000+. The projector is 30–40% of total cost. The launch monitor, software subscriptions, and screen are the other major expenses. See our comparison of projectors under $1,000 and under $500 for budget options.
What display technology is best for golf simulators?
DLP (Digital Light Processing) is the most common technology in golf simulator projectors because of its high contrast, fast response times, and resistance to image degradation over time. LCD (3LCD) projectors offer strong color accuracy and brightness but may show visible pixel gaps at close distances. LCoS offers the best image quality but at significantly higher cost. For most golf installations, DLP provides the best balance of performance and value.
Do I need an ALR screen for a golf simulator?
An ALR (Ambient Light Rejecting) screen is recommended but not mandatory for golf simulators. ALR screens improve perceived contrast by 20-40% in rooms with ambient light, making ball flight and course graphics appear sharper and more vivid. In fully controlled dark rooms, a standard high-contrast gray screen is sufficient. If you have windows or ambient light you can’t eliminate, an ALR screen is worth the investment.
What aspect ratio should I use for a golf simulator?
16:9 is the standard aspect ratio for most golf simulation software including E6, The Golf Club 2019, and GSPro. It matches modern projector native resolutions and provides a wide, immersive course view. 16:10 is acceptable if your projector is native WUXGA—software will add thin black bars or stretch to fill. Avoid 4:3 projectors for golf simulation.
How loud should a golf simulator projector be?
Golf simulator projectors should ideally produce under 35dB of fan noise. Since the projector typically mounts above and behind the golfer, excessive noise becomes distracting during the quiet, focused moments of address and swing. Laser projectors tend to run quieter than lamp-based models because they generate less heat. Check the noise specification before purchasing and consider eco mode for quieter operation.
Choose Based on Your Space and Priorities
Golf simulation success depends on matching the projector to your space and use case. If you have <10 feet of throw distance, short-throw is mandatory—the BenQ LU935ST or Optoma ZH406ST are your choices. If response time is critical, the Optoma GT1080HDR is incomparable. If budget drives the decision, the Epson PowerLite 800F works if you have space and lighting control. If you want the ultimate setup, the BenQ 4K Laser ST combines every premium feature.
Remember: the projector is one component of a golf simulation system. The screen, launch monitor, software, and room setup matter equally. A mediocre projector in a well-designed room with good software outperforms a premium projector in a poorly set-up space. Get all the pieces right.
For broader context on choosing projectors across different scenarios, see our complete projector selection guide and comparisons of home theater projectors, gaming projectors, and ultra-short-throw options.
Related Resources for Golf Simulator Setup
- How to Choose a Projector – Complete decision framework for all use cases.
- Best Ultra-Short-Throw Projectors – Deeper dive into short-throw technology.
- Best 4K Laser Projectors – For premium golf installations needing maximum detail.
- Best Projectors for Bright Rooms – Relevant for golf rooms with ambient light.
- Calculate Projector Throw Distance – Precise math for your specific room.
- ALR Screens for Golf Simulation – Maximize image quality with the right screen.
- How to Mount a Projector to Ceiling – Installation guidance for golf bays.
- Laser vs. Lamp: Long-Term Cost Analysis – Maintenance and ownership costs explained.
- Best Gaming Projectors – Fast response time for interactive experiences.
- Best Home Theater Projectors – For comparison with darkened-room alternatives.