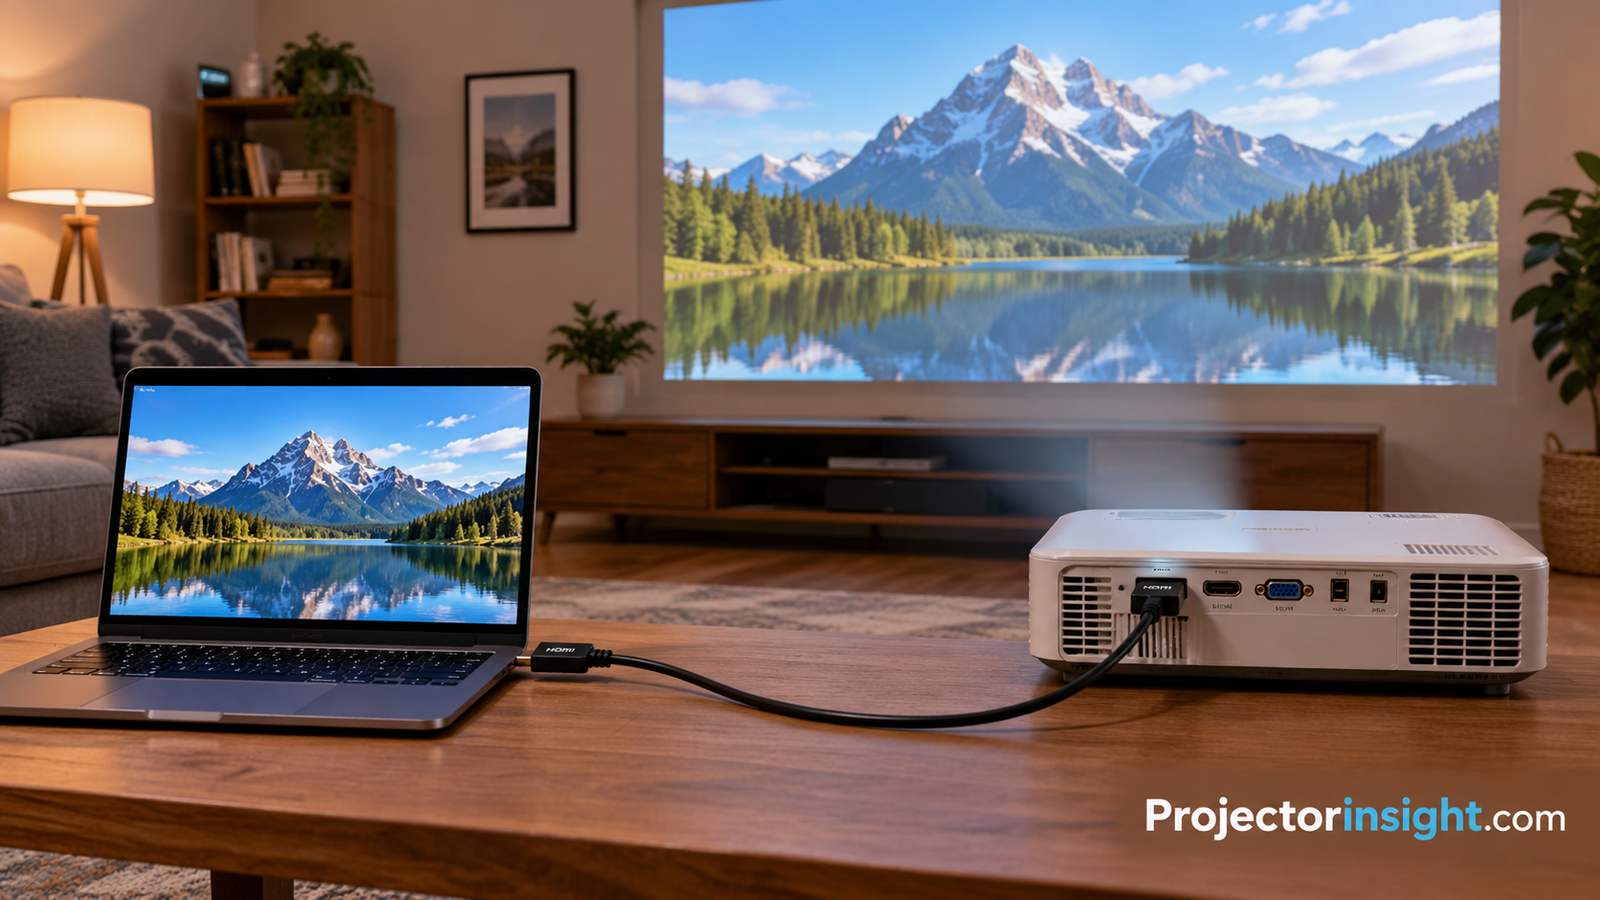
How to Connect a Projector to a Laptop or Mac: The Complete Guide
Windows laptop, MacBook, Epson projector or a wireless setup: here is exactly which cable, adapter and setting you need, and what to do when the screen stays blank.
You unpack the projector, plug it in, and the wall glows with a blank blue screen. Now what? Connecting a projector to a laptop should take two minutes, yet it trips up plenty of people because laptops, Macs and projectors all speak slightly different physical languages. One has a full-size HDMI port, another only has USB-C, and the projector might still expect a blue VGA plug from a decade ago.
This guide walks you through every common situation: a Windows laptop with HDMI, a MacBook that needs an adapter, an Epson projector with its own software, and wireless options for when you would rather not run a cable across the room. Each core step includes a simple diagram, and we finish with a troubleshooting section for the stubborn “no signal” message. If you are still shopping for a projector, our guide to choosing a projector is a good place to begin.
What You Need Before You Start
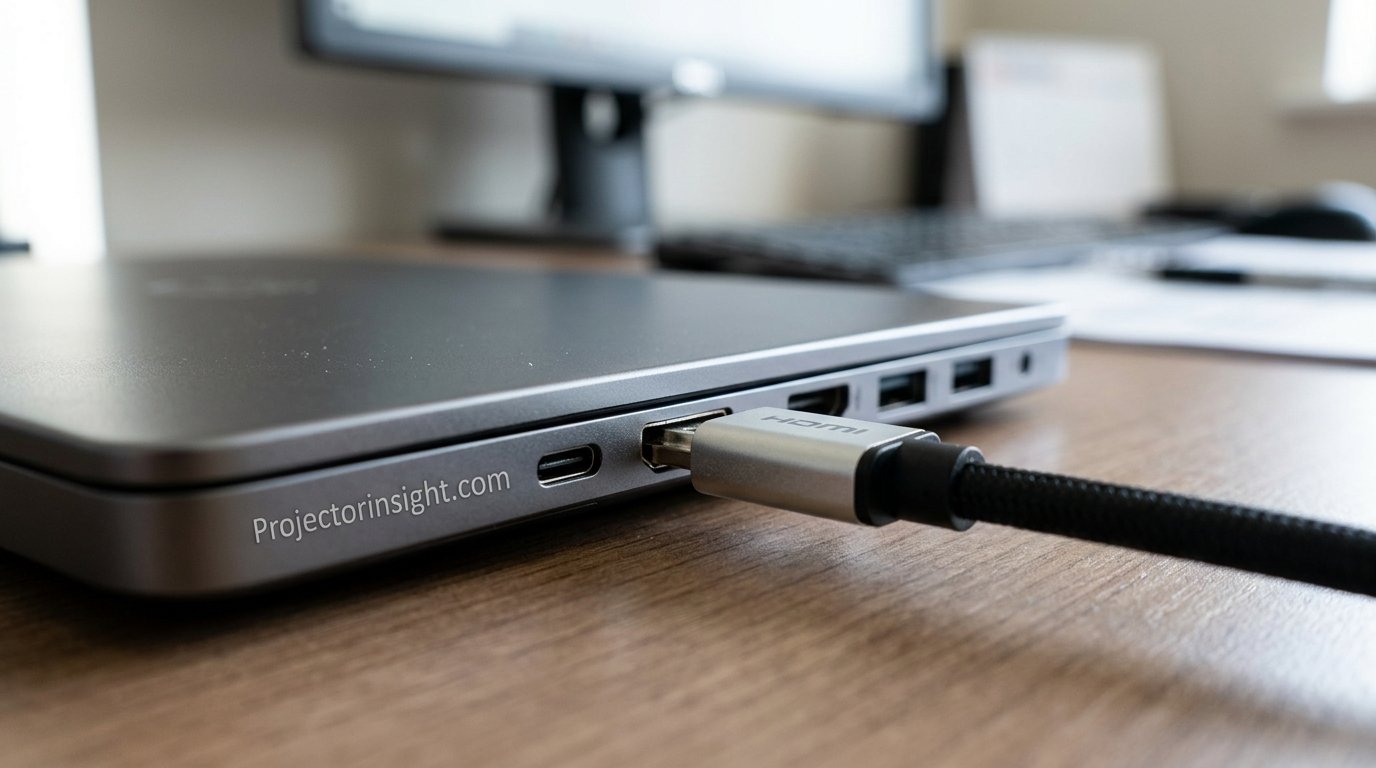
A little preparation saves a lot of frustration. Before you touch a single cable, take two minutes to check what both devices actually offer. Look at the side and back of your laptop, then at the connection panel on the projector. Most of the time you will find at least one port in common. When you do not, an inexpensive adapter solves the problem.
The short checklist
- A projector with power. Plug it in and let the fan spin up. Most lamp and laser projectors need a minute to warm before they show a picture.
- A laptop that is charged or plugged in. Driving an external display uses extra power, and a laptop on low battery may dim or throttle.
- The right cable. HDMI is the answer in nearly every case. A standard HDMI cable works for 1080p, while a High Speed or Ultra High Speed cable is safer for 4K.
- An adapter if your laptop lacks a matching port. Thin laptops and every modern MacBook usually need a USB-C to HDMI adapter or a small hub.
- A surface or screen at a sensible distance. The picture will only be as good as the space in front of the lens. If you are unsure how far back to place it, use our walkthrough on how to calculate projector throw distance.
Power everything off first?
HDMI is designed to be hot-pluggable, meaning you can connect it while devices are on. In practice, the smoothest routine is to turn the projector on first, wait for the lamp or laser to stabilise, and then connect the cable to your already-running laptop. Your laptop then detects a new display right away and sends a signal without a restart.
Know your projector type
Business and classroom projectors tend to include several ports, sometimes VGA, HDMI and USB. Portable mini projectors often provide a single HDMI or USB-C input and lean on wireless casting. Home theatre models focus on HDMI and sometimes offer a dedicated gaming mode. Knowing which family yours belongs to helps you predict what you can plug in. If yours is a compact model, our roundup of the best portable mini projectors shows what to expect from small units.
Stock up on the essentials: a reliable HDMI cable and a USB-C adapter cover most laptops.
Shop HDMI Cables on AmazonPorts, Cables and Adapters Explained
Ports look confusingly similar until you learn to tell them apart. Once you can identify four or five shapes, you can connect almost any laptop to almost any projector. Here is a plain-language tour of what you are likely to see.
| Port | What it looks like | Carries audio? | Best for |
|---|---|---|---|
| HDMI | Wide, flat, trapezoid-shaped plug | Yes | Almost every modern setup |
| Mini or Micro HDMI | Smaller version of HDMI, found on some ultrabooks | Yes | Slim laptops and tablets |
| USB-C (with video) | Small oval, reversible | Yes | MacBooks and modern Windows laptops |
| DisplayPort | Similar to HDMI, one cut corner | Yes | Desktop-style laptops and gaming rigs |
| VGA | Blue, 15-pin D-shaped plug with screws | No | Older projectors and school rooms |
| DVI | White, wide plug with screws | No | Rare, mostly legacy hardware |
Why HDMI usually wins
HDMI carries video and sound in one cable, is supported by nearly every projector made in the last fifteen years, and requires no special drivers. It is also easy to buy anywhere. If both your laptop and projector have an HDMI port, that is the simplest path and you can skip to the next section.
USB-C is not always video
This catches many buyers out. A USB-C port might only charge or transfer data. To send video, it must support DisplayPort Alt Mode or Thunderbolt. Look for a small DisplayPort logo, a Thunderbolt lightning symbol, or check your laptop’s spec sheet. Every Thunderbolt port on a Mac supports video output, and most modern USB-C ports on Windows laptops marked with a display icon do as well.
Adapters worth owning
Handy to keep in a bag
- USB-C to HDMI adapter
- USB-C multiport hub with HDMI
- Mini HDMI to HDMI adapter
- VGA to HDMI converter (for old projectors)
Skip these
- Unbranded ultra-cheap adapters with no rating
- Passive VGA to HDMI cables that claim to convert
- Extra-long thin cables with no shielding
A quality adapter costs little and makes the difference between a stable picture and random flicker. Passive VGA to HDMI cables in particular do not work, because VGA is analogue and HDMI is digital. You need a small powered converter box to translate between them.
Not sure which adapter fits your laptop? Browse popular USB-C to HDMI options.
Find a USB-C to HDMI AdapterHow to Connect a Projector to a Laptop with HDMI (Windows)
This is the most common scenario, and it is refreshingly simple. If you own a Windows 10 or Windows 11 laptop with an HDMI port, you can be on screen in a few steps. Follow them in order and the picture should appear almost immediately.
Step 1: Position the projector and power it on
Place the projector on a stable surface or mount, aim the lens at the screen or wall, and turn it on. Give it a minute to warm up. If you plan a permanent install, read our guide on how to mount a projector to the ceiling.
Step 2: Plug one end of the HDMI cable into the projector
Find the HDMI input on the projector and push the plug in firmly until it seats. Note which input you use, such as HDMI 1 or HDMI 2, because you may need to select it later. Do not force the plug; it only fits one way.
Step 3: Plug the other end into your laptop
Connect the free end to your laptop’s HDMI port. If your laptop has only USB-C, use the adapter from the previous section. On some laptops there are two similar ports, one for video and one for charging only, so check for a display icon beside the port.
Step 4: Select the correct input and choose a display mode
Use the projector remote to press Source or Input and choose the HDMI port you used. On your laptop, press Windows + P and pick Duplicate to mirror your screen, or Extend to use the projector as a second monitor. You should see your desktop on the wall within a couple of seconds.
Windows + P again. If it still stays blank, jump to our troubleshooting section or read our detailed article on the projector no signal HDMI error.Need a longer or 4K-ready cable to reach across the room? Check certified High Speed options.
See 4K HDMI CablesHow to Connect a MacBook or Mac to a Projector
Macs handle external displays gracefully, but the hardware is where people get stuck. Almost every current MacBook uses USB-C or Thunderbolt ports, and some models include an HDMI port and an SD card slot as well. Mac desktops such as the Mac mini and iMac provide HDMI or Thunderbolt outputs depending on the model. Once you have the physical link sorted, macOS does most of the work automatically.
Step 1: Work out which port your Mac has
Look at the edge of your Mac. A small oval port with a lightning bolt or a plain USB-C symbol means you need a USB-C to HDMI adapter or hub. A full-size HDMI slot means you can plug in a normal cable directly. Older Macs may include a Mini DisplayPort, which needs a Mini DisplayPort to HDMI adapter.
Step 2: Attach the adapter or cable to the Mac
Plug your USB-C to HDMI adapter into any Thunderbolt or USB-C port on the Mac. If you are using a hub, insert it now and connect power if the hub supports pass-through charging. Adapters are reversible, so you cannot plug them in upside down.
Step 3: Connect the HDMI cable to the projector
Run an HDMI cable from the adapter to the projector’s HDMI input, and set the projector to that input using its remote or control panel. The projector will show a blank or blue screen until the Mac starts sending video.
Step 4: Set the display arrangement in System Settings
Open System Settings and choose Displays (on older versions, System Preferences > Displays). Your Mac should already show the projector. Click it, then choose Mirror for [display] for identical images or leave it as extended to use it as a second screen. Set the resolution to match the projector’s native resolution, usually 1920 x 1080 for full HD.
Step 5: Confirm sound and Night Shift or True Tone
Choose the projector or HDMI device under Sound > Output if you want audio through its speakers, or leave the Mac speakers active if you use external speakers. Turn off Night Shift and True Tone during a presentation, since warm tinting changes how colours look on the wall.
A multiport hub gives your Mac HDMI, USB and charging in one small dongle.
Shop USB-C Hubs for MacWireless Ways to Connect a Projector to a Laptop
Cables are reliable, but they are not always convenient. If your projector sits across a meeting room or you simply hate cable clutter, wireless casting can work well. Just know that wireless adds a small delay and relies on your Wi-Fi network, so it suits slides, photos and video playback better than fast games or live editing.
| Method | Works with | Typical use | Watch out for |
|---|---|---|---|
| Miracast (Windows Cast) | Windows laptops and projectors with Miracast | Quick presentations | Not supported by every projector |
| AirPlay | Macs and projectors with AirPlay built in or an Apple TV | Mac mirroring, video, music | Both devices must share a network |
| Chromecast / Google Cast | Chrome browser, Android, some projectors | Tab casting, streaming | Full-screen mirroring may lag slightly |
| Wireless HDMI kit | Any laptop with HDMI and any HDMI projector | Fixed installs without long cables | Extra cost and a power source at each end |
| Manufacturer app | Epson iProjection, BenQ, and others | Meeting rooms with many users | Software must be installed |
Step 1: Put the projector into wireless or screen mirroring mode
On the projector, press Source and choose Screen Mirroring, Wireless Display or the equivalent. The projector will show an on-screen name and sometimes a code. Make sure the projector is on the same Wi-Fi network as your laptop for AirPlay or Chromecast methods.
Step 2: Cast from Windows or Mac
On Windows, press Windows + K to open the Cast panel, wait for the projector’s name to appear, and click it. On a Mac, click the Control Centre icon in the menu bar, choose Screen Mirroring, and select the projector or Apple TV. If a code appears on the projector, enter it when prompted.
Step 3: Adjust for lag and resolution
Once connected, open a short video or click through a slide to test smoothness. If the picture lags, move closer to the router, switch to a 5 GHz network, or reduce the resolution in your display settings. For anything time-sensitive, plug in a cable instead.
When wireless is a good idea
Wireless casting shines in classrooms, shared offices and casual movie nights. It is also handy for portable projectors that already include a streaming platform, because you can beam a phone or laptop screen without any adapters. If you like the idea of a projector that streams on its own, have a look at the best smart projectors with Netflix, and our reviews of the XGIMI Horizon and the Anker Nebula show how smoothly built-in casting can work.
When to stay wired
If you are gaming, editing video, presenting a live demo with animation, or working in a crowded Wi-Fi environment, choose HDMI. A cable has zero dropouts and no perceptible lag. Many people keep both: a wired connection for important moments and wireless as a quick fallback when no cable is nearby.
Want the easiest wireless upgrade? A streaming stick or wireless HDMI kit can turn any projector into a cast-ready screen.
Explore Wireless HDMI KitsHow to Connect an Epson Projector to a Laptop
Epson is one of the most popular projector brands for schools, offices and home cinemas, and its models follow the same rules as any other projector, with a few extras. Most Epson units include HDMI, some include USB Type B for a “USB Display” connection, and many business models support the free Epson iProjection app for wireless use. If you own one of Epson’s popular home models, our Epson Home Cinema 1080 review covers what the ports and menus look like.
Step 1: Use HDMI for the simplest link
Connect an HDMI cable from your laptop to the Epson projector’s HDMI port, then press the Source Search button on the remote. Epson projectors scan each input and lock onto the first active signal, which is a very convenient feature.
Step 2: Try USB Display if you have no HDMI
Some older Epson models let you send video over a USB cable. Connect the square USB Type B end to the projector and the other end to your laptop. Windows may install the Epson USB Display software the first time; follow the prompts. Then choose USB Display as the source on the projector.
Step 3: Go wireless with Epson iProjection
Install the free Epson iProjection app on your laptop, connect both devices to the same network, then search for the projector in the app. Select it, enter the keyword displayed on screen, and your laptop desktop will appear. The app also lets several people share the display, which is useful in meetings.
Why Epson is easy
- Source Search finds the active input
- Clear on-screen guidance
- Good wireless software for meetings
Things to check
- Not every model has wireless built in
- USB Display only on certain models
- Some older units need a Wi-Fi module
For work projectors, the difference between LCD and DLP technology can affect image feel, colour and rainbow effect. If you are curious how Epson’s 3LCD design compares, read our 3LCD vs DLP projectors comparison.
Compare Epson projectors that ship with plenty of ports and wireless options.
Browse Epson ProjectorsDisplay Settings That Make or Break the Picture
A projector can be perfectly connected and still look wrong. Fuzzy text, a stretched picture or cropped edges usually come down to a handful of settings. Spend a few minutes here and the image will look sharper on every screen size.
Duplicate versus extend
Duplicate (also called mirror) shows the same content on your laptop and the projector. It is the safest choice for presenting because you see exactly what the audience sees. Extend treats the projector as a second monitor. You can keep speaker notes on your laptop while the audience sees only the slide. Second screen only turns off the laptop display, which is ideal for movie night with the lid closed.
Resolution and refresh rate
Set your laptop to the projector’s native resolution. If the projector is 1080p, choose 1920 x 1080. Feeding it a different resolution forces the projector to rescale, which softens text. On Windows, right-click the desktop, choose Display settings, select the projector and pick the resolution. For gaming, also set the refresh rate; our 4K 120Hz gaming projector guide explains which models can take advantage of it.
| Setting | Where to find it | Recommended choice |
|---|---|---|
| Display mode | Windows + P, or Displays in macOS | Duplicate for talks, Extend for notes |
| Resolution | Display settings | Match the projector’s native resolution |
| Scaling | Display settings > Scale | 100 to 125 percent for a large image |
| Aspect ratio | Projector menu | 16:9 or Auto for most content |
| Keystone | Projector menu | Use lens shift or move the projector first |
| Picture mode | Projector menu | Presentation, Cinema or Game depending on use |
Fixing a stretched or cropped image
If the edges are cut off, the projector might be applying overscan. Look for an option called Aspect, Overscan or Scan mode in the projector menu and choose Full, Just Scan or Native. If the image looks squashed, the projector may be set to 4:3 while your laptop outputs 16:9.
Keystone and focus
A trapezoid-shaped image means the projector is tilted. Keystone correction fixes it digitally but slightly reduces sharpness, so it is better to reposition the projector or use lens shift when available. Focus by adjusting the ring on the lens while showing a page of small text. Cleaning the lens can also sharpen a soft picture; see our guide on how to clean a projector lens.
Brightness and room lighting
Perfect settings cannot beat a washed-out picture in a bright room. Lumens matter, and our explainer on what ANSI lumens are helps you interpret brightness claims. For daytime use, browse the best projectors for bright rooms.
A proper screen improves contrast and colour more than most projector settings do.
Shop Projector ScreensGetting Sound to Work Through Your Projector
Video is only half the experience. It is common to connect everything, see a beautiful picture, and hear nothing. That usually means audio is still playing through your laptop speakers, or the projector has very small speakers that are turned down.
Sending sound over HDMI
HDMI carries audio by default, but your laptop has to choose the projector as its output. On Windows, right-click the speaker icon in the taskbar, choose Sound settings and select the HDMI output under Choose where to play sound. On a Mac, use System Settings > Sound > Output. If you do not see an HDMI option, unplug and replug the cable, or try another port.
Using the projector’s built-in speaker
Built-in speakers are convenient for meetings and small rooms. They are usually mono and not very loud, so do not expect cinema sound. Check that the projector is not muted and that the volume is turned up on both the projector and your laptop.
Better options for movies and music
Good upgrades
- Bluetooth speaker paired to your laptop
- Soundbar connected to the laptop by cable
- Projector with a 3.5mm or optical audio out
- HDMI audio extractor for older setups
Common mistakes
- Leaving audio on laptop speakers
- Bluetooth lag during video playback
- Plugging into audio-in instead of audio-out
If you want to keep things simple, connect a soundbar or powered speakers to your laptop’s headphone jack, or use an HDMI splitter that provides a separate audio output. For a proper home cinema, our roundup of the best home theater projectors is a good starting point, and most of them expect an external sound system.
Audio delay
Some Bluetooth speakers add a noticeable delay so lips no longer match the audio. If you see this, use a wired connection, or choose a low-latency Bluetooth codec. Many video players also include an audio delay adjustment that can compensate.
Add real sound to your setup with a compact soundbar or Bluetooth speaker.
Find Soundbars & SpeakersVGA, DisplayPort and USB-C: Connecting the Less Common Way
Not every setup is a clean HDMI to HDMI job. Older classroom projectors still lean on VGA, gaming laptops sometimes offer DisplayPort, and ultrathin computers rely on USB-C alone. Here is how to handle each case.
Connecting through VGA
VGA is analogue, carries no sound and tops out at lower quality than HDMI, but it is still found on older business projectors. Connect a VGA cable to the blue port on the projector and to your laptop if it has one. If your laptop does not have VGA, use an active HDMI to VGA converter, which is a small box or dongle with its own chip. Tighten the two screws on the plug to keep the connection firm, since a loose VGA plug causes colour tints and ghosting. Remember to run a separate audio cable if you need sound.
Connecting through DisplayPort
DisplayPort is common on gaming laptops and workstations. If your projector has only HDMI, use a DisplayPort to HDMI adapter or a dedicated cable. Adapters work well for standard resolutions; for high refresh rates, choose one that explicitly lists support. A DisplayPort cable can also carry audio to the projector.
Connecting through USB-C
Some modern projectors, especially compact and business models, have a USB-C input that accepts video directly. In that case, connect a USB-C cable from your laptop to the projector, and it may even charge your laptop at the same time. Use a cable rated for video, because charging-only cables will not transmit a picture. If your projector lacks USB-C, use the adapter route from earlier.
| Your laptop has | Your projector has | You need |
|---|---|---|
| HDMI | HDMI | Standard HDMI cable |
| USB-C | HDMI | USB-C to HDMI adapter or cable |
| USB-C | VGA only | USB-C hub with VGA, or USB-C to HDMI plus HDMI to VGA converter |
| HDMI | VGA only | Active HDMI to VGA converter and audio cable |
| DisplayPort | HDMI | DisplayPort to HDMI adapter |
| Mini HDMI | HDMI | Mini HDMI to HDMI cable |
If you are choosing a projector partly for its ports, our best business presentation projectors guide highlights models with a generous mix of inputs, including USB-C and wireless options.
Have an older projector? A reliable active converter keeps it useful with modern laptops.
Shop HDMI to VGA ConvertersFixing “No Signal” and Other Connection Problems
Even careful setups sometimes fail. The good news is that nearly every projector connection problem falls into a short list of causes. Work through the fixes below in order, starting with the simplest.
The quick fix routine
- Check the input. Make sure the projector is set to the same port you plugged into.
- Reseat the cable. Unplug both ends, wait a few seconds, and plug them back in firmly.
- Try Windows + P or the Displays panel. Choose Duplicate or Extend to force your laptop to send a signal.
- Swap the cable or port. A worn cable is a surprisingly common culprit.
- Restart in order. Turn off the projector, restart your laptop, then power the projector back on before reconnecting.
| Symptom | Likely cause | What to try |
|---|---|---|
| “No signal” message | Wrong input or loose cable | Change source, reseat the cable, press Windows + P |
| Projector on, blank picture | Laptop not outputting | Check display settings, update graphics drivers |
| Flickering or sparkles | Bad cable or adapter | Use a shorter, certified cable |
| Picture but no sound | Audio output not switched | Select HDMI in sound settings |
| Wrong resolution or fuzzy text | Non-native resolution | Set resolution to native |
| Purple or green tint | Loose VGA plug or damaged cable | Tighten screws or replace cable |
| Projector shuts off | Overheating or dusty filter | Clean vents and filter, allow airflow |
Update your graphics drivers
If your laptop does not detect the projector at all, outdated graphics drivers may be responsible. On Windows, update through Device Manager or the manufacturer’s utility. On a Mac, keep macOS up to date, since display support is bundled with the operating system.
Check the adapter chain
Adapters and hubs are handy but add points of failure. If a hub is plugged in and nothing works, connect the projector directly with a single adapter to rule the hub out. Some hubs also limit resolution when many ports are in use.
When the projector itself misbehaves
If the projector powers on but never shows anything, even from its own menu, the issue is not your laptop. Our guide to a projector that turns on but has no picture covers lamp, laser and internal causes, and if it shuts down by itself, see why your projector keeps turning off. For error messages specific to HDMI handshakes, our no signal HDMI error article goes deeper.
A spare certified cable is the cheapest troubleshooting tool you can own.
Get a Spare HDMI CableCable Length, Extenders and Gear Worth Buying
Distance is the hidden variable in many projector setups. A cable that works perfectly across a desk may fail when stretched across a living room or run through a ceiling. Understanding limits helps you avoid buying twice.
How long can an HDMI cable be?
Passive HDMI cables generally perform reliably up to about 5 to 7 metres for 1080p, and shorter for 4K at high refresh rates. Beyond that, signals weaken, causing sparkles, dropouts or a full loss of picture. For runs of 10 metres or more, choose an active cable with built-in signal boosting, an optical HDMI cable, or a wireless or HDBaseT extender.
| Distance | Best option | Notes |
|---|---|---|
| Up to 3 m | Standard certified HDMI cable | Works for nearly everything |
| 3 to 7 m | High Speed or Ultra High Speed cable | Choose quality, thicker cables for 4K |
| 7 to 15 m | Active or optical HDMI cable | Optical cables handle 4K well |
| 15 m and beyond | HDBaseT extender or wireless kit | Uses Ethernet cable or radio link |
Ceiling mounts and hidden cables
For a permanent ceiling install, run the cable through the wall or a cable channel and leave a little slack at both ends. Avoid sharp bends near the plugs, which strain the connector. If you are planning an install, our walkthrough on mounting a projector to the ceiling includes cable routing pointers.
Useful extras
- HDMI switch: lets several devices share one projector input.
- Cable clips and sleeves: keep runs tidy and prevent tripping.
- Presentation clicker: handy for standing away from the laptop.
- Carry case: protects the projector, cables and adapters in one bag.
- Surge protector: shields a costly projector from power spikes.
Budget matters when kitting out a setup. If you have not bought a projector yet, our guide to the best projectors for every budget and room size and the best projectors under 500 dollars can help you choose something that pairs neatly with a laptop.
Going the distance? Optical HDMI cables keep 4K stable over long runs.
See Long HDMI CablesBest Setups for Movies, Work and Gaming
Once your laptop and projector are talking, a few small tweaks tailor the experience to what you actually want to do. The same connection can feel totally different depending on how you configure it.
For movie nights
Choose Second screen only so your laptop screen turns off, and put the laptop on charge. Select the projector’s Cinema mode, dim the room, and use external speakers. If you watch a lot of films, a native 1080p or 4K projector offers a big jump in sharpness; see our picks of the best native 1080p projectors. Outdoor backyard nights need a different approach, covered in our guide to the best outdoor movie projectors.
For work and presentations
Use Duplicate for simplicity or Extend if you want speaker notes. Turn off notifications so private messages do not pop up on the wall, set the laptop to never sleep, and carry your own adapter because you cannot count on the meeting room having one. Test the connection before the audience arrives, and keep a spare cable in your bag. BenQ makes several reliable business models; our BenQ projector review shows how they handle ports and setup.
For gaming from a laptop
Wired HDMI is a must. Enable the projector’s Game or Low Latency mode, set your laptop to the projector’s highest supported refresh rate, and turn off extra image processing. Windows Game Mode and a fully charged laptop help too.
Wired HDMI gives you
- Lowest lag
- Highest stability
- Full resolution and audio
Wireless gives you
- Freedom from cables
- Occasional lag or dropouts
- Lower quality in busy networks
A short pre-show routine
Before any important event, run through the same checklist: power on the projector, connect the cable, choose the input, set the display mode, check the sound and confirm the focus. Doing it in the same order each time means you can fix any issue faster because you know what has been ruled out.
Ready for a bigger upgrade? Explore projectors with wired and wireless connections built in.
Browse Projectors on AmazonFrequently Asked Questions
How do I connect a projector to my laptop?
Connect an HDMI cable from your laptop to the projector, power on the projector, choose the matching input with its remote, and then press Windows + P on a Windows laptop or open Displays on a Mac. Pick Duplicate or Extend, and your screen appears on the wall. If your laptop has no HDMI port, use a USB-C or Mini HDMI adapter.
How do I connect a laptop to a projector with HDMI?
Plug one end of the cable into the projector’s HDMI input and the other into your laptop’s HDMI output. Set the projector source to the same HDMI port, then use your operating system’s display settings to mirror or extend the screen. Use a High Speed cable for reliable 1080p and 4K.
How do I connect a MacBook to a projector?
Most MacBooks need a USB-C to HDMI adapter or a USB-C hub with HDMI. Plug the adapter into the Mac, run an HDMI cable to the projector, select the correct input, and open System Settings > Displays to mirror or extend. Set the resolution to the projector’s native setting for the sharpest picture.
How do I connect a Mac to a projector wirelessly?
If the projector supports AirPlay, or you use an Apple TV connected to it, open Control Centre on the Mac, choose Screen Mirroring and select the projector. Both devices must be on the same Wi-Fi network. If the projector lacks AirPlay, use a streaming stick or the manufacturer’s app.
How do I connect an Epson projector to my laptop?
The simplest way is HDMI. Connect the cable, press Source Search on the Epson remote, and then choose Duplicate or Extend on your laptop. Some models also support USB Display or wireless projection with the Epson iProjection app on the same network.
Why does my projector say “no signal”?
The most common causes are the wrong input source, a loose cable and a laptop that is not sending a video signal. Reseat the cable, choose the correct source, press Windows + P to force detection, and try a different cable or port. Our article on the projector no signal HDMI error gives a full checklist.
Why is my laptop not detecting the projector?
Check that the cable is fully inserted, the projector is on and the correct input is selected. Then open the display settings and click Detect on Windows, or hold Option and click Detect Displays on a Mac. Update your graphics drivers, and test with another cable or adapter if the problem persists.
Can I connect a projector to a laptop without HDMI?
Yes. You can use a USB-C adapter, a DisplayPort adapter, a VGA connection, or a wireless method such as Miracast, AirPlay or Chromecast. Some projectors also support USB Display or a manufacturer app. The best choice depends on which ports both devices provide.
Do I need to install drivers to use a projector?
Not for HDMI, USB-C or VGA connections. The laptop treats the projector like any other monitor. Only special methods such as USB Display or manufacturer apps require additional software.
Why is there no sound from my projector?
Your laptop is probably still sending audio to its own speakers. Change the sound output to the HDMI or projector device in your sound settings. Also make sure the projector is not muted and that its speaker volume is turned up.
Why does my projected image look blurry or cropped?
Blurry text is often a resolution mismatch or a dirty or out-of-focus lens. Set your laptop to the projector’s native resolution, adjust the focus ring and clean the lens. A cropped picture usually comes from overscan; change the aspect or scan mode in the projector menu to Full or Native.
How long can my HDMI cable be?
Reliable results are generally achieved up to around 5 to 7 metres with a good passive cable. For longer distances, use an active or optical HDMI cable, an HDBaseT extender or a wireless kit to keep the picture stable.
Conclusion: You Are Two Steps From a Big Screen
Connecting a projector to a laptop or Mac comes down to a simple pattern: match the ports, choose the right input, and set your display mode. HDMI handles nearly every situation, an inexpensive adapter bridges USB-C and other gaps, and wireless options are there when you prefer a clean room without cables. If something goes wrong, the fix is almost always the input source, a loose plug or a setting hiding in your display menu.
Take a few minutes to build a small kit with a reliable HDMI cable, a USB-C adapter and a spare converter, and you will be ready for meetings, movie nights and game sessions anywhere. If you are still choosing the projector that will anchor your setup, start with our complete guide to projectors for every budget and pick the one that fits your room and your ports.
Ready to build your setup? Grab the cable, adapter and projector that fit your laptop.
Shop Projectors & Accessories