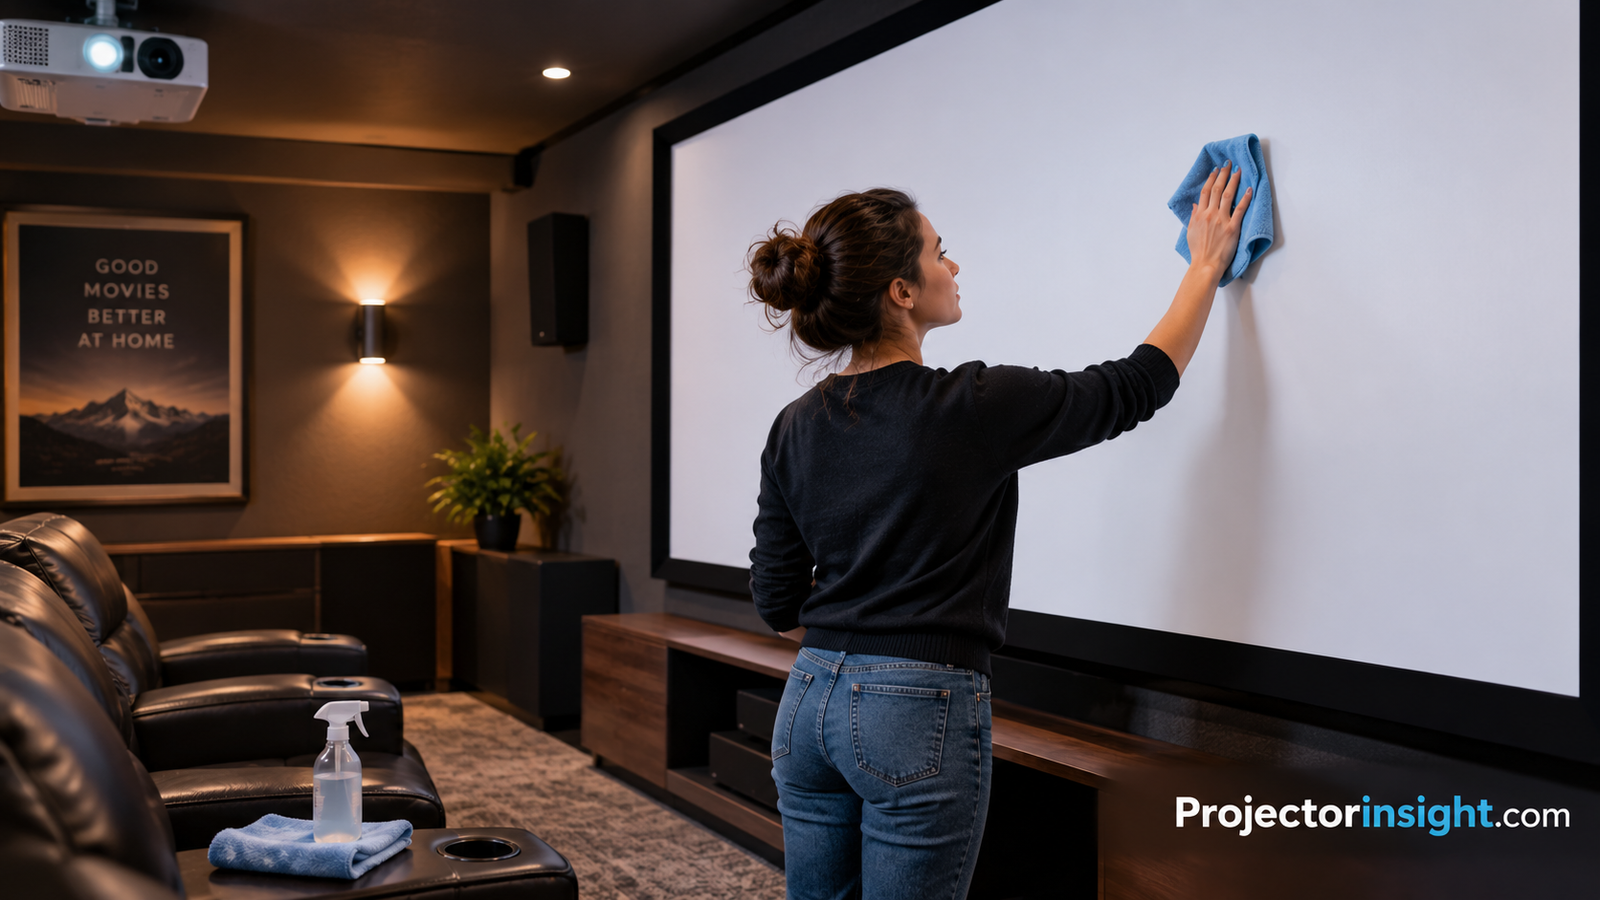
How to Clean a Projector Screen Safely, Step by Step
A gentle, tested routine for bringing back bright whites and deep contrast without scratching, streaking, or staining the surface.
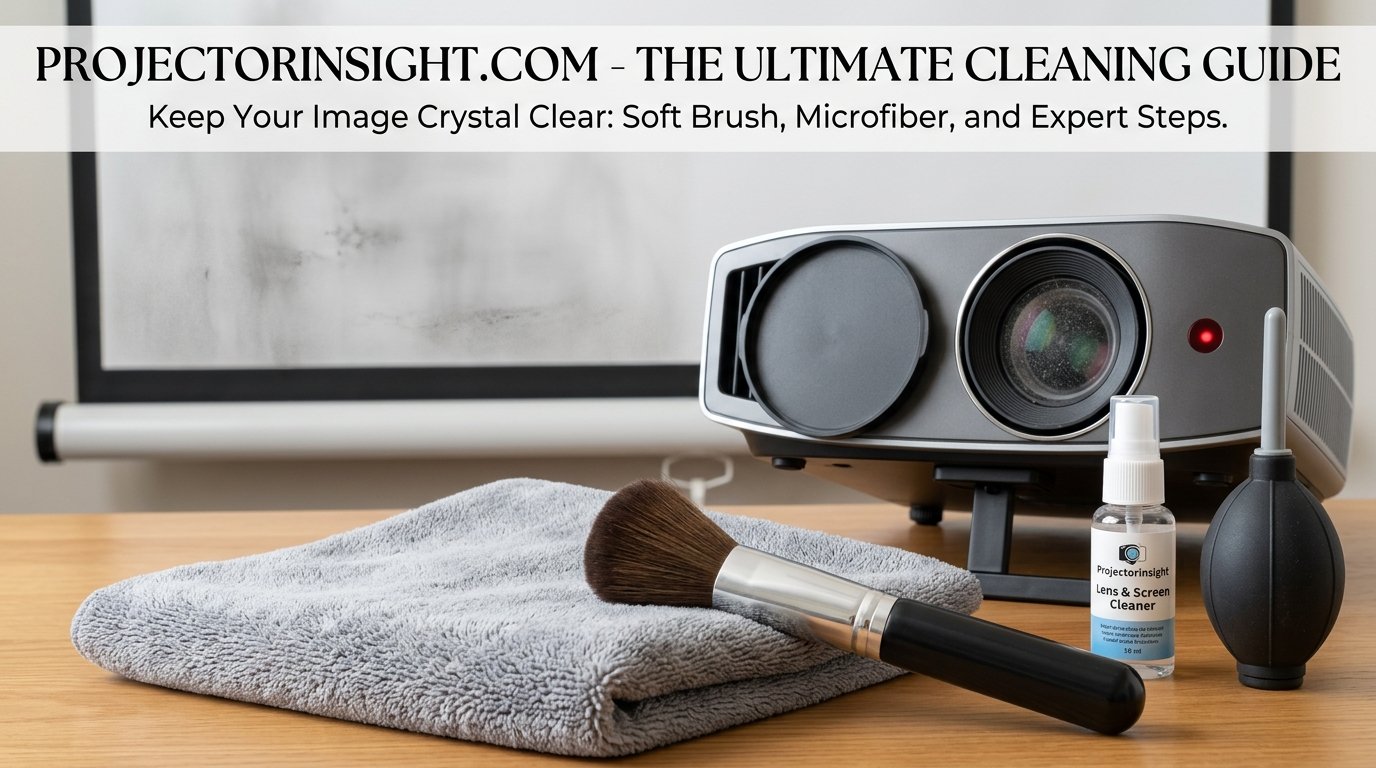
Your projector puts out a beautiful image, but only if the screen is ready to receive it. This guide shows exactly how to clean any type of projector screen, from simple matte white to delicate ambient light rejecting fabric, with clear diagrams for every step.
Why a clean projector screen changes everything you watch
Most people blame the projector when the picture starts to look tired. Colors seem a little muddy, whites drift toward beige, and dark scenes lose their punch. Very often the projector is fine. The surface it is shining on is the problem. A screen quietly collects dust, skin oils, cooking haze, pet hair, and tiny fibers every single day, and all of that sits directly in the path of the light you paid for.
Think about what a screen actually does. It takes light from the lens and bounces it back toward your eyes as evenly as possible. Anything on the surface interrupts that job. A fine layer of dust scatters light in random directions, which lowers contrast. A greasy fingerprint reflects differently from the material around it, so it shows up as a glossy patch you can see during bright scenes. Over months, a thin film builds up across the whole surface and dulls the image in a way that is easy to mistake for an aging lamp or laser.
Cleaning also protects your investment. A good screen can cost as much as an entry-level projector, and the wrong cleaning habits are one of the fastest ways to ruin one. People reach for glass cleaner, kitchen paper, or a wet sponge, and permanently scratch or stain a surface that would have lasted for many years with a little care. This guide walks you through a safe method that works on nearly every screen type, explains why each step matters, and shows you what to avoid.
If your image already looks soft, it is worth ruling out other causes before you start scrubbing. Our guide on why a projector looks blurry covers focus, lens, and distance issues, and the walkthrough on how to clean a projector lens is a natural companion to this article, because a dirty lens and a dirty screen often show up together.
Signs your screen is overdue for cleaning
- Whites look slightly yellow or grey even after calibrating the picture.
- You can see faint streaks or cloudy patches when a bright, plain scene plays.
- Dust is visible when you shine a phone flashlight across the surface at a shallow angle.
- Hair, lint, or specks show up as tiny dark dots in light scenes.
- The bottom edge of a pull-down screen looks darker than the rest, a sign that hands have touched it.
- The screen has not been wiped down since it was installed.
If two or more of those sound familiar, the routine below will make a visible difference in a single afternoon.
Know your screen type before you touch it
Not all projector screens are built the same way, and a method that is perfectly safe on one can damage another. Spend two minutes identifying what you own. Check the manual, the sticker on the case or frame, or the product page you bought it from. If you cannot find any of that, the descriptions below will help you work it out.
Matte white and grey vinyl screens
These are the most common type, used in pull-down, electric, and fixed-frame designs. The surface is a flexible vinyl or PVC-based fabric with a smooth, slightly textured finish. They are forgiving, but they stain from oils and can develop creases if pressed too hard. They respond well to dry dusting followed by a damp microfiber wipe.
Woven acoustically transparent screens
Home theater setups that hide speakers behind the picture use a woven fabric with microscopic holes so sound can pass through. Those holes trap dust, and pressing on the surface can stretch the weave. Never use liquids on these unless the manufacturer says so. A soft brush and gentle suction are the safe tools.
Ambient light rejecting screens
Ambient light rejecting, or ALR, screens have a specialized optical layer that reflects projector light toward the viewer while absorbing light from other angles. They are wonderful in living rooms, but the coating is far more delicate than plain vinyl. If you own one, especially for an ultra short throw projector, read our breakdown of ALR screens for ultra short throw projectors to understand what is on the surface, then follow the gentlest version of the method in this article. Rubbing that layer can leave permanent marks.
Fixed-frame tensioned screens
These stretch fabric over an aluminum frame using tension. The fabric can be vinyl, woven, or ALR, so identify the material first. The extra thing to know is that pressure matters. Pushing hard on a tensioned surface can leave a visible dent that never fully relaxes.
Painted walls and screen paint
Many people project onto a wall painted with a screen coating or a smooth flat white. These surfaces are usually washable to some degree, but abrasive scrubbing burnishes the paint and changes its sheen in that spot. Light, damp wiping is best.
Portable and outdoor screens
Inflatable and folding outdoor screens live a rougher life. They collect grass, pollen, and bugs, and they are stored folded, which makes them prone to dirt in the creases. If you use one for backyard movies, the same method applies, but plan on cleaning more often. Our list of outdoor movie projectors pairs nicely with a rugged screen and a cleaning routine.
| Screen type | Safe dry tool | Liquids? | Risk level |
|---|---|---|---|
| Matte white or grey vinyl | Soft brush or microfiber | Damp cloth, mild soap if needed | Low |
| Woven acoustically transparent | Soft brush, low suction | Avoid unless approved | Medium |
| ALR or optical coating | Very soft brush or air blower | Only barely damp, distilled water | High |
| Fixed-frame tensioned | Depends on fabric | Depends on fabric | Medium |
| Painted wall | Dry microfiber | Damp cloth, gentle soap | Low to medium |
| Portable or outdoor | Soft broom brush or cloth | Damp cloth, mild soap | Low |
When in doubt, always default to the gentlest option. You can escalate to stronger methods later, but you can never undo a scratch.
The supplies you actually need
You do not need a specialty kit or an expensive product with a proprietary name. The best screen cleaning setup is boringly simple, and most of it may already be in your home. What matters is that every item is soft, clean, and free from chemicals that can react with the screen surface.
Essentials
- Two or three clean microfiber cloths. Use a fresh, lint-free pair that has never been washed with fabric softener, because softener leaves a waxy residue that transfers to the screen.
- A soft, wide brush. A clean dust brush with fine, flexible bristles, or a soft makeup-style brush, lifts dust without grinding it into the fabric.
- Distilled water. Tap water contains minerals that leave chalky spots as it dries. Distilled water dries clean.
- Mild, fragrance-free dish soap. Only for stubborn marks, and only a drop or two.
- A small bowl or spray bottle. For mixing the solution and controlling how much moisture you use.
- A flashlight or phone light. Shining light across the surface at a low angle shows dust and streaks that are invisible head-on.
Helpful extras
- A rubber blower bulb. The type photographers use to clear camera sensors moves dust with gentle air and zero contact.
- A vacuum with a soft brush attachment. Useful for woven screens, always on the lowest setting and never touching the fabric.
- Cotton gloves. They keep your own skin oils off the surface while you work.
- A stable step stool. Reaching overhead while holding a wet cloth is how accidents happen.
What to keep far away from your screen
Skip glass cleaner, all-purpose sprays, alcohol wipes, baby wipes, bleach, ammonia, vinegar mixes, abrasive sponges, paper towels, and tissues. Each of these does harm in its own way. Ammonia and alcohol can dry out and cloud the coating, paper towels contain wood fibers that scratch, and scented wipes leave oils. If a cleaning product is designed for something else, it is not designed for your screen.
Prepare the room and the screen
Good results start before any cloth touches the fabric. Preparation takes five minutes, and it stops you from spreading dust around or creating new problems while you fix old ones.
Power everything down
Turn off the projector and let it cool. A running projector puts out heat, and its bright beam makes it hard to see what you are cleaning. If the projector is ceiling-mounted, the fan may still be spinning, so wait for it to stop before you move around the room. If yours is mounted overhead, our article on how to mount a projector to the ceiling explains why cable routing and position matter, and it will help you avoid bumping the unit while you work.
Deal with the room first
Dust settles downward. If you clean the screen and then dust the shelves above it, half of what you wiped away will be right back. Do the reverse. Dust the ceiling corners, shelves, speakers, and top of any furniture near the screen first, then clean the screen last. Switch off ceiling fans and close the windows and doors so the air stays still.
Give yourself good light
Turn on the room lights and open the curtains. You want to see clearly. Later, you will darken the room and use a flashlight for the inspection step, but for the actual cleaning, plenty of light helps you spot marks you might otherwise miss.
Fully extend a pull-down or electric screen
Lower the screen all the way so the fabric hangs flat and free. Cleaning a partly rolled screen leaves you fighting slack and wrinkles. Make sure the fabric is not touching anything behind it, such as a wall with a rough texture or a shelf. If it swings, wait until it settles. For fixed-frame screens, check that the frame is not loose, since pressure from wiping can twist a poorly mounted frame.
Protect the floor and the furniture
A drop of cleaning solution running down the surface can land on a couch or a hardwood floor. Lay an old sheet or a towel underneath the working area. It also catches dust as it falls.
Check your own setup
While the screen is down, glance at your positioning. If the picture edges do not line up with the fabric, or you are not sure the screen is the right size for your room, our guide on what size projector screen you need will help you decide whether a replacement is worth thinking about later. Also note any permanent marks, creases, or tears now. Those are things cleaning cannot fix, and it is useful to know that before you start.
Step 1: Remove loose dust before anything wet
This is the step most people skip, and it is the most important one. Wiping a dusty screen with a damp cloth turns dust into a fine gritty paste, and that paste acts like sandpaper as you drag it across the surface. Always start dry.
How to do it
- Hold a clean, soft brush lightly, with the bristles just touching the fabric. You should barely feel any resistance.
- Start at the top edge of the viewing area. Sweep in slow, straight strokes from top to bottom so the dust falls toward the floor instead of drifting back up.
- Lift the brush away at the end of each stroke rather than dragging it back up over cleaned fabric.
- Work in vertical columns, overlapping each pass slightly. Take your time. Fast strokes fling dust into the air, where it settles right back down.
- Give the brush a shake away from the screen every few passes so it does not redeposit what it has collected.
Using air and suction for delicate screens
For woven or ALR surfaces, a rubber blower bulb is an excellent alternative. Hold it several inches away and squeeze short puffs across the surface at a shallow angle. Avoid canned compressed air, because the propellant can spit cold liquid onto the fabric and leave spots. For woven acoustically transparent screens, a vacuum on the lowest setting with a soft brush attachment held a hand’s width away pulls dust out of the weave without touching it.
The edges and the case
Do not forget the black border, the frame, and the top of the roller case. Those collect dust that falls onto the viewing area every time the screen moves. Wipe them with a dry microfiber cloth after you finish the fabric, not before.
Why this step alone can fix half your problems
If your screen has only been sitting for a few weeks, dry dusting may be all it needs. Try turning on a bright, plain scene afterward. If the picture already looks cleaner, you may not need any liquid at all, and skipping the water reduces risk. Many owners of premium and ALR screens do exactly this and stop here.
Step 2: Test your method in a hidden spot
Every screen surface reacts a little differently, and manufacturers change coatings and materials over time. A spot test costs you five minutes and can save you from a very expensive mistake. Do it every time you try a new cloth, a new soap, or a new screen.
Pick the right place
Choose a low corner or an area within the black border that never shows in the projected picture. On a pull-down screen, the bottom edge near the weighted bar is a good choice. On a fixed frame, look near a corner. Avoid the center or anywhere in the image area.
Run the test
- Dampen the tip of a clean microfiber cloth with distilled water. It should feel barely wet, not dripping.
- Press it gently against the hidden spot, then wipe in one slow motion.
- Wait about five minutes for the fabric to dry fully.
- Look at the tested area in bright light and again from a low angle. You are checking for color transfer, cloudy patches, texture changes, or a change in sheen.
- Check the cloth itself. If any color came off onto the fabric, stop. The screen surface is reacting, and you should stick to dry methods only.
What a pass looks like
A pass means the tested spot looks identical to the surrounding fabric once it dries, with no ring, no shine, and no color on the cloth. If that is what you see, you can move on to the full cleaning routine with reasonable confidence.
What to do if the test fails
If the fabric looks different, do not try a stronger cleaner. Contact the manufacturer with the model name and describe what happened. They often publish care instructions for their specific coating. Until you hear back, stick with dry brushing and air.
The same caution applies when you buy a new screen. If you are still shopping and weighing options, our guide on how to choose a projector can help you match the display and screen more carefully, so you end up with a surface you feel comfortable maintaining.
Step 3: Mix a gentle cleaning solution
When dry dusting is not enough, a very mild solution is your next tool. The goal is to lift oils and dried residue without leaving anything behind, so simpler is always better.
The basic recipe
Fill a small bowl or spray bottle with about one cup of distilled water. Add one or two drops of mild, fragrance-free dish soap and stir gently so it does not foam. That is the whole recipe. Too much soap is a common mistake, because it leaves a film that attracts new dust.
For the lightest touch
On sensitive surfaces, skip the soap completely and use plain distilled water. This alone removes a surprising amount of surface grime, and it is the safest liquid method. Only add soap if plain water fails on a particular mark.
What about vinegar, alcohol, or commercial screen sprays?
Homemade tricks like vinegar or rubbing alcohol are popular online, but they can cloud or dry out many screen coatings. Commercial sprays vary widely in quality. Unless your screen manufacturer specifically recommends a product, distilled water and a tiny amount of gentle soap are the safest choices.
How to control moisture
Never spray the screen directly. Spray the cloth, or dip the cloth and wring it out until it feels only faintly damp. Excess liquid can run down the fabric, seep behind it, or wick into seams. On fixed frames, it can even reach the tension mechanism. A properly damp cloth leaves a barely visible sheen that disappears in under a minute.
Keep your cloths organized
Use one cloth for the damp pass and a second, completely dry one for the follow-up. Label them if you like. Mixing them up is how streaks and water marks happen.
Step 4: Wipe the screen the right way
Now comes the part everyone pictures when they think of cleaning, and technique matters more than effort. Gentle, consistent movement beats scrubbing every time.
Wrap the cloth properly
Fold the damp microfiber cloth into a flat pad about the size of your palm, so there is a smooth face and no loose corners that could snag. Hold it with your fingertips, not your fist. A light hand is the entire secret here.
Wipe in a consistent pattern
- Begin at the top-left corner of the viewing area.
- Move in a long, smooth vertical stroke from top to bottom with almost no pressure.
- Lift the cloth off the fabric at the bottom, move to the next column, and overlap the previous stroke by roughly one third.
- Refold to a clean face of the cloth every few strokes, so you are never spreading collected dirt around.
- Keep going until you reach the far edge, then stop. Do not double back over the same section while it is still wet.
Why straight lines beat circles
Circular scrubbing works dirt into the surface and creates swirl marks you will see forever under bright scenes. Long straight lines, on the other hand, lift dirt in a single direction and leave a uniform finish. Stay away from the temptation to give a mark just one more rub.
Pressure is the enemy
You should barely feel the fabric under the cloth. If you are pressing so hard that the screen moves, stop. On a pull-down screen, hold the bottom bar with your other hand to keep the fabric steady, and never lean on the surface. On ALR and woven screens, press even lighter, or skip the wipe and use dry methods.
Watching for problems mid-wipe
If you see any color transfer to the cloth, the fabric texture changing, or the surface looking cloudy, stop right away. Let the area dry and reassess. A screen that behaves oddly under a damp cloth is telling you it prefers dry care.
While you are working, notice whether the surface seems much dingier than you expected. A screen that has taken years of buildup can look shockingly different afterward, and it may also improve your overall picture in bright conditions. If you often watch with the lights on, our roundup of the best projectors for bright rooms is worth a look, because a clean screen paired with a strong projector makes daytime viewing far better.
Step 5: Treat stubborn marks without damage
Some marks refuse to leave with a single pass: a fingerprint, a small coffee splash, a smear from a child’s hand. Resist the urge to scrub harder. The better approach is patience, and treating each mark individually.
The blotting method
- Dampen a clean corner of your microfiber cloth with your gentle solution.
- Place it lightly on the mark and hold it there for a few seconds so the moisture loosens the residue.
- Lift straight up rather than dragging. You are blotting, not wiping.
- Rotate to a clean section of the cloth and repeat until the mark fades.
- Follow with a clean, distilled-water-only blot to remove soap, then let it dry.
Fingerprints and skin oils
These respond well to blotting with a very lightly soapy cloth. They tend to spread if you wipe, so patience matters. Avoid hand lotion on the day you clean, because it transfers immediately.
Food and drink splashes
Blot up any liquid right away with a dry cloth. Sugary residues need a damp blot with plain water, as sugars stay sticky if left to dry. Never rub, since that pushes the stain deeper into the weave.
Pet hair and lint
Use a soft brush or your hands in cotton gloves to lift hair gently. A lint roller is not recommended, since adhesive can leave residue on the surface.
Pencil, marker, and ink
These are the hardest marks, and often permanent. Do not try solvents on your own. Contact the manufacturer for advice, and accept that some marks can be reduced but not fully removed.
Mold and mildew
If you see small dark spots on a stored screen, the cause is usually moisture trapped while it was rolled up. Do not scrub. Wipe gently with a damp cloth and distilled water, then dry thoroughly in open air, and follow up with the manufacturer’s guidance. To avoid it in the first place, always make sure the screen is fully dry before you retract it.
| Mark type | Best first move | What to avoid |
|---|---|---|
| Dust and lint | Soft brush or blower | Wet cloth on dry dust |
| Fingerprints | Damp blot, plain distilled water | Rubbing or lotion |
| Drink splash | Dry blot, then damp blot | Scrubbing |
| Cooking haze | Light damp wipe, top to bottom | Degreaser sprays |
| Ink or marker | Ask the manufacturer | Alcohol or solvents |
| Mildew spots | Damp wipe, thorough drying | Bleach |
Step 6: Dry the screen and inspect your work
The job is not finished when the last stroke ends. Drying and inspecting are what separate a clean-looking screen from one that only looks clean until the lights go down.
Let it dry naturally
Leave the screen fully extended for at least fifteen to thirty minutes with good airflow. Do not use a hair dryer, fan aimed directly at the fabric, or heat of any kind. Direct heat can warp vinyl or damage coatings. Gentle room air is plenty.
Pat away any lingering moisture
If you see droplets, pat them with a dry microfiber cloth. Pat, do not wipe. This prevents mineral spots and makes drying faster.
The flashlight test
- Dim the room lights and hold a phone flashlight near the fabric at a very low, shallow angle.
- Sweep the beam slowly across the screen. Dust, streaks, and residue will show up as bright specks or hazy patches.
- Circle back to any problem area with a dry brush or a light blot.
The projector test
Finish by turning on your projector and displaying a plain white image, then a plain grey one. Look for uneven patches, dark spots, or streaks. Then try a bright scene from a movie you know well. If the picture looks brighter and cleaner, you have done it right. If you are unsure your setup is performing as it should, run through our guide on how to set up a projector to make sure position and focus are also dialed in.
Do not retract too soon
Rolling up a damp screen traps moisture against the fabric, and that is how mildew forms. Wait until it is completely dry, then retract slowly and evenly so the fabric winds without wrinkles. Check the edges as it goes up to ensure it is not tracking to one side.
Common mistakes that ruin projector screens
Most screen damage does not come from age. It comes from cleaning mistakes that seemed sensible in the moment. Here are the ones we see most, and why each one hurts.
Using glass cleaner or household sprays
Glass cleaners contain ammonia or alcohol. Both can cloud coatings and dry out vinyl over time. The damage often appears slowly, so people do not connect it to the spray they used months ago.
Scrubbing a dry, dusty surface
Rubbing dust in with a cloth scratches the surface. Always brush or blow dust off first.
Touching the fabric
Every fingerprint is a small patch of oil. It is tempting to point at the screen while telling someone about a scene, but it leaves a mark. Keep hands off the viewing area, and if you must handle the screen, hold only the bottom bar or the border.
Using too much water
Excess water runs, stains, and seeps behind the fabric. It can damage motors, springs, and frames. A cloth that is barely damp is always enough.
Skipping the spot test
No amount of experience replaces a test in a hidden corner. Coatings differ between brands and even between production batches.
Cleaning too often
It is possible to over-clean. Repeated wiping, even gentle wiping, wears down surfaces over years. Dry dusting frequently and liquid cleaning rarely is the healthiest balance.
Using abrasive tools
Magic erasers, scouring pads, and rough sponges are absolutely off limits. They act like fine sandpaper and permanently change the surface texture.
Ignoring the projector itself
A dusty projector blows dust onto the screen, and its intake vents and filters affect airflow. If you have ever seen a projector shut off on its own or fail to show a picture, the causes can involve heat and dust inside the unit. Our troubleshooting guides on why a projector keeps turning off and when a projector turns on with no picture can help you rule out hardware problems.
Pros and cons of the three main cleaning approaches
Dry dusting only
- Lowest risk to any coating
- Fast and easy to repeat
- No drying time
Cannot remove oils or dried marks.
Damp wipe with distilled water
- Lifts light grime and haze
- Leaves no residue if done right
- Safe for most vinyl screens
Risky on coated and woven screens.
Mild soap solution
- Best for oily fingerprints
- Cuts cooking haze
- Cheap and simple
Too much soap leaves a film that attracts dust.
Household chemical sprays
- Feels powerful
- Already in your cupboard
Can permanently cloud, stain, or dry out the surface. Avoid.
Step 7: Build a routine that keeps the screen clean
The easiest screen to clean is one that rarely gets dirty. A few habits and a light schedule keep the surface looking fresh for years, and each one takes almost no effort.
A simple schedule
| How often | Task |
|---|---|
| Every two weeks | Quick dry brush or blower pass from top to bottom |
| Every two to three months | Dust the room and frame, then a full dry clean |
| Twice a year | Damp wipe with distilled water, followed by the flashlight inspection |
| Only when needed | Blot individual marks with mild soap solution |
Retract when you are not watching
A pull-down or electric screen spends most of its life rolled up in its case if you let it. That protects it from dust, sunlight, curious hands, and pets. If you keep the screen down permanently, cover it with a clean dust sheet when you are away for long periods.
Watch what happens near the screen
Cooking, candles, and cigarette smoke are the biggest causes of that yellowish film. If your theater is near a kitchen, close the door while cooking. Keep drinks and snacks away from the screen wall, and keep pets and children from swatting at it.
Manage sunlight and heat
Direct sunlight fades and yellows vinyl over time. Use curtains or blinds, and avoid mounting a screen above a radiator or vent. A stable room temperature also prevents fabric from wrinkling or warping.
Keep the projector clean too
Clean the projector’s vents and check its filter on a regular schedule. Less dust inside the projector means less dust blowing across the room. Clean the lens gently as needed, using the steps in our lens cleaning guide.
When cleaning will not fix it
Sometimes a screen is simply worn out. Signs include permanent yellowing that cleaning does not improve, cracks or peeling in the coating, deep creases that do not relax, and a surface that has become noticeably glossy or rough. If that is where you are, replacing the screen is often the biggest upgrade you can make, even bigger than buying a new projector. Comparing your options against the overall setup is smart. Our guides on the best home theater projectors, projector versus an 85 inch TV, and what ANSI lumens actually mean will help you weigh a full upgrade.
Screens and different projector types
Modern laser and lamp projectors both depend on a clean surface to deliver their best contrast. If you are curious how the light source changes what you see, read laser versus lamp projectors. And if you plan to upgrade to a brighter model, our list of 4K laser projectors shows what a premium picture can look like on a clean, well-cared-for screen.
Frequently asked questions
How do I clean a projector screen without damaging it?
Start with a soft brush or air blower to remove dry dust, test a hidden corner with a barely damp microfiber cloth and distilled water, then wipe gently in straight vertical strokes with almost no pressure. Avoid glass cleaner, alcohol, ammonia, and anything abrasive.
Can I use water on a projector screen?
On most matte white and grey vinyl screens, a barely damp cloth with distilled water is safe. Woven and ALR screens are more sensitive, so check your manual and always spot test first. When in doubt, stay dry.
What is the best cleaner for a projector screen?
Plain distilled water is the safest choice. For oily marks, add one or two drops of mild, fragrance-free dish soap to a cup of distilled water. Commercial sprays vary, so use one only if your manufacturer recommends it.
Can I use a vacuum to clean my projector screen?
Only on woven acoustically transparent screens, and only with a soft brush attachment on the lowest setting held a short distance from the fabric. Never let a nozzle touch or press on the surface.
How often should I clean my projector screen?
Dry dust every couple of weeks, do a fuller dry clean every few months, and reserve damp cleaning for once or twice a year or when a mark appears. Cleaning too often can wear the surface.
How do I get fingerprints off a projector screen?
Blot, do not rub. Use a clean corner of a microfiber cloth dampened with a very mild soap solution, hold it briefly on the print, lift straight up, and follow with a plain distilled-water blot.
Is it safe to use glass cleaner on a projector screen?
No. Glass cleaners often contain ammonia or alcohol that can cloud coatings, dry out vinyl, and cause permanent marks. Use distilled water and a soft cloth instead.
How do I clean an ALR screen?
Use a very soft brush or blower for dust. If a liquid is needed, use only a barely damp microfiber cloth with distilled water, following the manufacturer’s care instructions, and test a hidden area first. Never scrub.
Why does my projector screen look yellow?
Yellowing usually comes from smoke, cooking vapor, sunlight, or age. Light surface film can sometimes be improved with a gentle damp wipe, but permanent yellowing means the material has aged and may need replacement.
Can I clean a painted projector wall the same way?
Usually yes, with a dry microfiber cloth first and then a lightly damp one. Avoid scrubbing, since it can burnish the paint and change its sheen in that spot.
Should I clean the projector lens at the same time?
It is a good idea. A dusty lens lowers sharpness and brightness in the same way a dirty screen does. Use a dedicated lens cloth or blower, and follow proper lens care steps separately from the screen.
When should I replace my projector screen instead of cleaning it?
Consider replacing it if it has permanent yellowing, cracks, peeling coating, deep creases, or a rough or glossy surface that cleaning does not improve.
Final thoughts: gentle habits, brighter picture
Cleaning a projector screen is not complicated, but it does reward patience and a light touch. Identify your screen type, brush away dry dust first, test in a hidden corner, use only distilled water and a drop of mild soap when necessary, and finish with a careful inspection under low-angle light. Seven simple steps protect a surface that shapes every movie, match, and game night in your home.
Just as important is what you leave out. No sprays, no scrubbing, no paper towels, and no rushing. Build a small routine around dry dusting, and reserve liquid for the rare occasions it is needed. Do that, and your screen will keep delivering bright whites, deep contrast, and a clean image for years.
Ready to put together your cleaning kit? A few soft tools go a long way.
You may also like
As an Amazon Associate, we earn from qualifying purchases. This comes at no extra cost to you.