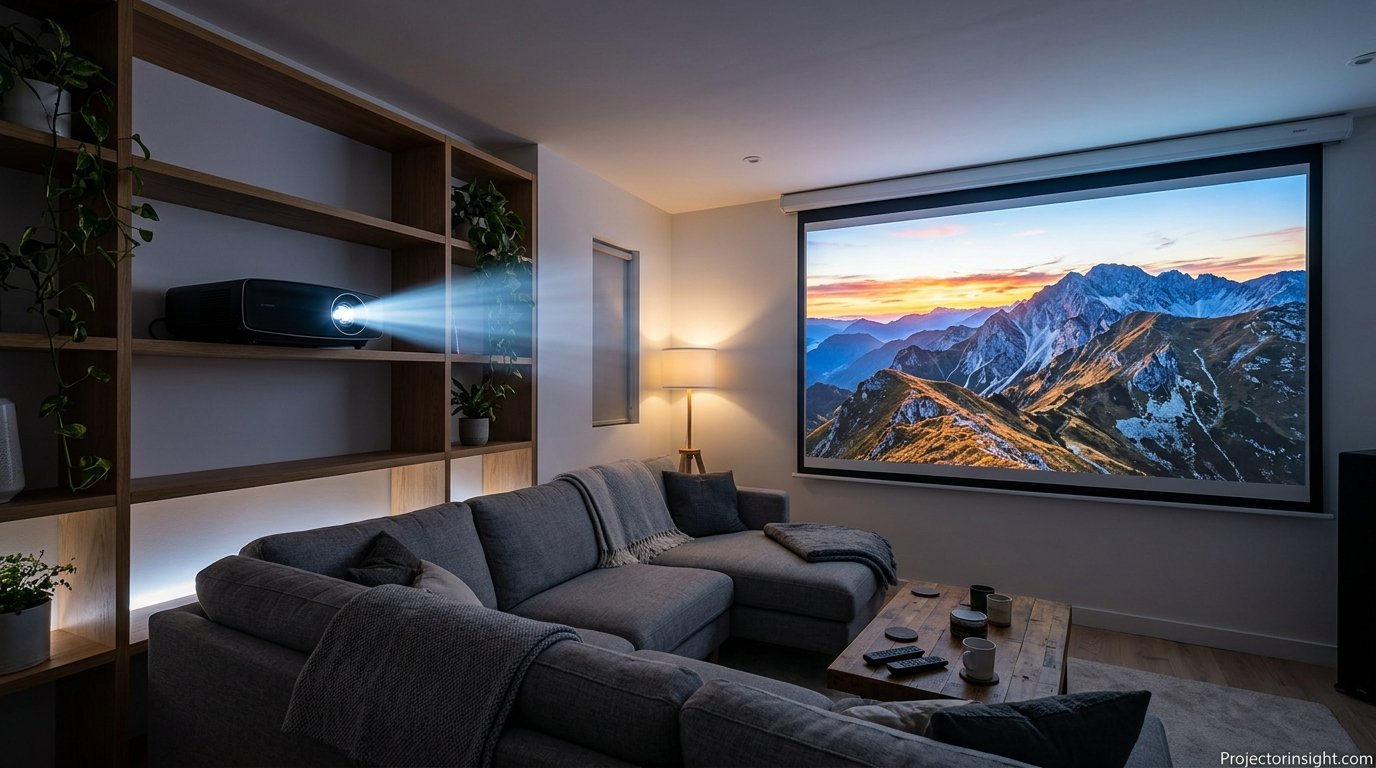
How to Set Up a Projector: The Complete Step-by-Step Guide for Any Room
Unboxing to a sharp, bright, perfectly aligned picture: placement, mounting, connections, focus, sound and picture tuning, explained the way a friend who has done it a hundred times would walk you through it.
A projector can turn a bare wall into a cinema, a gaming arena or a boardroom, but only if it is set up properly. The difference between a mushy, tilted, washed-out image and a crisp one that makes people ask “wait, is that a projector?” almost never comes down to price. It comes down to placement, alignment, a decent surface, and a few settings most people never touch.
The good news is that the process is the same for nearly every model. This guide takes you through it in order, with a diagram for each core step so you can see what is happening rather than just read about it. If you have not bought a projector yet, start with our guide on how to choose a projector, then come back here once the box arrives.
What Setting Up a Projector Really Involves
Setting up a projector sounds like a single task, but it is really five small jobs that depend on each other. First you decide where the picture will land. Second you decide where the projector will sit to put it there. Third you connect power and a video source. Fourth you shape the image so it is sharp and rectangular. Fifth you tune brightness, color and sound so the result is comfortable for long viewing.
Skipping any of these is how people end up disappointed. A projector placed too close makes a small image, and one placed too far makes a dim, soft one. A great projector aimed at a textured, off-white wall will look worse than a modest one aimed at a proper screen. Poorly chosen settings can crush shadows or blow out highlights, and no amount of resolution rescues that.
The order matters
Always work from the screen backward. Decide the image size first, because that determines the distance. Distance determines where the projector goes. The location determines the cable runs and the power outlet. Doing it the other way around, plugging in wherever there happens to be a socket, is the classic beginner mistake and it usually means moving everything later.
How long it takes
For a simple tabletop or shelf setup, plan on 20 to 30 minutes. A ceiling mount with hidden cables can take an afternoon. If you want to calibrate the picture carefully, budget an additional half hour. It is time well spent, because you only do this once and you will look at the result for years.
Not sure your current projector suits your room? See our top-rated options for every budget.
Shop Projectors on AmazonGear and Prep Before You Start
Gathering everything first saves a lot of trips up and down a ladder. Most projectors ship with a power cable, a remote and batteries, and sometimes an HDMI cable, but the included cable is often too short to reach where you actually want to place the unit.
The essentials checklist
- The projector, its power cord and remote (with batteries installed)
- An HDMI cable long enough to reach the source, with a few spare feet of slack
- A video source: streaming stick, game console, Blu-ray player, laptop or a phone with the right adapter
- A tape measure and, ideally, a laser distance measure
- Painter’s tape to mark the screen edges on the wall
- A stable surface, tripod or ceiling mount
- A surge-protected power strip
- A screen, or a plan for the wall (covered in Step 6)
Nice-to-have extras
A small level, cable clips and a Velcro cable tie roll make the finished setup look tidy. A pair of decent speakers or a soundbar will improve the experience far more than any picture tweak, since built-in projector speakers are rarely impressive. If you plan to stream, check that your Wi-Fi reaches the projector’s location, or use a wired source instead.
Read the manual for two numbers
Before anything else, find your model’s throw ratio and whether it has lens shift. These two specs decide almost every placement question. Throw ratio tells you how far away the projector must sit for a given image width. Lens shift tells you how much you can move the picture up, down or sideways without tilting the unit. Both are usually printed in the spec sheet or the quick-start guide.
| Item | Why you need it | Skip it if |
|---|---|---|
| Long HDMI cable | Reaches the projector without stretching or unplugging | Source sits right beside the projector |
| Tripod or mount | Stable, adjustable height | You have a level, sturdy shelf |
| Screen | Better contrast, color and even brightness | Your wall is smooth, flat and white |
| External speaker | Real bass and clear dialogue | You only need casual background audio |
| Surge protector | Protects a costly lamp or laser engine | Never skip this |
Grab the cables, mounts and accessories you need in one go.
Browse Projector AccessoriesChoose the Right Room and Wall
The room does more to shape your picture than most people expect. A projector only creates light, and everything else comes from how that light interacts with your space. The ideal room is one you can darken, with a wall or screen area that is flat, pale and free of windows, glossy art and light switches.
What makes a good projection wall
Look for a surface that is smooth. Heavy texture, such as orange-peel or knockdown plaster, scatters the light and adds a grainy look that no focus adjustment can remove. Color matters too. A soft matte white or light gray wall works well, while beige, yellow or bold colors tint every shade on screen. A wall painted in flat, neutral paint is an excellent free upgrade over bare drywall.
Where to sit relative to the wall
As a rule of thumb, sit at about 1.5 to 2.5 times the screen width from the picture. Closer than that and you will notice pixels on a lower-resolution model. Farther and the image loses its immersive feel. If you are still deciding on dimensions, our guide to what size projector screen you need walks through the numbers for common room sizes.
Light control is part of the room
Windows, hallway lights and even light-colored ceilings bounce light back onto the screen and wash out blacks. You can improve almost any room with blackout curtains and by turning off overhead lights. If your room cannot be darkened, you will need a brighter model, and our roundup of the best projectors for bright rooms is the place to start.
Bedrooms, living rooms and basements
Basements are a projector’s natural habitat: dark, quiet and rarely full of windows. Bedrooms work well because the projector can sit on a dresser and throw onto the wall opposite the bed, though watch out for glare from closet doors and mirrors. Living rooms are the hardest, since they usually have windows and multiple light sources, but they are also where a good setup shines. If you share the space, consider a screen that rolls up when not in use.
Blackout curtains and matte screens make any room better for projection.
Shop Room UpgradesWork Out Your Throw Distance
Throw distance is simply how far the projector’s lens must sit from the screen to fill it. Every projector has a throw ratio, which is the distance divided by the image width. A ratio of 1.5:1 means that for an image 100 inches wide, the projector should sit 150 inches away.
The simple formula
Take your desired image width and multiply it by the throw ratio. If your projector has a zoom lens, the spec lists a range such as 1.2 to 1.5, which gives you a minimum and maximum distance. That flexibility is helpful, because you can place the projector anywhere between those two numbers and use the zoom ring to fill the screen. Our detailed walkthrough on how to calculate projector throw distance includes worked examples and a lookup table.
Standard, short and ultra-short throw
Projectors fall into three broad families. Standard throw models sit several feet back and usually mount on the ceiling or a rear shelf. Short throw units need only a couple of feet. Ultra short throw projectors sit inches from the wall on a media console and fire upward, which is convenient in small rooms and avoids anyone walking through the beam. See the comparison in UST vs standard throw projector if you are still deciding which suits your layout.
| Type | Typical throw ratio | Distance for a 100″ wide image |
|---|---|---|
| Standard throw | 1.3 – 2.0 | About 10 – 17 feet |
| Short throw | 0.6 – 1.0 | About 5 – 8 feet |
| Ultra short throw | Below 0.4 | Under 3.5 feet |
The example distances above are for an image 100 inches wide, which is a very large picture, roughly a 115-inch diagonal on a 16:9 screen. Scale the numbers down proportionally for smaller pictures. Always confirm using your own model’s manual, because two projectors with similar prices can have very different lenses.
Short on space? Ultra short throw models sit right against the wall.
See UST ProjectorsPlace or Mount the Projector
With distance sorted, it is time to put the projector where it belongs. You have three realistic options: a table or shelf, a tripod, or a permanent mount. Each has trade-offs in stability, tidiness and flexibility.
Tabletop and shelf placement
This is the easiest option and perfect for renters or anyone who wants to move the projector between rooms. Choose a stable, level surface at roughly the height of the screen’s center or bottom edge. Keep at least a few inches clear on all sides for ventilation, because blocked vents are one of the leading reasons a projector overheats and shuts down. If that ever happens, read why does my projector keep turning off.
Ceiling mounting
A ceiling mount gives you a permanent, tidy installation with no furniture in the way. It also keeps the projector out of reach of pets and kids. Choose a mount rated well above your projector’s weight, locate ceiling joists with a stud finder, and never mount into drywall alone. Our full guide on how to mount a projector to the ceiling covers hardware, measurements and cable routing in detail.
Inverted mode
If you mount upside down, you will need to flip the image in the projector’s menu. Look for a setting called Projection Mode, Ceiling or Front-Ceiling. Do it before final alignment so you are not adjusting a mirrored picture.
Keep it level and square
The projector should point straight at the screen center, level left to right and, ideally, level front to back. Small feet or a tripod head allow fine adjustment. A tilted projector causes a keystone-shaped image, which you can partly fix in software, but a square-on placement always looks best.
Ceiling mount pros
- Clean, permanent look
- Out of the way of people
- Consistent alignment
Ceiling mount cons
- Needs drilling and cable runs
- Harder to adjust later
- Fixed to one room
Find a sturdy mount rated for your projector’s weight.
Shop Projector MountsPower Up and Connect Your Source
Now for the satisfying part: plugging things in. Connect the power cord to a surge-protected outlet, then attach your video source with an HDMI cable. Turn the projector on first, wait for it to finish starting, and then power on the source. This order reduces the chance of the projector missing the handshake signal.
Choosing the right input
Use the remote to open the input menu and select the port that matches your cable, usually HDMI 1 or HDMI 2. If the screen says no signal, do not panic. Check the cable ends, try the other port and confirm the source is actually on. Our troubleshooting guide for the projector no signal HDMI error lists every fix in order of likelihood.
Connecting a laptop, phone or tablet
A laptop connects with HDMI or USB-C, and you may need to press a display shortcut to mirror or extend the screen. See how to connect a projector to a laptop or Mac for platform-specific steps. For phones, wired and wireless routes both exist, and the guides on connecting a phone to a projector and connecting an iPhone to a projector walk through each method.
Built-in smart features
Many current models include Wi-Fi and a full streaming interface, so you can skip the external stick entirely. Check that the projector supports the apps you use, since not every model has licensed apps built in. If streaming is your main use, browse our picks for the best smart projectors with Netflix.
Cable tips that prevent headaches
For runs longer than about 15 feet, use a high-quality certified HDMI cable, or an active or fiber optic one for 4K and high refresh rates. Cheap, long passive cables are a frequent source of flickering and dropouts. Leave a little slack so movement does not pull on the connector, and secure runs with clips so nobody trips over them.
Long, reliable HDMI cables prevent dropouts and flicker.
Find HDMI CablesFocus, Zoom and Align the Image
This is the step that turns “it works” into “it looks great.” With a test image or a menu screen showing, work through four adjustments: zoom, position, focus and keystone. Do them in that order, because each one affects the next.
Zoom first
Use the zoom ring or menu control to make the image exactly fill your screen or taped-off area. If your projector has no optical zoom, you will need to move it closer or farther instead. Avoid digital zoom where possible, since it shrinks the picture by throwing away pixels.
Then position with lens shift
Lens shift moves the image up, down or sideways without tilting, keeping the picture rectangular and sharp. If your projector has it, use the dials to line up the top and bottom edges with the screen. Without lens shift, you will need to raise or lower the projector or angle it, which introduces keystone distortion.
Focus using fine detail
Display something with small text, such as the menu, and turn the focus ring until the letters look crisp in all four corners. Step back to your seat and check from there, since it is easier to judge sharpness at viewing distance. If the image is blurry no matter what you do, use why is my projector blurry to track down the cause, which is sometimes a smudged lens or a mismatched resolution.
Keystone as a last resort
Digital keystone correction squares up a trapezoid image, but it works by shrinking part of the picture, which reduces sharpness. Use it only for small fixes. Whenever you can, physically reposition the projector to remove the distortion instead.
A clean lens gives the sharpest possible focus.
Get a Lens Cleaning KitPick and Set Up the Screen
You can project on a wall, but a screen almost always gives a better picture. A dedicated surface is flatter, has a precise gain and color response, and often has a black border that frames the image and makes it look sharper.
Wall, paint or screen?
A smooth, flat white wall is a perfectly acceptable start. Projector-specific paint offers a more uniform surface than ordinary paint if you do not want a visible screen. A physical screen wins on contrast and flatness, and it is the only way to use specialized surfaces such as ambient light rejecting materials.
Understanding screen gain
Gain measures how much light a screen reflects compared with a reference white surface. A gain of 1.0 is neutral. Higher numbers look brighter but narrow the viewing angle and can cause hot spots. For a dim room, a gain near 1.0 to 1.1 is usually best. For a room with some ambient light, a higher-gain or ALR surface can help.
ALR screens and short throw
Ambient light rejecting screens reflect light back toward the viewer while absorbing light from other angles, which keeps blacks deeper in lit rooms. Ultra short throw projectors need a specially designed version, so read ALR screen for UST projector before buying.
Screen size and aspect ratio
Match the screen’s aspect ratio to your content. A 16:9 screen suits most streaming, TV and gaming. A 2.35:1 screen suits movie lovers who want the widescreen cinema look. If you are torn on size, remember that bigger is not always better. A large image from a low-brightness projector will look dim, and a huge picture close to your seat can make text hard to read. If you are weighing a projector against a television, projector vs 85 inch TV lays out the trade-offs clearly.
Installing the screen
For a fixed frame, assemble it on the floor, then hang it on the wall using the supplied brackets. For a pull-down, fix it to the ceiling or wall at a height that puts the picture’s center near eye level when seated. Make sure the viewing surface is taut with no ripples. When it eventually gets dusty, follow the steps for how to clean a projector screen so you do not damage the coating.
Upgrade from a bare wall with a screen that suits your room.
Shop Projector ScreensAdd Proper Sound
Most projectors include tiny speakers that are fine for a quick presentation but disappointing for movies. Real sound transforms the experience, and it is usually the single best-value upgrade after the screen.
Wired options
Look at the audio outputs on your projector. A 3.5mm jack connects to most powered speakers and soundbars. An optical output carries digital audio, which is cleaner. If your projector supports HDMI ARC or eARC, you can pass audio to a compatible soundbar with one cable. Alternatively, send audio straight from your streaming device to a receiver or soundbar and let the projector handle only the picture.
Wireless options
Bluetooth is convenient, but it can introduce lip-sync delay. If dialogue seems late, check whether your projector or speaker has a low-latency mode, or use a wired connection for movies and gaming. Our step-by-step guide to how to connect a speaker to a projector covers every route, including Bluetooth transmitters for older models.
Speaker placement basics
Place a soundbar directly below or above the screen, centered. For stereo speakers, put them on either side of the screen, angled slightly toward your seat. If you add a subwoofer, corner placement boosts bass, but try a few spots to avoid boomy resonance. Keep speakers away from the projector’s exhaust fan if you can, because fan noise can compete with quiet dialogue.
Noise from the projector itself
Fan noise is measured in decibels, and quieter models sit around 25 to 30 dB. If yours is louder, use Eco or Low lamp mode, which reduces heat and noise, and keep the vents clear. Placing the projector behind the seating position also puts the fan sound farther from your ears.
Give your picture the sound it deserves with a soundbar or speaker set.
Shop SoundbarsTune the Picture Settings
Factory settings are usually tuned to look impressive in a bright showroom, not accurate in your dark living room. A few minutes in the picture menu makes a striking difference, and you do not need special equipment to get most of the benefit.
Start with the right picture mode
Choose Cinema, Movie or Filmmaker mode for films and TV, because these modes aim for accurate color. Bright or Dynamic modes look punchy but often add a green tint and clip highlights. Game mode reduces processing delay, which matters for fast-paced titles.
Brightness and contrast
Brightness, confusingly, controls black level. Set it so dark scenes still show detail without the black bars turning gray. Contrast controls white level. Raise it until whites look bright, then back off slightly so bright clouds or snow still show texture rather than a flat white blob. If you love deep blacks, read about projectors with the highest contrast ratio.
Color temperature
Look for a setting called Warm, Cinema or D65. It gives whites a neutral look instead of a cold blue tint. If your model offers RGB gain and offset controls, you can fine-tune further, but the preset is usually close enough for most people.
Sharpness, noise reduction and motion
Excess sharpness creates halos around edges, so keep it low, often near zero on high-resolution models. Turn off aggressive noise reduction. Motion smoothing can make films look like a soap opera, though some viewers like it for sports. Try both and see which you prefer.
Lamp, laser and eco modes
Lower power modes extend the life of the light source, reduce fan noise and often improve black levels in a dark room. In a bright room, you may need full power. Wondering about the cost of running your setup? Does a projector use a lot of electricity gives real numbers. The light technology itself is worth understanding too; see laser vs lamp projector and 3LCD vs DLP projectors for how each behaves.
Want a helping hand? A calibration disc or colorimeter makes tuning easy.
See Calibration ToolsControlling Ambient Light and Room Treatment
A projector’s brightness rating is only meaningful in relation to the room. A 3000-lumen projector in a dark basement will look glorious. The same projector in a sunny living room may struggle. Understanding what those ratings mean, and how to work around your room, saves money and frustration. If the numbers confuse you, what are ANSI lumens explains the standard.
Brightness guidelines by room
| Room condition | Suggested brightness | Helpful extras |
|---|---|---|
| Dedicated dark room | 1,000 – 2,000 lumens | Dark walls and ceiling |
| Living room, lights off | 2,000 – 3,000 lumens | Blackout curtains |
| Living room, some daylight | 3,000+ lumens | ALR screen |
| Office or classroom | 3,500+ lumens | Blinds, front lights off |
Cheap fixes that make a big difference
Start with blackout curtains, then turn off or dim any lights that reflect off the screen. Wall color matters more than most people realize. Light walls and ceilings bounce projected light back into the room, lifting the black level. Painting the wall around the screen a darker, matte shade improves contrast. Even hanging a dark cloth behind you helps.
When you need a brighter machine
If the room cannot be fully darkened, plan for more lumens and a higher-contrast surface. Presentation spaces have the same challenge, so our list of the best business presentation projectors is a good reference for bright conference settings.
Setting up outdoors
An outdoor movie night follows the same steps, with extra concerns. Use a stable table or tripod, secure the screen against wind, keep cables off walkways and protect equipment from dew and rain. Dusk is the sweet spot for picture quality. Our picks for the best outdoor movie projectors are built for exactly this, and if you prefer to travel light, look at the best portable mini projectors.
Dark room advantages
- Deep blacks and rich color
- Lower brightness needed
- Longer light source life
Bright room challenges
- Washed-out image
- Higher lumens needed
- ALR screen often worthwhile
Fighting daylight? Brighter projectors and ALR screens help.
Shop Bright Room ProjectorsTroubleshooting and Long-Term Care
Even a perfect setup runs into small issues. Most have simple fixes, and knowing them keeps a bad evening from turning into a returned product.
Common setup problems and quick fixes
| Problem | Likely cause | Try this |
|---|---|---|
| No image | Wrong input or loose cable | Reseat HDMI, cycle inputs |
| Powers on, no picture | Lens cap, source issue or lamp fault | Remove cap, test another source |
| Blurry corners | Projector not square to screen | Level and center the unit |
| Trapezoid image | Projector angled | Use lens shift or reposition |
| Sudden shutdown | Overheating | Clear vents, clean filter |
| Dim picture | Eco mode, dirty lens, ambient light | Switch mode, clean, darken room |
If your projector lights up but shows nothing, go through projector turns on but no picture step by step. For overheating and shutdowns, revisit why does my projector keep turning off.
Routine maintenance
Dust is the enemy. Clean or replace the air filter every few months, especially if you have pets. Wipe the lens gently with a microfiber cloth designed for optics; the guide to how to clean a projector lens shows the safe method. Let the projector cool down fully before unplugging, because cutting power while the fan is still running can shorten the light source’s life.
Light source lifespan
Lamps typically last a few thousand hours, while laser and LED sources last many times longer. Eco mode extends life. When a lamp starts to dim or color shifts, replacement usually restores the original look.
Storage and moving
If you move the projector around, use its case, replace the lens cap and avoid jolts while hot. Store it somewhere dry and cool. Keep the manual and remote batteries handy, because you will want them when you change rooms.
What to buy next
If your current projector is holding you back, the upgrade path is clear. For movie fans, the best home theater projectors deliver the cinematic look. Gamers should check the best 4K 120Hz gaming projectors. If you want a broad overview, see best projectors for every budget and room size, and best native 1080p projectors for sharp value picks.
Keep your projector healthy with replacement filters and cleaning supplies.
Shop Maintenance SuppliesFrequently Asked Questions
How far should a projector be from the screen?
It depends on the throw ratio. Multiply your image width by the ratio to get the distance. A standard projector with a 1.5 ratio needs 12.5 feet for an image that is 100 inches wide (about 8.3 feet). Short and ultra short throw models need far less room.
Do I need a projector screen, or can I use a wall?
A smooth, flat, light-colored wall works well to start. A screen improves contrast, evenness and color, and it is required for special surfaces like ALR. If picture quality matters to you, a screen is worth it.
How high should I place a projector?
Ideally, at the height suggested by your projector’s lens shift range, usually near the top or bottom edge of the image. Ceiling mounts sit above the screen top, while tabletop placement usually sits below the picture. Always aim square to the screen to avoid keystone distortion.
What is keystone correction, and should I use it?
Keystone correction digitally squares a tilted, trapezoid image. It works, but it reduces sharpness. Use it for small adjustments, and prefer physical repositioning or lens shift for a clean picture.
How do I make my projector picture sharper?
Set the focus at viewing distance using fine text, clean the lens, use native resolution from your source, keep the projector square to the screen, and lower the sharpness setting to avoid halos. If it stays soft, see our blurry projector guide.
Can I set up a projector in a room with windows?
Yes, but you will need blackout curtains or blinds, and probably a brighter projector or an ALR screen. Evening viewing is much easier than daytime.
How do I connect my phone to a projector?
Use a wired adapter that outputs video, or a wireless mirroring feature such as screen mirroring on Android or AirPlay on iPhone, if your projector supports it. Our phone connection guides cover every method.
Should I leave the projector on eco mode?
In a dark room, yes. Eco mode reduces noise, heat and power use, and extends light source life. Switch to a higher brightness mode only when ambient light demands it.
How long should I let a projector warm up?
Give it about ten minutes before judging color or finalizing focus. Most projectors are usable immediately, but the picture stabilizes as the light source and optics reach operating temperature.
Can I mount a projector upside down?
Yes. Nearly all home projectors support ceiling mounting. Enable the ceiling or inverted projection mode in the settings menu so the picture flips correctly.
What HDMI cable length is safe for a projector?
Passive certified cables work reliably up to around 15 feet for 4K. Beyond that, use an active, fiber optic or extender solution to avoid flicker and dropouts.
What picture mode is best for movies?
Cinema, Movie or Filmmaker mode. They are tuned for accurate color and natural contrast. Use Game mode for consoles to reduce input lag.
Conclusion
Setting up a projector is less about technical wizardry and more about doing a handful of things in the right order. Choose a room you can darken, decide your image size, work out the throw distance, place the projector square to the screen, connect a decent source, then zoom, shift and focus until edges are crisp. Add a proper screen and real sound, and take ten minutes to tune the picture.
Do that, and even a modest projector will outperform a premium one that was set up carelessly. Take your time on the first attempt, keep your placement flexible until you are happy, and enjoy the payoff: a big, beautiful picture that turns any evening into an event. If you are ready to upgrade or start fresh, the links below are a great place to begin.
Ready for a big-screen upgrade? Explore top projectors, screens and accessories.
Shop Projectors on Amazon
Pingback: Why Is My Projector Blurry? Every Cause & Fix